Great Planes U-Can-Do 3D 60 ARF - GPMA1270 User Manual
Page 16
❏
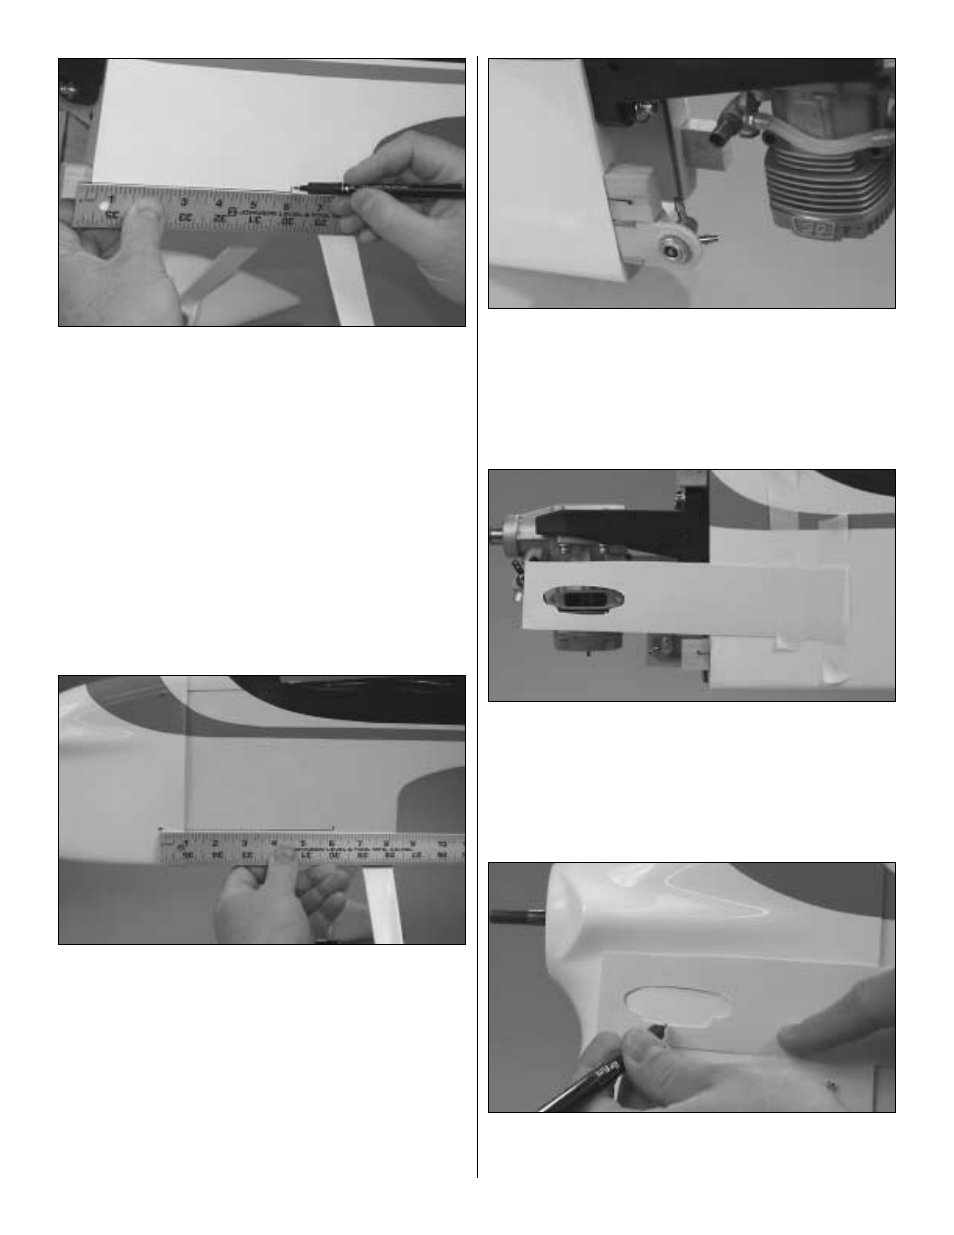
2. Hold a ruler to the fuse centered on one of the cowl
mounting blocks. Use a felt-tip pen to draw a line directly
onto the fuse along the straightedge.
❏
3. Mark a reference point on the end of the line exactly
6" [152mm] from the center of the cowl mounting block.
❏
4. Mark the location of the remaining three cowl mounting
blocks the same way.
❏
5. Place the cowl on the fuse. Mount the spinner and prop
to the engine. Position the cowl on the fuse so it is in
alignment with the spinner. Be certain there is at least a
3/32" [2.5mm] gap between the front of the cowl and the
back plate of the spinner. It may be helpful to have an
assistant hold the cowl for you.
❏
6. Align the ruler with the line on the fuselage. Mark the
center of the cowl mounting block on the cowl 6" from the
reference point. Drill a 1/16" [1.6mm] hole through the cowl
and the mounting block at the mark. Enlarge the hole in the
cowl only with a 3/32" [2.4mm] drill. Mount the cowl to the
block with a #2 x 3/8" [9.5mm] screw and a #2 washer
❏
7. With your assistant holding the cowl in position, mark,
drill and mount the cowl to the three remaining cowl
mounting blocks the same way
❏
8. Remove the cowl. Clean the reference marks off the fuse.
9. Use the filler valve mount from a Great Planes Handy Mounts
set (GPMQ6000), or fashion a mount from 1/8" [3mm] plywood
(not included) for the fuel filler valve. A Great Planes Easy-
Fueler for glow fuel was used on this model (GPMQ4160, not
included with this kit). Use epoxy to securely glue the filler valve
mount to the firewall in a location where the filler valve will be
accessible outside the cowl when it's time to fuel the engine.
❏
10. Use thin cardboard or plastic to make templates for
the muffler, mixture screw, filler valve and glow plug cutouts
in the cowl. Tape the template(s) to the fuselage accurately
indicating the positions. Note: With this engine installation
we installed the muffler bolts through two 1/4" [6mm] holes
in the right side of the cowl. This is the time to decide how
you are going to mount your muffler.
❏
11. Remount the cowl under the templates. Use a felt-tip
pen to transfer the holes in the template onto the cowl.
Remove the templates and the cowl.
16