Mount the cowl mount the engine – Great Planes U-Can-Do 3D 60 ARF - GPMA1270 User Manual
Page 15
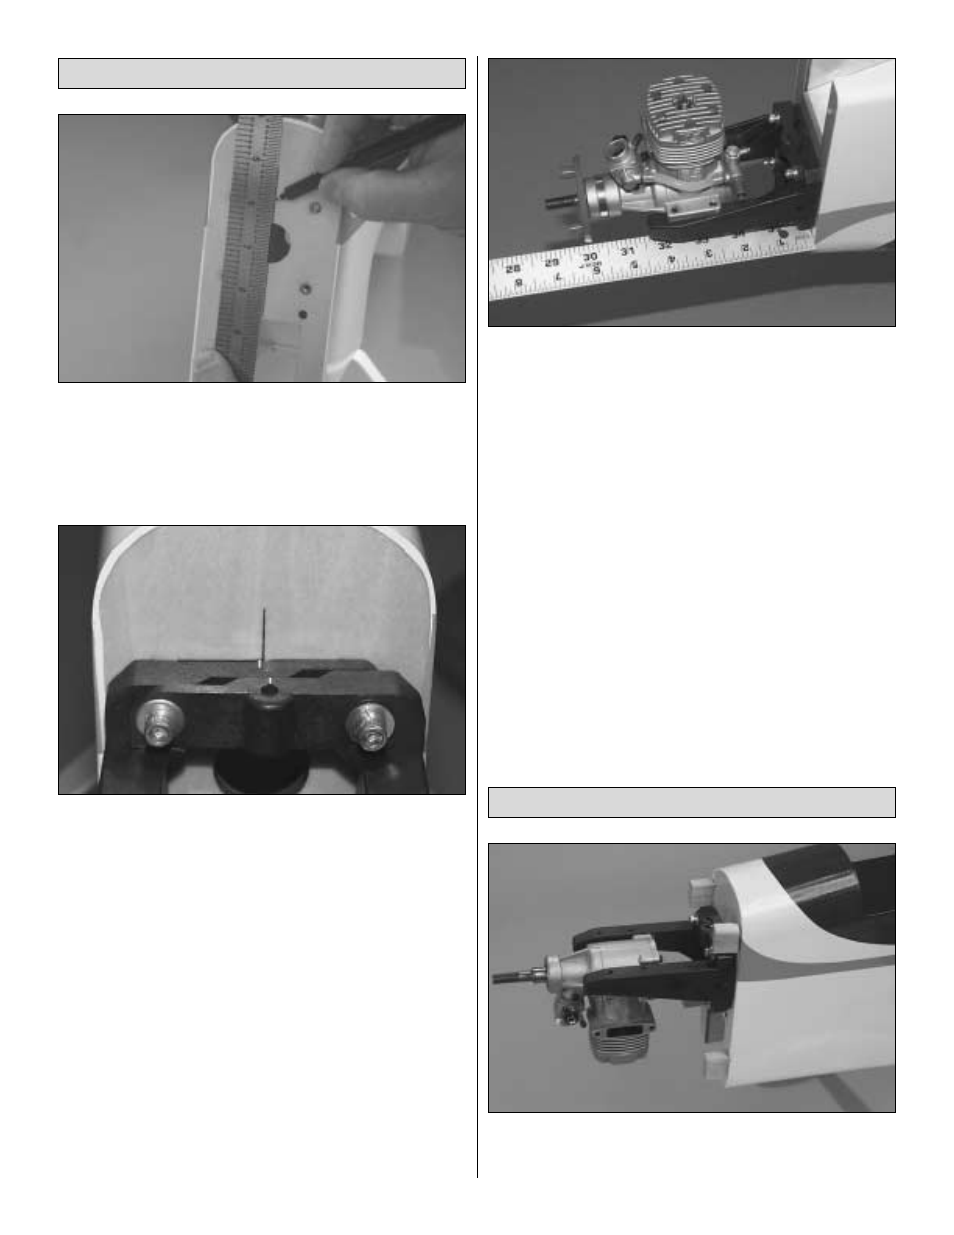
❏
1. Draw a vertical line on the firewall using the embossed
lines as a guide. Note: This line is offset to the left side of the
fuse so that the spinner will be on the center-line of the fuse.
❏
2. Trim the spreader bars from both halves of the engine
mount. Mount the engine mount to the firewall with four
8-32 x 1" [25mm] SHCS, #8 flat washers and #8 lock washers,
but do not fully tighten the bolts.
❏
3. Adjust the width of the mount to fit the engine. Center
the molded-in “tick” marks on the engine mount equally to
the left and right of the vertical line on the firewall. Tighten
the mounting bolts.
❏
4. Place the back plate of the spinner on the engine.
Note: Depending on your engine choice, it may be
necessary to enlarge the hole in the back plate.
❏
5. Use small clamps or another method to temporarily
secure the engine to the mount with the back plate of the
spinner 5-7/8" [150mm] from the firewall. Use the Great
Planes Dead Center
™
Engine Mount Hole Locator
(GPMR8130) or your preferred method to mark the engine
mount holes onto the engine mount.
❏
6. Remove the engine from the mount. Drill #29 holes
through the mount at the marks you made. Tap 8-32 threads
into the mount. Mount the engine to the mount with four
8-32 x 3/4" [19mm] SHCS, #8 flat washers and #8 lock washers.
❏
1. Use epoxy to glue the four 3/8" x 3/4" x 3/4"
[9.5 x 19 x 19mm] maple cowl mounting blocks to the firewall
in approximately the locations shown.
Mount the Cowl
Mount the Engine
15