Great Planes Phazer EDF ARF - GPMA1802 User Manual
Page 9
9
❏
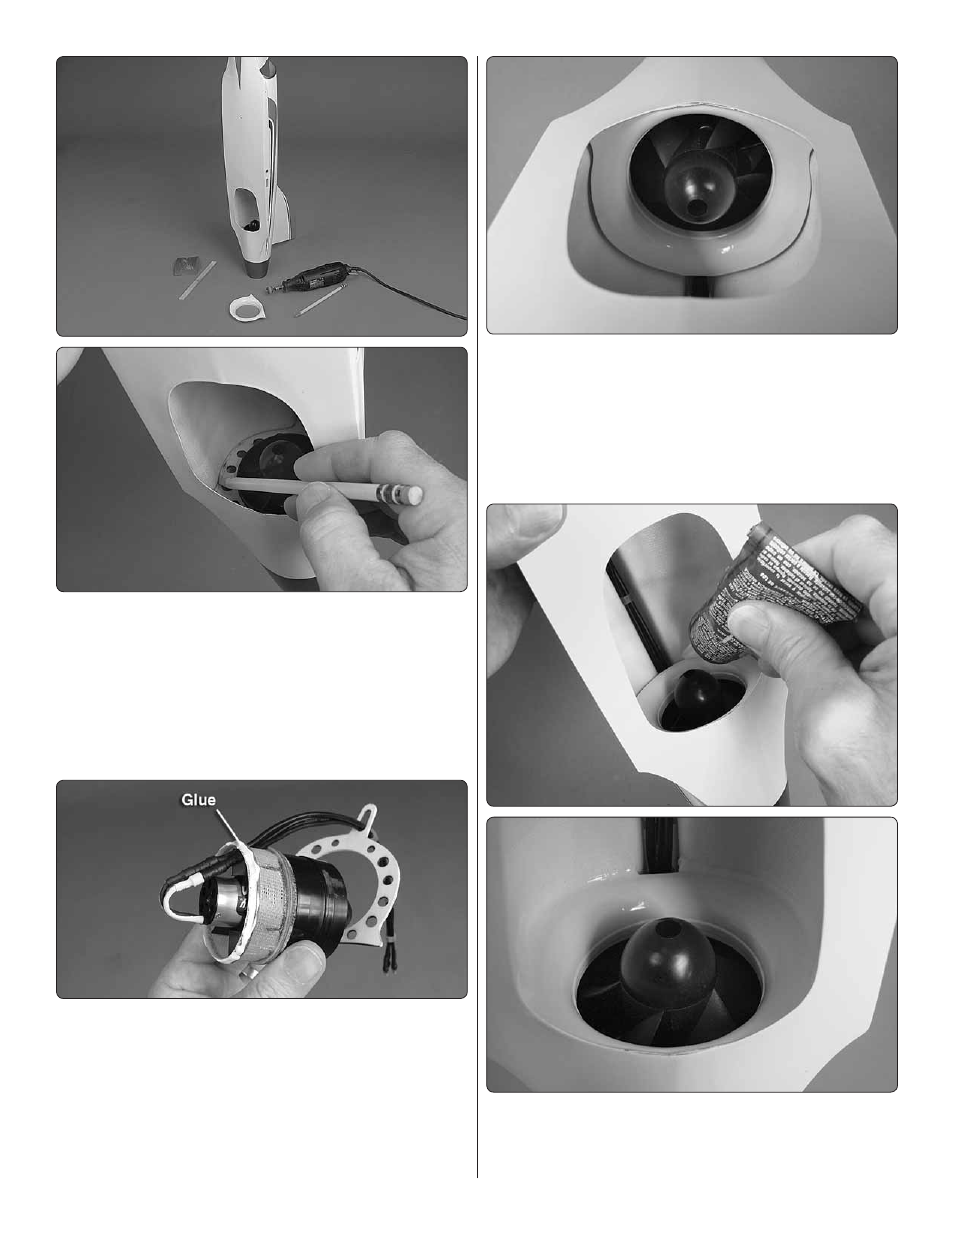
5. If necessary, use a pencil to mark the edges of the
plywood housing mount where it requires any trimming to fi t.
Hint: You should be able to prop the fuselage vertically on
your workbench, making it easy to see. Mark any areas of the
housing mount that require trimming.
❏
6. Take out the fan and housing mount, then trim the mount
where you marked it for trimming. Continue to fi t and trim the
housing mount as necessary until you can get a good fi t.
❏
7. Once you can get a good fi t, remove the housing mount
and fan unit. Apply a fi llet of thick, slow-drying glue such as
30-minute epoxy mixed with microballoons or Zap Goo around
the end of the cone adapter ring. Install the fan unit and ply
housing mount into position, making certain the adapter ring
is keyed all the way around the inside of the tail cone. Wipe
off any excess glue, then use thick or medium CA to glue
the fan housing mount to the fuselage and the fan unit to the
fan mount.
❏
8. Test-fi t the front housing fl ange, making sure it is keyed
around the inside of the fan housing. Make any adjustments
for a good fi t.
❏
9. Once satisfi ed with the fi t of the front housing fl ange
take it out of the fuselage. Apply a bead of thick CA around
the lip where it fi ts into the housing, then reposition it into the
fuselage and housing. Immediately wipe away any excess CA.
❏
10. After the CA has hardened, use 30-minute epoxy
mixed with microballoons, Zap Goo or RTV silicone to make
a fi llet around the fl ange to the fuselage. Permanently glue
the fl ange into position.