Apply the decals – Great Planes P-51 Mustang GP/EP ARF - GPMA1205 User Manual
Page 18
18
❏
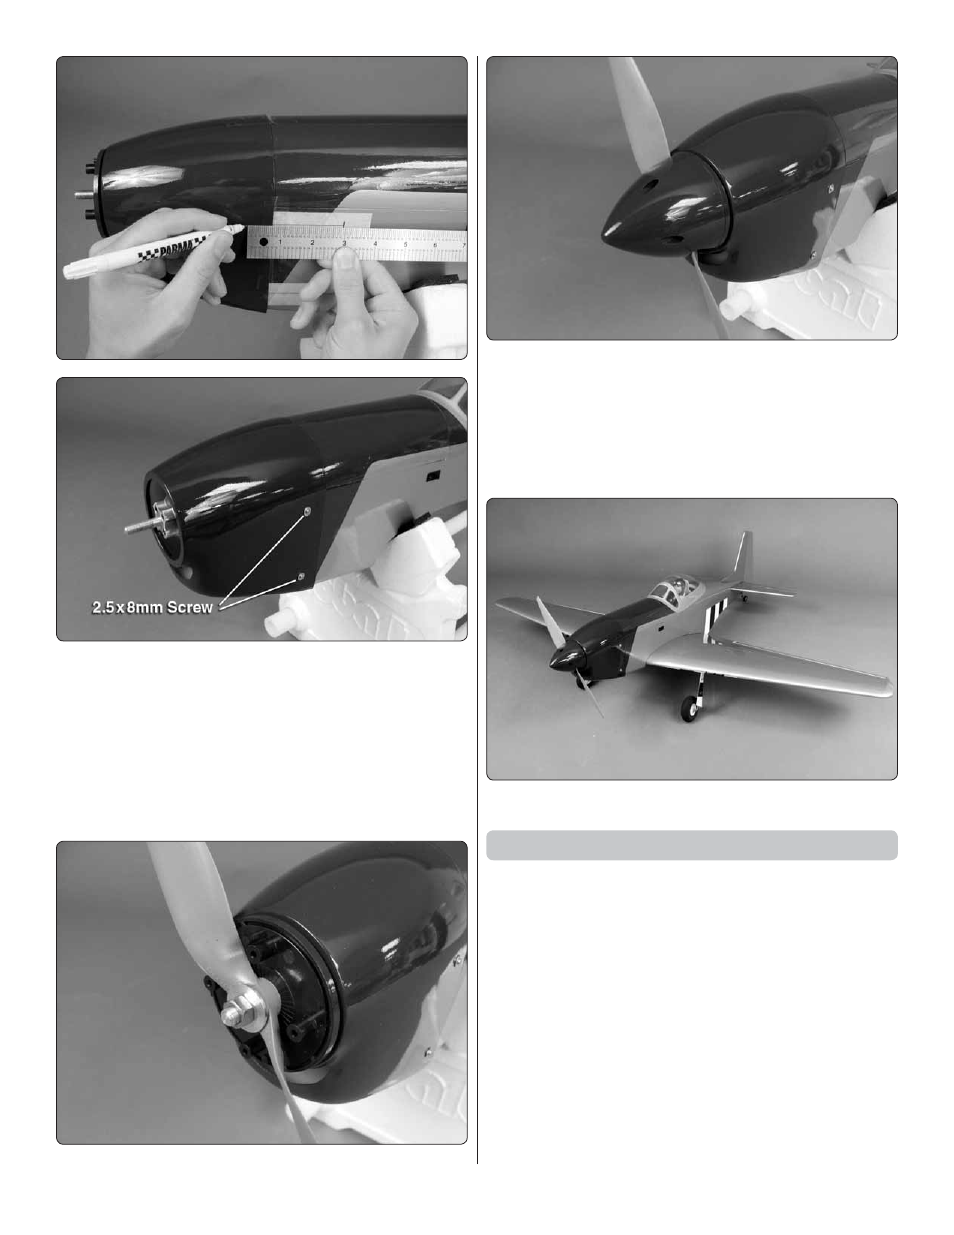
10. Measure back along the lines on the tape 3" [76mm]
and mark the cowl for the four mounting screws. Drill 5/64"
[2mm] holes through the cowl and through the cowl mounting
tabs at your marks. Remove the cowl from the fuselage and
enlarge the holes in the cowl to 3/32" [2.4mm]. Thread a
2.5x8mm self-tapping screw into each cowl mounting hole in
the fuselage and back it out again. Apply a drop of thin CA to
each hole. Mount the cowl using four 2.5x8mm self-tapping
screws and four 2.5mm washers.
❏
11. Install the spinner backplate, propeller, prop washer
and prop nut. Install the spinner onto the spinner backplate
using the included spinner screws.
❏
12. Join the aileron servo leads together using a Y-harness.
Connect the Y-harness to your receiver and mount the wing
to the fuselage using the included wing bolts.
❏
13. This completes the assembly of the P-51!
Apply the Decals
❏
1. Be certain the model is clean and free from oily fi ngerprints
and dust. Prepare a dishpan or small bucket with a mixture
of liquid dish soap and warm water—about one teaspoon of
soap per gallon of water. Submerse the decal in the soap and
water and peel off the paper backing.
Note:
Even though the
decals have a “sticky-back” and are not the water transfer type,
submersing them in soap & water allows accurate positioning
and reduces air bubbles underneath.
❏
2. Position decal on the model where desired. Holding the
decal down, use a paper towel to wipe most of the water away.
❏
3. Use a piece of soft balsa or something similar to squeegee
remaining water from under the decal. Apply the rest of the
decals the same way.