Great Planes P-51 Mustang GP/EP ARF - GPMA1205 User Manual
Page 12
12
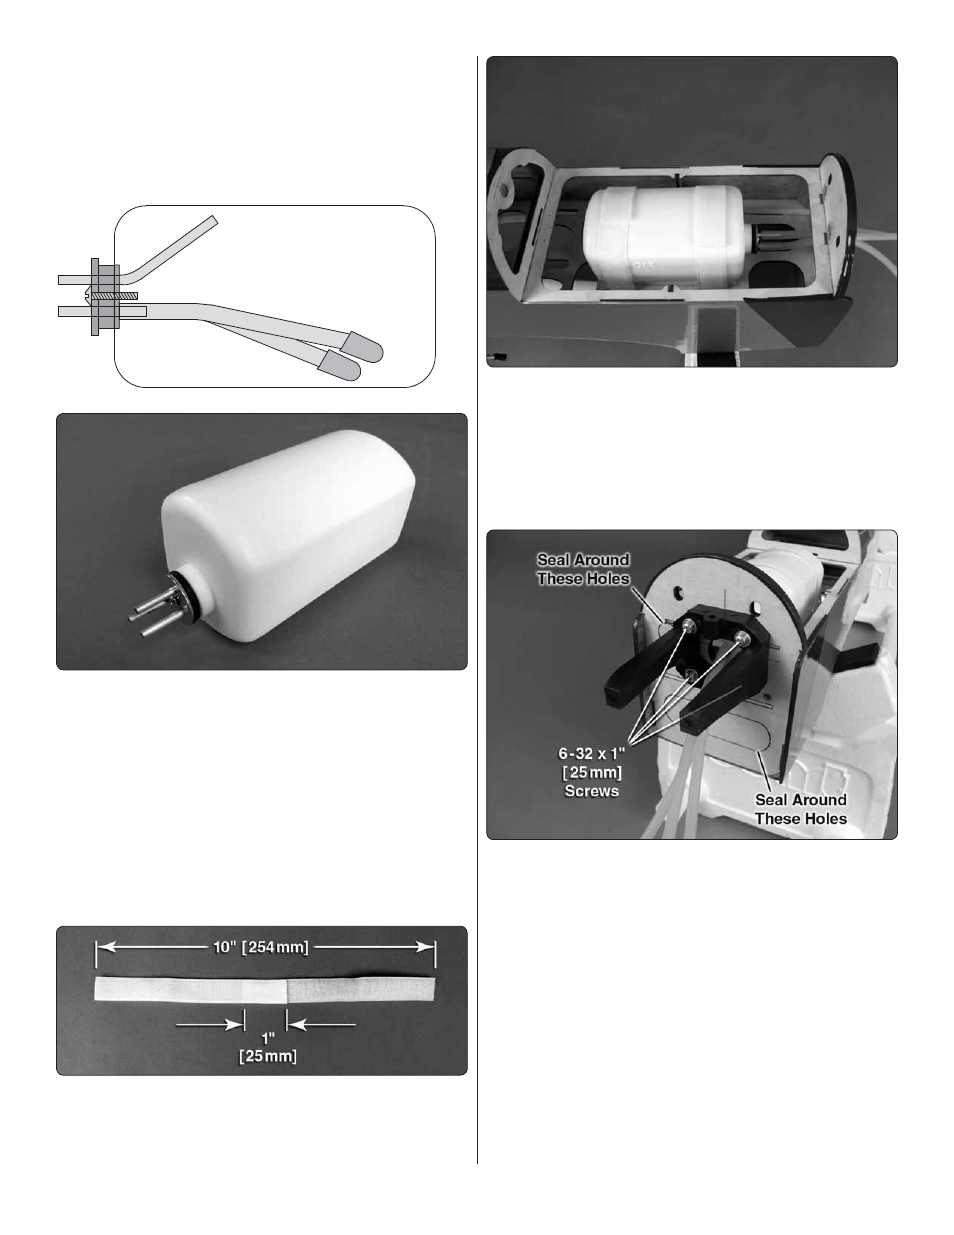
the top of the stopper above the sealed off fuel tube hole. The
fi ll and carb lines should extend out 1/2" [13mm] beyond the
stopper and the vent line should be bent upwards and left
uncut. With the tubes installed in the stopper, fi t the stopper
plates loosely in place with the 3 x 25mm phillips screw to
hold the assembly together.
Top of Tank
Vent
Fill and Carb Lines
❏
2. Fit the stopper assembly into the tank with the vent line
pointing toward the top of the tank, but not touching.
Note:
the writing on the tank will be upside down when the tank
is installed on the fuel tank tray.
The fuel tubing and clunks
(fuel pickup) on the carb and fi ll lines should almost reach
the back of the tank but not touch. The clunks must be able
to move freely inside the tank when assembled. Adjust the
length of the fuel tubing accordingly. When satisfi ed, tighten
the 3x25mm screw in the stopper to secure it in place (do
not over-tighten). Mark the side of the tank that must face up
when installed in the plane, and we also suggest marking the
tubes in the stopper.
❏
3. Make two 10" [254mm] straps from the included
hook and loop material by overlapping the mating ends by
approximately 1" [25mm].
❏
4. Connect a 6-7" [152-178mm] piece of standard fuel tubing
to each tube protruding from the fuel tank. Cut a piece of 1/4"
[6mm] foam rubber (not included) and place it on the fuel tank
tray. Insert the hook and loop straps through the slots in the
fuel tank tray. Fit the fuel tubing attached to the tank through
the hole in the fi rewall (with the correct side of the tank facing
up) and use the straps to tightly secure the tank to the tray.
❏
5. Using four 6-32 x 1" [25mm] screws, four #6 fl at washers,
four #6 lock washers and thread locking compound, attach
the engine mount inverted to the fi rewall. Leave the screws
slightly loose. Test fi t your engine between the mount halves.
Slide the mount halves against the sides of the engine and
fi nish tightening the mount screws. Apply a bead of medium
or thick CA glue around each cool air hole perforation to seal
them from fuel.