Great Planes Giant Big Stik ARF - GPMA1224 User Manual
Page 20
forget to temporarily remove the servo mounting screws,
harden the holes with thin CA, allow to harden, then
reinstall the screws.
❏
6. If you’ve installed the nose gear, temporarily remove
the nose gear wire and file a flat spot for the screw in the
steering arm. Reinstall the wire and tighten the 6-32 x 1/4"
[6.4mm] screw with a drop of threadlocker.
❏
7. Position the fuel tank hatch over its opening. Using the
holes already in the hatch as a guide, drill 1/16" [1.6mm]
holes into the support ledge. Mount the hatch with four #2 x
3/8" screws and #2 washers. Remove the screws and
hatch, harden the holes with thin CA, allow to harden, then
mount the hatch.
❏
1. Connect one 36" [910mm] servo extension to each
servo for the elevator and rudder. Secure the connections
with heat shrink tubing. Guide the servo wires down through
the fuselage and mount the servos using the same
procedures used for mounting servos all along (don’t forget
to harden the screw holes with thin CA).
❏
2. Make the pushrods and hook up the rudder and elevator
using the same hardware used for the flaps and ailerons. Be
certain to distance the elevator control horn far enough away
from the rudder so that the two will not interfere.
❏
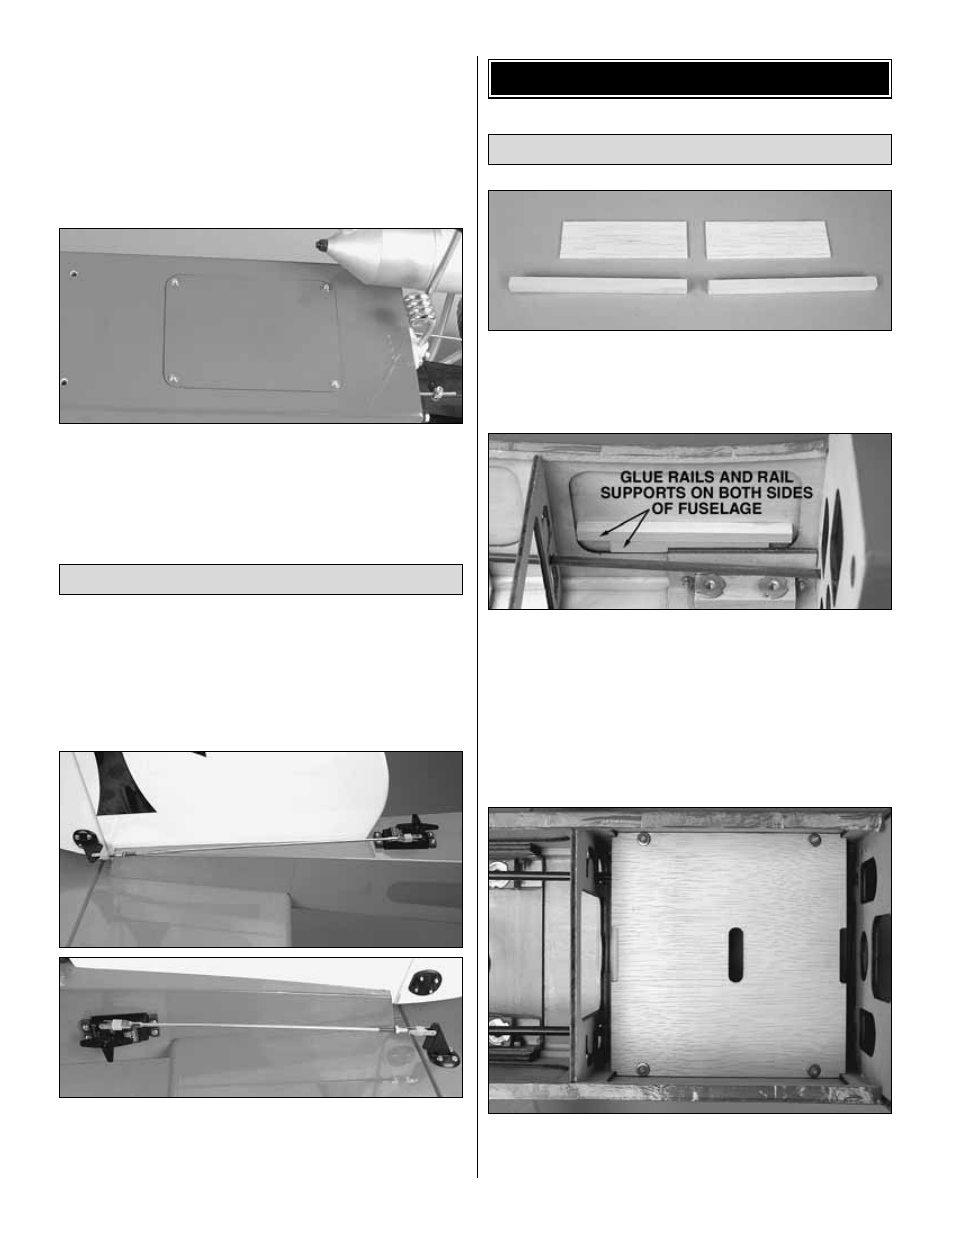
1. Cut the 1/4" x 1/4" x 8" [6.4 x 6.4 x 200mm] hardwood
mounting rails into two 4" [100mm] pieces. Cut the 1/16" x
1" x 6" [1.6 x 25 x 150mm] balsa rail support into two 3"
[75mm] pieces.
❏
2. A plywood receiver/battery tray is included with this kit.
For C.G. considerations, the tray may be mounted ahead of
or behind former 3. If using a glow engine, mount the tray in
the forward location. If using a gas engine, mount the tray in
the aft location. Trim the 1/16" x 1" x 3" [1.6 x 25 x 75mm]
balsa rail supports as necessary to position the rails at the
desired height in the fuselage. For the model shown in this
manual, the supports were cut to a width of 1/2" [13mm].
Glue the rail supports and the rails into position.
❏
3. Test mount the receiver/battery tray to the rails by drilling
1/16" [1.6mm] holes through the rails and screwing them in
place with four #2 x 3/8" [9.5mm] screws and #2 washers.
Mount the Receiver & Battery
GET THE MODEL READY TO FLY
Hook Up the Elevator & Rudder Servos
20