Install the fuel tank – Great Planes Giant Big Stik ARF - GPMA1224 User Manual
Page 18
the throttle pushrod guide tube–this may require temporary
removal of the engine. Drill the hole at an angle so the guide
tube will cross to the other side of the fuselage and so the
pushrod will align with the carburetor arm on the engine.
❏
9. Cut 17" [430mm] from the 36" [915mm] gray pushrod
guide tube. Use coarse sandpaper to roughen the outside
of the tube so glue will adhere. Slide the guide tube through
the hole in the firewall up into the radio compartment. There
is another hole in the former between the optional landing
gear mounting locations that the guide tube should go into.
❏
10. Cut the white, plastic throttle pushrod to a length of
23" [585mm]. Connect the pushrod to the carburetor arm
using the hardware shown in the photo.
We’ll connect the other end of the pushrod to the
servo later…
❏
11. It’s not necessary to do at this moment, but don’t
forget to fuelproof the plywood engine mount plate before
you fly the model.
❏
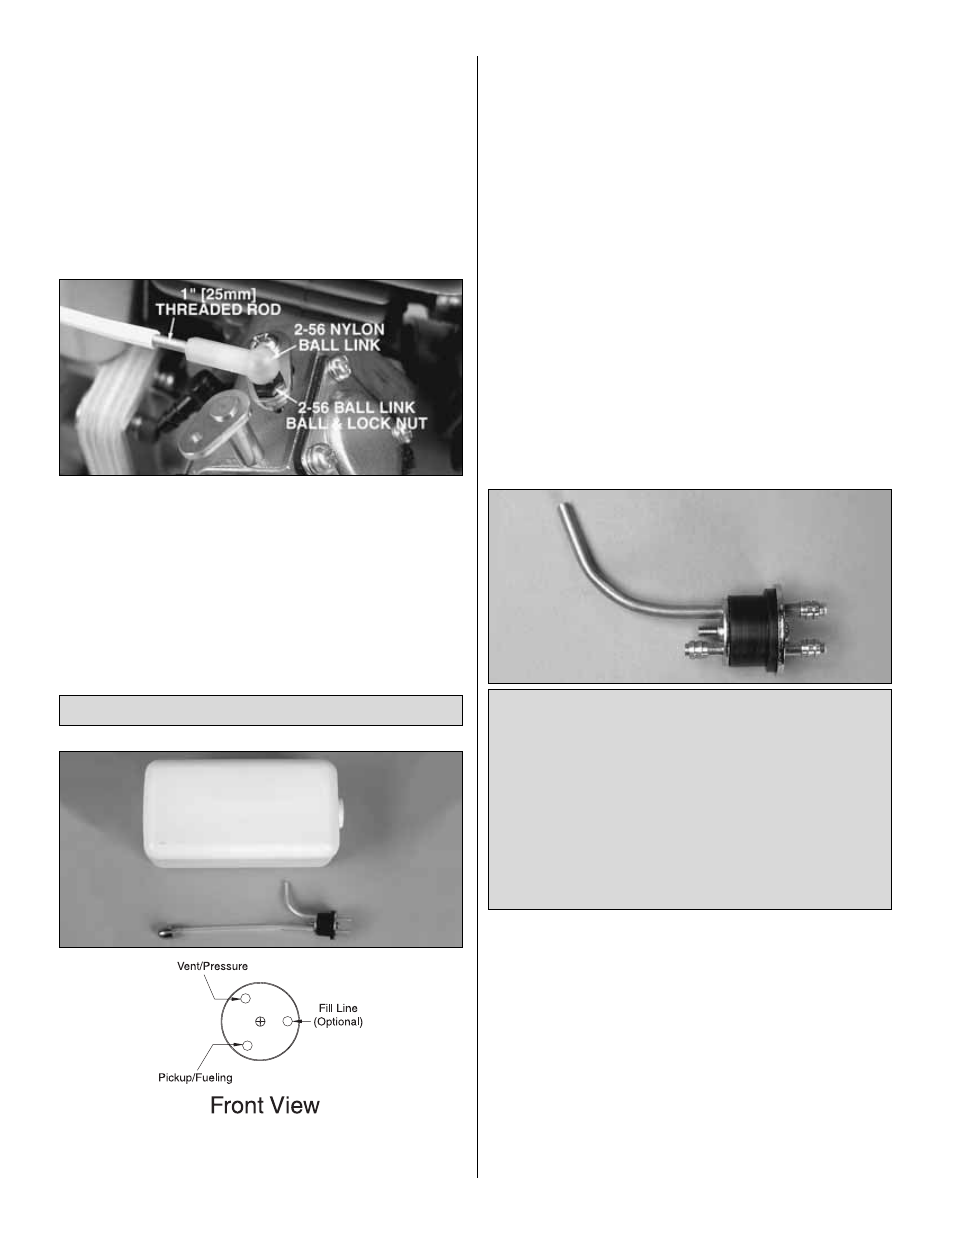
1. Remove the stopper from the fuel tank and shake out the
contents. If using a gas engine, follow the instructions in the
“Gas Fuel Tank Conversion” text box that follows this step.
Otherwise, assemble the stopper assembly to suit your
requirements for glow–most applications will require only a
two-line system–one line for the fuel pickup and
fueling/defueling and another line for overflow/muffler
pressure (or for a vent on gas engines). Since the engine and
fuel lines on this model are easy to get to, fueling will be done
through the pickup line. If, however, a third line is required for
fueling/defueling, simply install the third line into the stopper
(additional fuel line and clunk not included with this kit). The
third line will have to be closed after fueling. Install the
aluminum tubes into the stopper as shown in the sketch
above. When it’s time to install the tank and connect the lines
later, you can refer to the sketch so you will know which line
goes to the carb and which line goes to the muffler.
❏
2. Install the stopper assembly into the tank and tighten
the screw to complete the seal. Make sure the clunk on the
end of the fuel line does not contact the rear of the tank-
otherwise it may become stuck above the fuel level while
the model is in flight.
Gas Fuel Tank Conversion
1. The hardware necessary to do the gas conversion is
listed in the front of the manual. Substitute the included
aluminum fuel line tubes with 1/8" brass tubing. Cut the
vent tube and the pickup tube to the correct length, then
solder fuel line barbs onto one end of the tubes. Install
the tubes into the stopper assembly, then solder another
fuel line barb onto the other end of the pickup tube.
2. Connect the clunk to the pickup tube via a piece of gas-
compatible fuel line (not included).
Install the Fuel Tank
18