Preparations, Assemble the wings install the ailerons, Install the aileron servos & pushrods – Great Planes Extra 300SP EP ARF - GPMA1188 User Manual
Page 6
6
PREPARATIONS
❏
1. If you have not done so already, remove the major
parts of the kit from the box and inspect for damage. If any
parts are damaged or missing, contact Product Support at
the address or telephone number listed in the “Kit Inspection”
section on page 4.
❏
2. Remove the tape and separate the elevators from the
stab. Use a covering iron with a covering sock on medium
heat to tighten the covering on the wings, fuselage, etc. if
necessary. Apply pressure over sheeted areas to thoroughly
bond the covering to the wood. CAUTION: The Extra 300SP
EP was designed to be strong where needed, but lightweight
for excellent fl ight performance. Care must be taken when
assembling the plane to avoid damage.
ASSEMBLE THE WINGS
Install the Ailerons
Do the right wing fi rst so your work matches the photos
the fi rst time through.
Install the Aileron Servos & Pushrods
❏ ❏
1. Install the mounting hardware that came with your
servo to the servo. Cut three arms from a four arm servo
horn, center the servo and install the arm as shown. Install
a 16" [400mm] servo extension onto the servo lead. Secure
the extension to the lead with tape, a piece of shrink tube or
some other method to keep them from coming unplugged.
❏ ❏
2. Inside the wing a string is taped. Remove the tape and
then tie the string to the servo extension. Pull the string and
the servo lead through the wing. Untie the string from the lead.
❏ ❏
3. Install the servo into the servo opening. Drill a 1/16"
[1.6 mm] hole through each of the mounting holes in the servo.
Install and then remove a servo mounting screw into each of
the holes you have drilled. Apply a drop of thin CA into the
holes to harden the threads. Once the glue has cured install
the servo into the servo opening using the hardware included
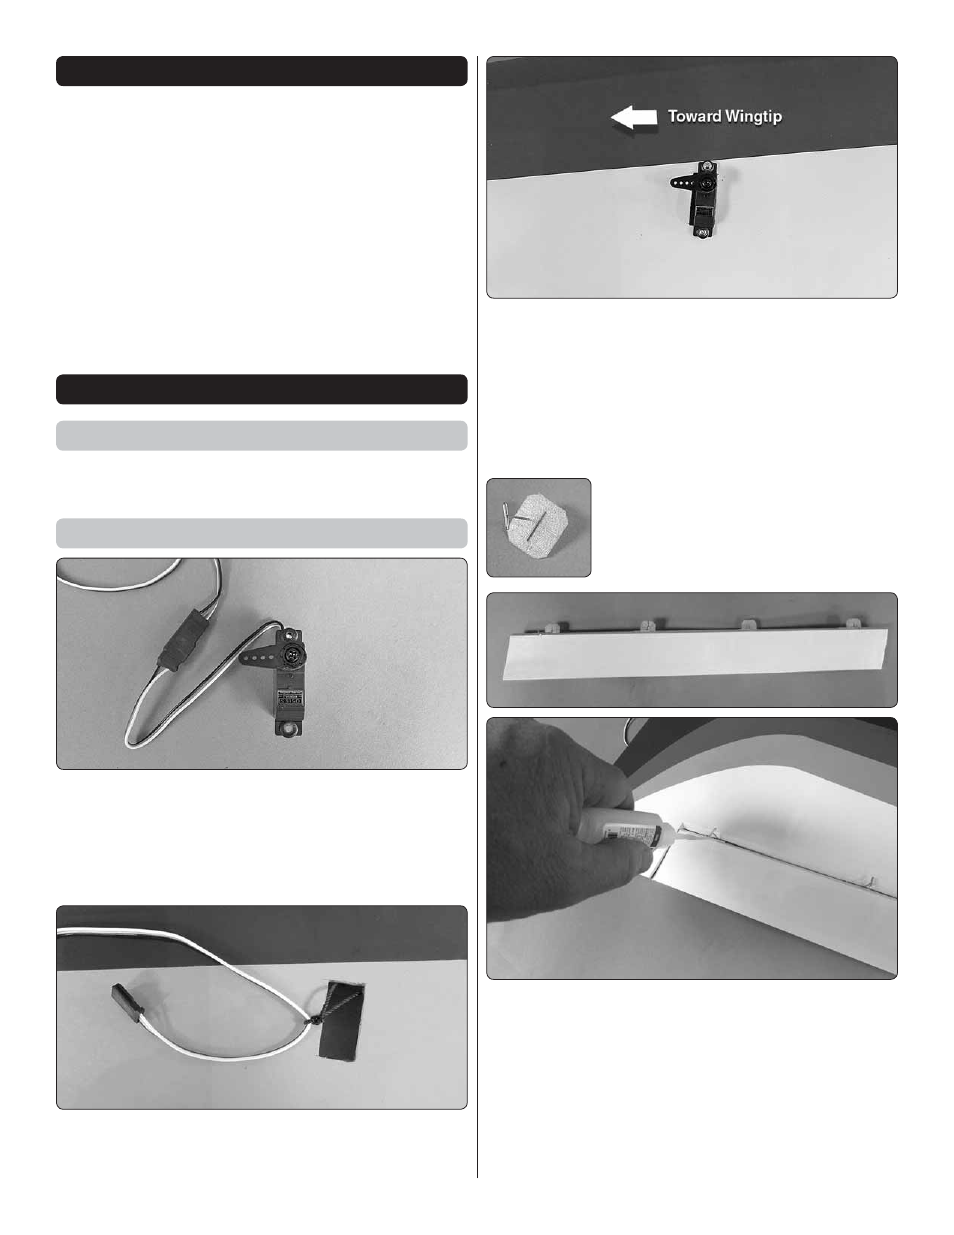
with your servo. Center the servo and then install a servo arm
as shown. The arm should be pointing towards the wingtip.
❏ ❏
4. Install a pin into the center of four
hinges. This will keep the hinge centered in
the slots of the wing and aileron.
❏ ❏
5. Install the hinges into the four slots in the aileron
and then install the aileron to the wing. Center the aileron in
the wing and be sure the hinges are all positioned properly
in the slots. When you are satisfi ed with the installation of the
aileron apply a couple of drops of thin CA glue onto each side
of the four hinges. Allow the glue to completely harden and
then remove the pins. Do not apply CA accelerator. This
will cause the hinge to get brittle and possibly break. Test the
hinges by pulling on the aileron and use more CA to secure
them, if needed.