Great Planes Curtis P-6E Hawk EP Biplane ARF - GPMA1164 User Manual
Page 6
6
❏ ❏
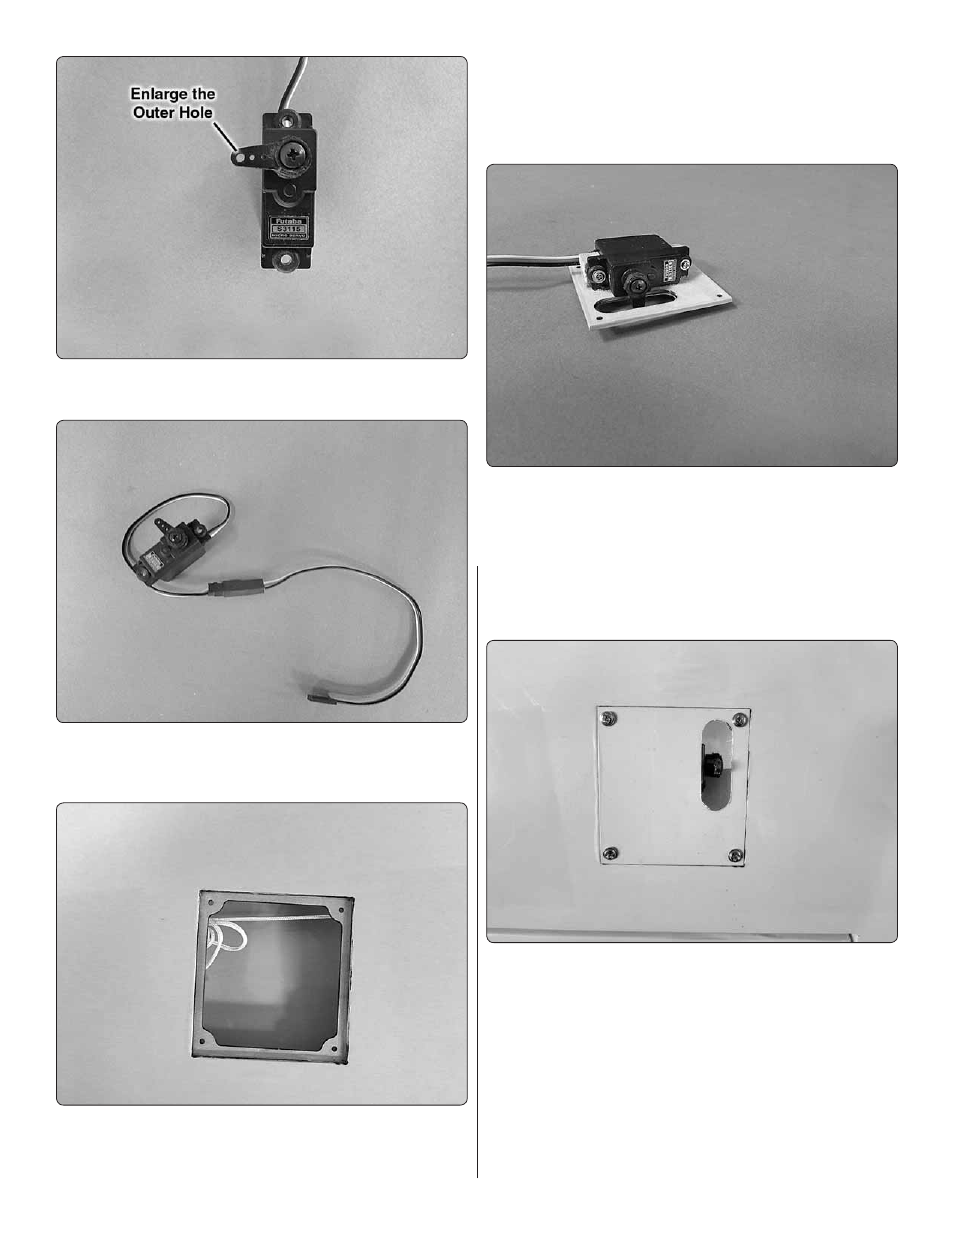
4. Enlarge the outer hole in the servo arm with a 5/64"
[2mm] drill bit.
❏ ❏
5. Install a 9" [229mm] servo extension onto the servo.
Be sure to secure the leads together with a piece of heat shrink
tubing, tape or some other method for securing the leads.
❏ ❏
6. Tie the string from inside the servo bay to the end
of the servo lead. Pull the lead through the wing, exiting out
through the hole at the center section of the wing.
❏ ❏
7. Place your servo onto the servo hatch, positioning it
so that the control horn is centered in the opening in the hatch.
Glue two 9/32" x 3/8" x 3/8" [7 x 10 x 10mm] wood blocks to
the hatch, positioning the servo between the wood mounting
blocks with 5 minute epoxy.
❏ ❏
8. After the glue has hardened place the servo between
the blocks. Drill a 1/16" [1.6mm] hole through the servo
mounting tabs, into the wood blocks. Using the servo mounting
screws that came with the servos, install and then remove
the servo mounting screws. Apply a couple of drops of thin
CA glue into the holes to harden the threads. When the glue
has hardened, install the servo to the hatch with the servo
mounting screws.
❏ ❏
9. Install and then remove a #2 x 3/8" [ 2 x 10mm] washer
head screw into the four laser cut holes in the fl ange around
the servo hatch opening. Apply a drop of thin CA glue into
each of the four holes to harden the threads. Once the glue
has hardened, secure the hatch to the wing with four of the
#2 x 3/8" [2 x 10mm] washer head screws.