Great Planes Curtis P-6E Hawk EP Biplane ARF - GPMA1164 User Manual
Page 15
15
❏
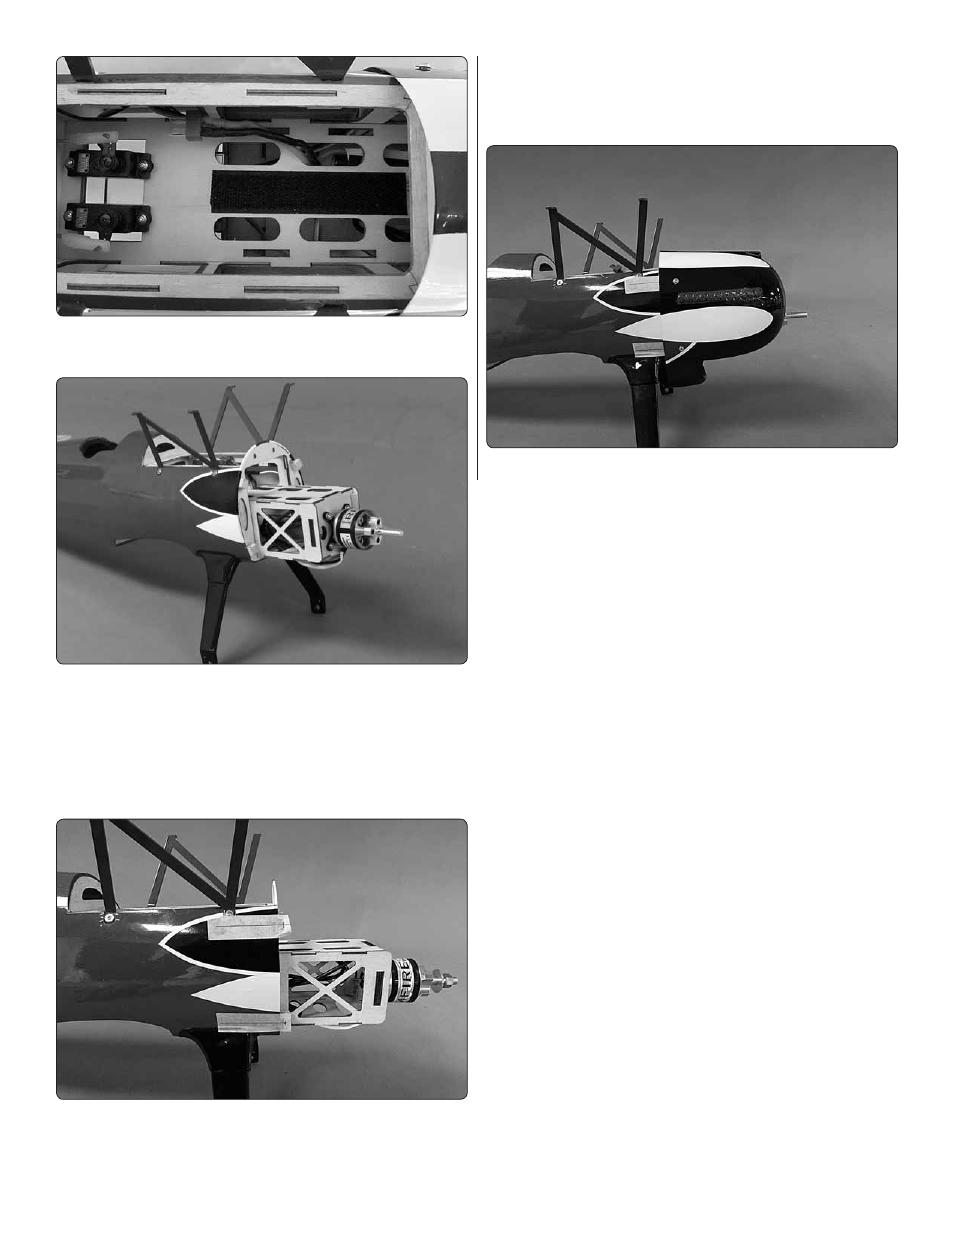
2. Install a 4" [102mm] adhesive backed strip of Velcro in
the battery compartment in the top of the fuselage.
❏
3. Assemble your motor following the instructions that came
with it. Install the motor to the fi rewall with four 4-40 x 3/8" [3
x 10mm] machine screws, #4 [3mm] lock washers and #4
[3mm] fl at washers. Be sure to apply a drop of thread locker
to the threads on each screw. Plug the leads from the motor
into the speed control. Follow the instructions with your motor
for determining the proper rotation for the motor.
❏
4. Apply a 2-1/2" [64mm] piece of masking tape on the
fuselage in line with each of the four cowl mounting blocks.
Draw a line from the center of each block back 2" [51mm].
❏
5. Position the cowl over the motor, centering the motor with
the hole in the front of the cowl. Be sure the motor prop fl ange
extends beyond the front of the cowl to allow for clearance
for the propeller.
❏
6. When you are satisfi ed with the position of the cowl, on
the lines you drew measure forward 2" [51mm] and make a
mark on the cowl. Drill a 5/64" [2mm] hole through one of the
marks and into the cowl mounting block. Install one of the
3/32" x 3/8" [2.5 x 10mm] washer head screws in the hole you
drilled. Re-check the cowl position and then drill on another
mark and install a screw. Repeat this for all four holes. After
you have drilled and inserted the screws, remove the cowl
and the masking tape from the fuselage. Apply a couple of
drops of thin CA into each of the holes you drilled to harden
the threads. Once the glue has hardened re-install the cowl.
❏
7. Install the prop to the motor shaft. Once you are satisfi ed
everything fi ts, remove the prop. (When you set up the
electronics it is safer to do so without the prop in place).