Install the tail assembly – Great Planes Curtis P-6E Hawk EP Biplane ARF - GPMA1164 User Manual
Page 11
11
❏
7. Secure the top wing to the “N” struts with 4-40 x 5/16" [3
x 8mm] machine screws, #4 lock washers and fl at washers.
After the struts are attached, work the center cabanes so that
they are resting in the pockets in the fuselage sides.
❏
8. The next step is to mark the mounting holes in the
fuselage for the cabane screws. With the “N” struts attached
to the wings, the top and bottom wing should be properly
positioned without any twists. The cabanes should now be
resting properly in the fuselage. The cabanes may not be fully
into the mounting pockets in the fuselage. That is acceptable.
If needed you can press down on the wing a bit to get the
cabanes in the pocket, but be careful not to distort the wings.
Using a pen, mark where the mounting holes for the cabanes
need to be drilled.
❏
9. Remove the top wing from the struts and remove the
center cabanes from the wing. Make sure to keep track of
which cabane goes on each side of the fuselage. On the
marks you made in the fuselage, drill a 3/32" [2.5mm] hole
through the fuselage sides. Insert and remove a 1/8" x 3/8"
washer head screw into each of the four holes. Apply a drop
of thin CA into each of the holes to harden the threads. After
the glue has hardened, secure the cabanes to the fuselage
and re-install the top wing.
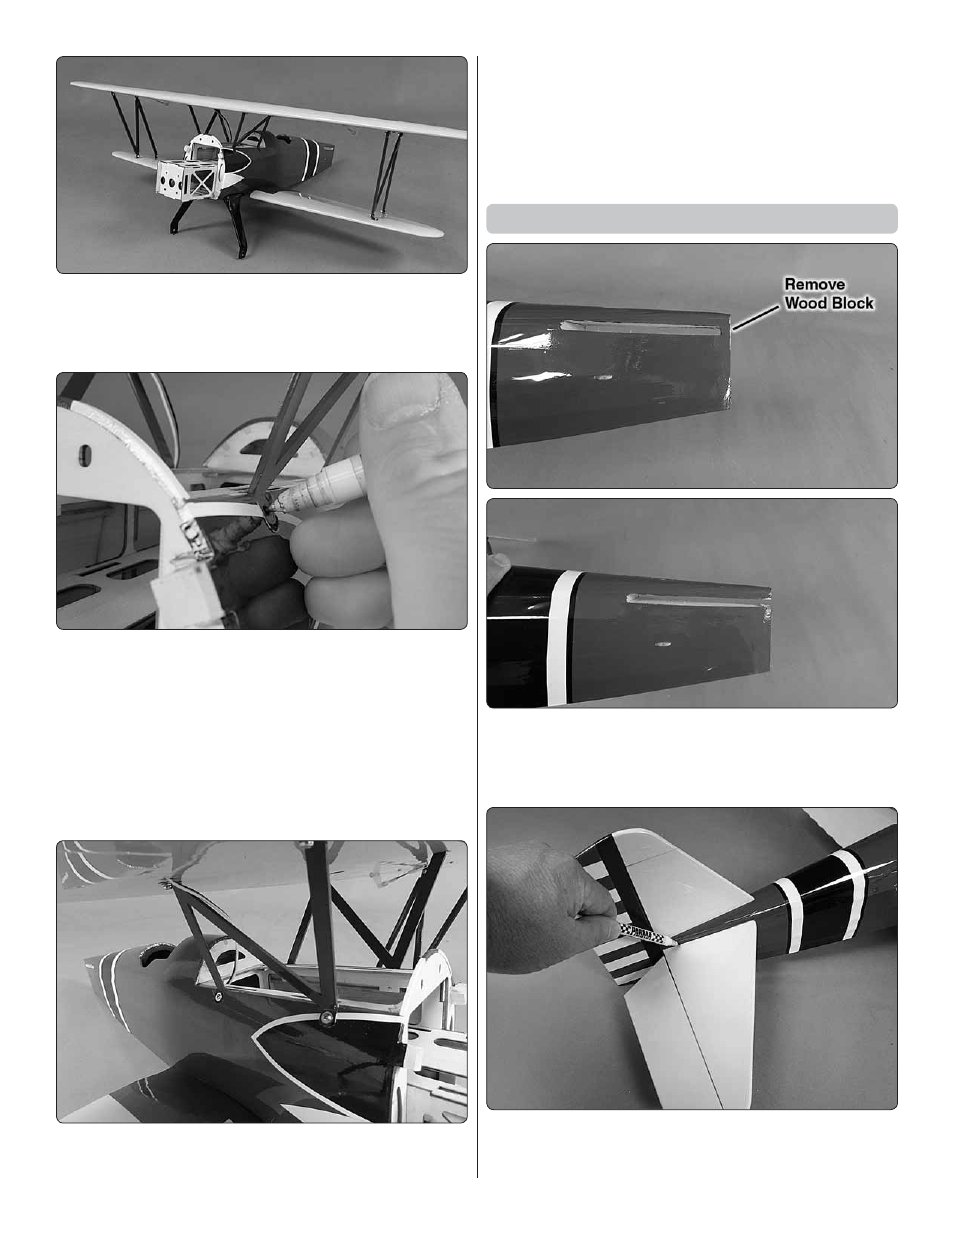
Install the Tail Assembly
❏
1. Located at the back of the fuselage in the slot for the
horizontal stabilizer, a small wood block has been temporarily
installed to protect the fuselage during shipping. Remove the
block with a hobby knife.
❏
2. Slide the stabilizer and fi n into the slots at the back
of the fuselage. Using a felt tip pen, outline the shape of the
fuselage on the stab and fi n. Remove them from the fuselage.