Connect the rudder – Great Planes Float Kit 60 - GPMQ1874 User Manual
Page 18
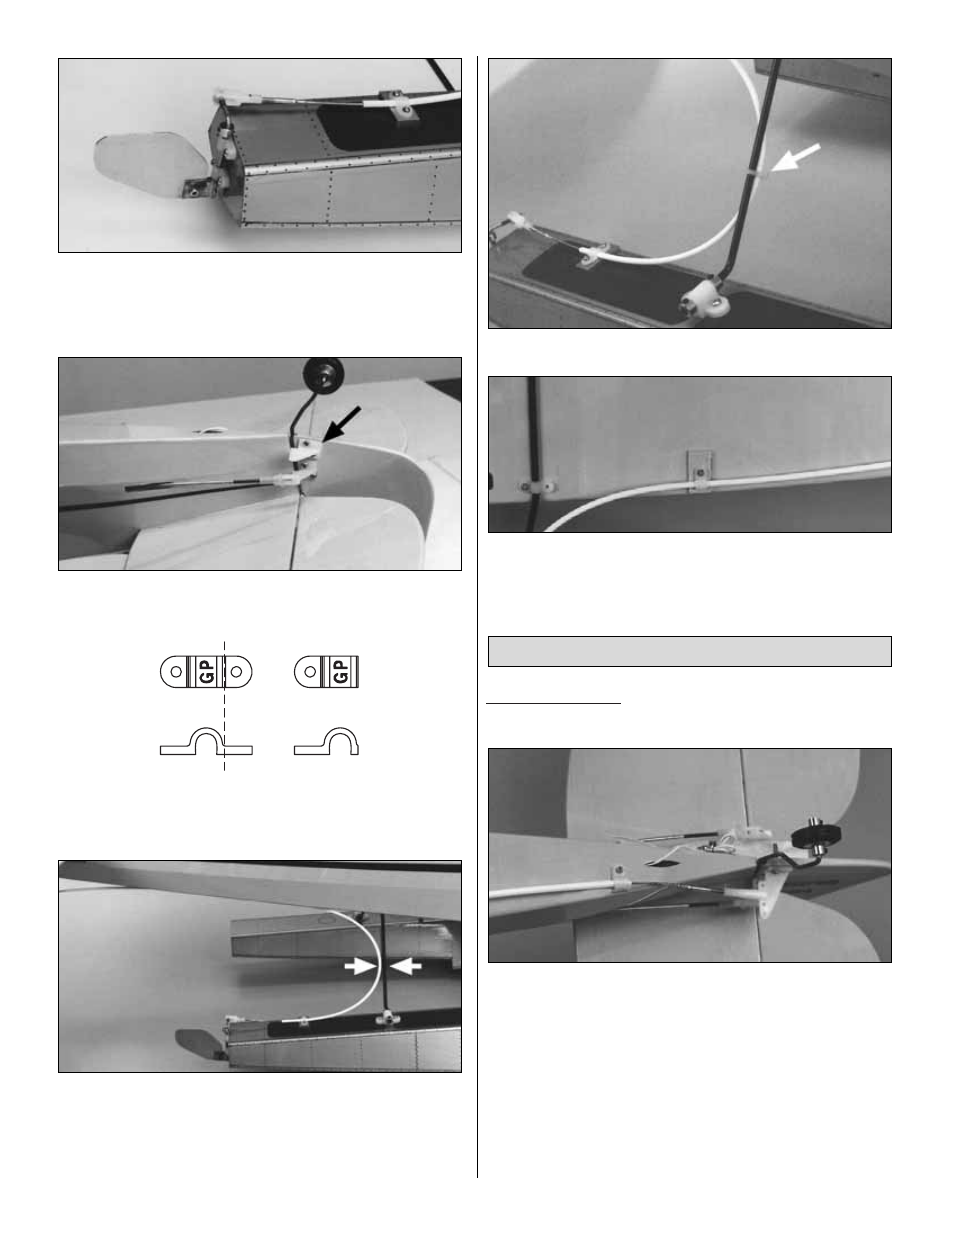
❏
3. Drill 1/16" holes in the mount plate. Then use #2 x
3/8" sheet metal screws to fasten a 1/8" hump strap and
outer pushrod tube with pushrod. Connect the swivel clevis
to the swivel on the rudder shaft.
❏
4. Mount an additional control horn (included with float
kit) on the right side of the rudder.
❏
5. Cut off one side of the
base from two 1/8" nylon hump
straps as shown in the sketch.
❏
6. Hold the outer pushrod tube and cable along the
bottom of the fuselage in a position that will provide a gentle
loop from the float to the rudder as shown in the photo.
Where the pushrod tube meets the fuselage, remove a
section of covering and install another die-cut plate.
❏
7. Fasten the guide tube to the aft strut with a nylon tie.
❏
8. Drill a 1/16" hole and secure the cable guide tube to
the mount plate with one of the cut-off hump straps and
#2 x 3/8" sheet metal screws.
20 - 40 Floats only
After performing steps A and B, continue with step 8.
A. Screw a threaded coupler to a nylon clevis. Then
temporarily fasten the clevis and coupler to the rudder
horn. Holding both the water rudder on the float and the
rudder on the model in a neutral position, determine the
length of the pushrod cable, remove it from the guide tube,
then cut it to length. Hint: A Great Planes cut-off wheel
(GPMR8200) works great for cutting cable like this without
fraying the end. Cut the guide tube to a length so that it will
not interfere with the threaded coupler when it is soldered
onto the cable. There must be enough clearance to allow
the cable to slide freely.
Connect the Rudder
18