Pushrod hookup build the water rudder all models – Great Planes Float Kit 60 - GPMQ1874 User Manual
Page 17
❏
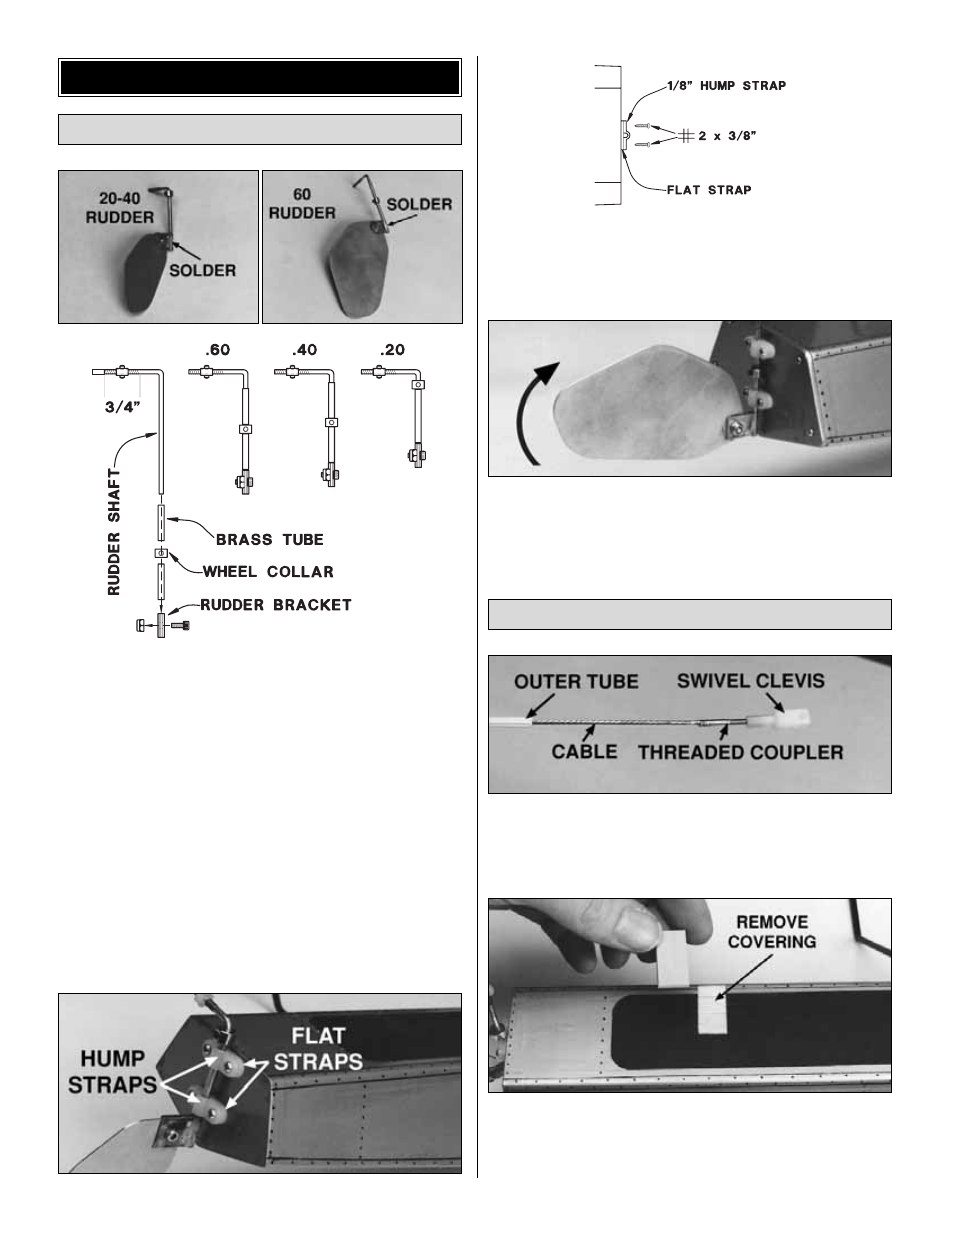
1. Install the wheel collar and the brass tube bearing
on the rudder shaft. Use the 4-40 x 1/4" socket head cap
screw and 4-40 lock nut to mount the rudder to the
rudder bracket, then silver solder the rudder bracket to the
rudder shaft. Do not solder the brass tube to the rudder
shaft. Note: The 60 and 40 floats require a brass tube,
wheel collar, then another brass tube. Refer to the sketch
for each assembly.
❏
2. Lock the wheel collar so the rudder shaft cannot slide
up and down in the brass tube. Note: on the 60 and 40
rudder, lock the wheel collar so the rudder shaft cannot
slide up and down on the bottom brass tube.
❏
3. Cut the threaded portion of the rudder shaft so 3/4" of
the thread remains, then screw on the nylon swivel 1/8"
past the end.
❏
4. Loosely install the rudder on the right float with two flat
straps, two 1/8" hump straps and four #2 x 3/8" sheet metal
screws. Adjust the bottom of the rudder bracket so it is even
with the bottom of the transom, then tighten the screws.
Note: Do not overtighten the 4-40 screw and nut that secures
the rudder to the bracket. The rudder must be able to pivot
upward in case it hits a foreign object in the water – or
the shore.
❏
1. With the floats mounted to the model, solder a
threaded coupler to one end of the braided cable, then
thread on the nylon swivel clevis. Slide the cable into the
pushrod guide tube.
❏
2. Position a die-cut 1/8" mount plate on the deck of the
float 3" from the rear. Remove the cover ing from
underneath, then glue it in position. Hint: Cover the mount
plate to match your floats before you glue it in place.
Pushrod Hookup
Build the Water Rudder
ALL MODELS
17