GME GR9240W User Manual
Page 6
PA G E 6
i n s t r u c t i o n m A n uA l
G r 9 2 0 0 s E r i E s
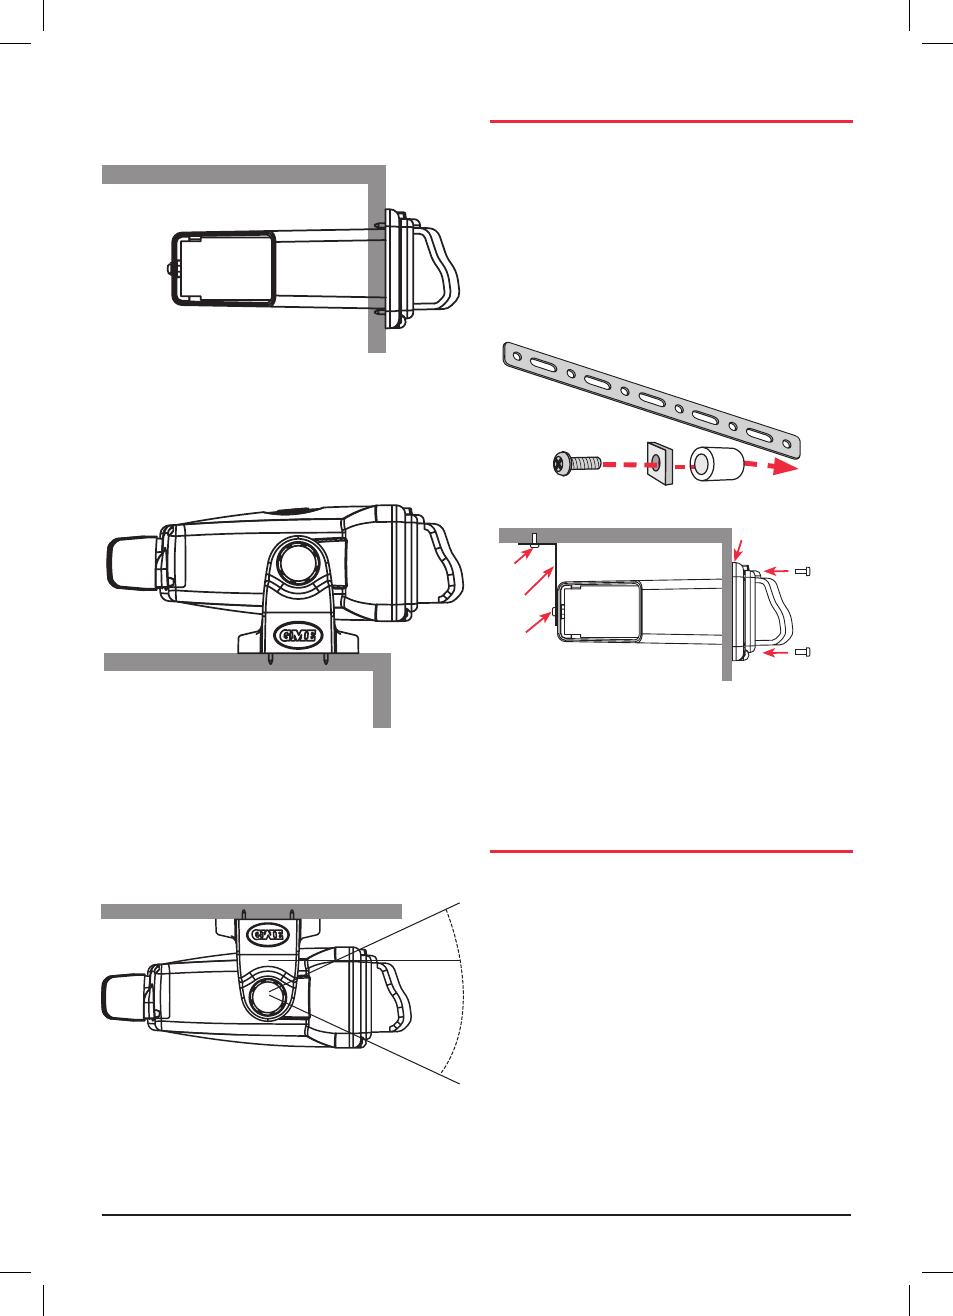
fluSH MOuNTING - GR9220
The GR9220 can be neatly flush mounted into a panel or
bulkhead so that just the controls and the protective cover
are visible.
Using the template provided, select a suitable location on a
panel or bulkhead. Examine behind the panel to determine
the best method of support. If the thickness of the panel is
not sufficient to support the unit, it will be necessary to use
the strap supplied (see following diagrams).
bRACkET MOuNTING - GR9240
1. Attach the GR9240 to the mounting bracket using the
two gimbal knobs.
2. Temporarily position the GR9240 in the desired location
and roughly mark the location of the bracket edges.
Now, remove the unit from the bracket and reposition
the bracket at the desired location to mark the mounting
hole positions .
3. Screw or bolt the bracket into position. The mounting
method will depend on the material to which the bracket
is being attached.
4. Refit the GR9240 into the bracket and adjust to the
desired angle before tightening the gimbal knobs.
5 . complete the antenna lead and electrical wiring
as described later.
Gr9240 on-Dash mounted
screw
strap
screw
screw
screw
Rubber gasket
Flush mount
support strap
rear centre screw with spacers
*
Use the rubber mounting gasket supplied. Place the gasket
between the plastic housing and the mounting surface. This will
improve the contact between the mounting surface and
stereo housing .
30
o
30
o
Gr9240 overhead mounted
Gr9220 Flush mounted