Installing a digital video cartridge (*), Before requesting service, C) optional with (3di450 supplied with cdi55o – Philips CDI550 User Manual
Page 12: Installation
Attention! The text in this document has been recognized automatically. To view the original document, you can use the "Original mode".
INSTALLATION
6. INSTALLING A DIGITAL VIDEO CARTRIDGE (*)
INTRODUCTION:
As soon as you have plugged this cartridge into your CD-I
player, you can play the latest CD-I discs, featuring interactive
movies, music videos and state-of-art video games and video
CD's. Enjoy yourself! But first......
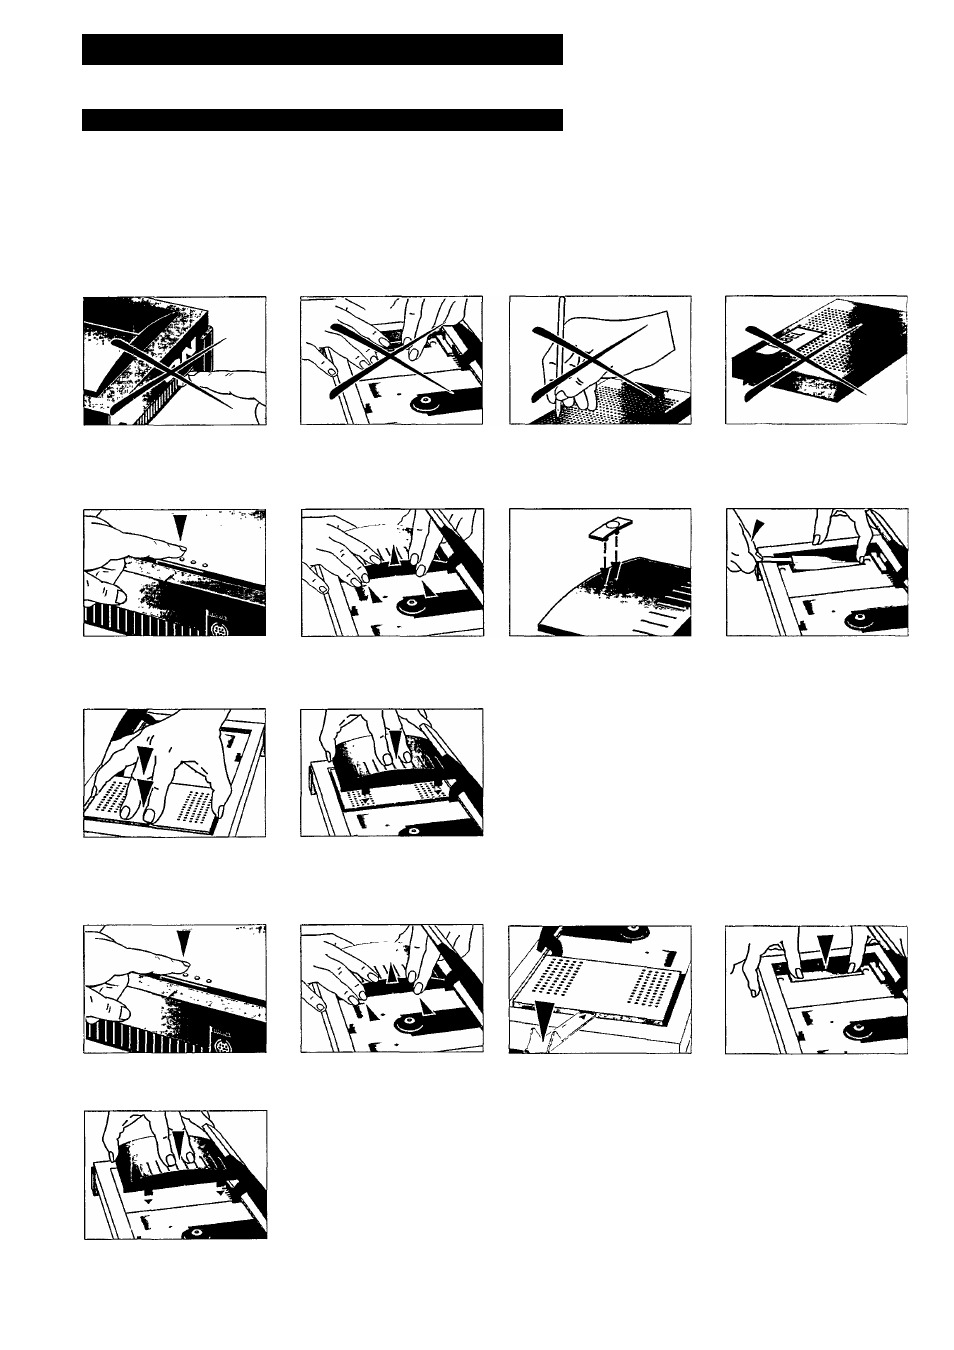
CAUTION - WHmE INSTALUNG (OR REMOVING) YOUR CARTRIDGE:
Note:
A special tool is supplied with the cartridge. Keep it safe in
case you need it.
Make sure the player
is
switched off.
INSTALLATION:
Do not touch the cartridge
connector!
Do not probe into the ventilation
holes!
Do not block the ventilation holes!
Open the disc cover.
Plug in the Digital Video Cartridge.
Push at the latches (side) to open
the Digital Video Cartridge cover.
Reinstall the Digital Video Cartridge
cover.
Mount the Digital Video Cartridge
identification badge on the Digital
Video Cartridge cover.
y,
Remove the metal protection of the
conneaor in the player witli tire
supplied tool. < Keep it tor possible
future use). Do not touch tile
connector.
THE CARTRIDGE IS NOW INSTALLED AND SHOULD NOT BE
REMOVED WITHOUT CAUSE: IT CARRIES A LOT OF EXTRA
MEMORY WHICH IS VALUABLE EVEN FOR TITLES WITHOUT
DIGITAL VIDEO (FULL MOTION).
REMOVAL:
Open the disc cover.
Reinstall the Digital Video Cartridge
cover.
Push at the latches (side) to open
the Digital Video Cartridge cover.
Remove the Digital Video Cartridge
with the supplied tool.
Reinstall the metal protection. Do
not touch the conneaor.
BEFORE REQUESTING SERVICE!
- IF THE PLAYER MALFUNCTIONS AFTER CARTRIDGE
INSERTION, TRY REMOVING AND REINSERTING IT.
- DO NOT ATTEMPT REPAIRS: THIS WILL INVALIDATE THE
WARRANTY.
C) OPTIONAL WITH (3DI450
SUPPLIED WITH CDI
55
O
12