Installation – Emerson Radio GP755 User Manual
Page 7
7
This unit can be used on a desk, or other level
surface away from excessive heat or direct
sunlight.
1. Set the OFF/LO/HI Ringer switch to LO or
HI to have the ringer sound when receiving
a phone call.
2. Set the TONE/PULSE switch to TONE or
PULSE to match the service provided on
your telephone line. If you are not sure of
your service, please contact your
telephone company.
3. DO NOT CONNECT TO THE
TELEPHONE LINE UNTIL CALLER ID
SETUP IS COMPLETED. Connect the
coiled cord to the handset and base.
Connect the long telephone cord into the
jack on the bottom of the base, thread it
through the groove toward the back of the
base.
INSTALLATION
UNPACKING:
When unpacking, make sure the following are included:
•
GP755 Telephone with Caller ID
• Modular Coil Cord
•
Modular Telephone Line Cord
If any of these items are missing or damaged, contact our customer service. Keep the
packaging to transport the telephone.
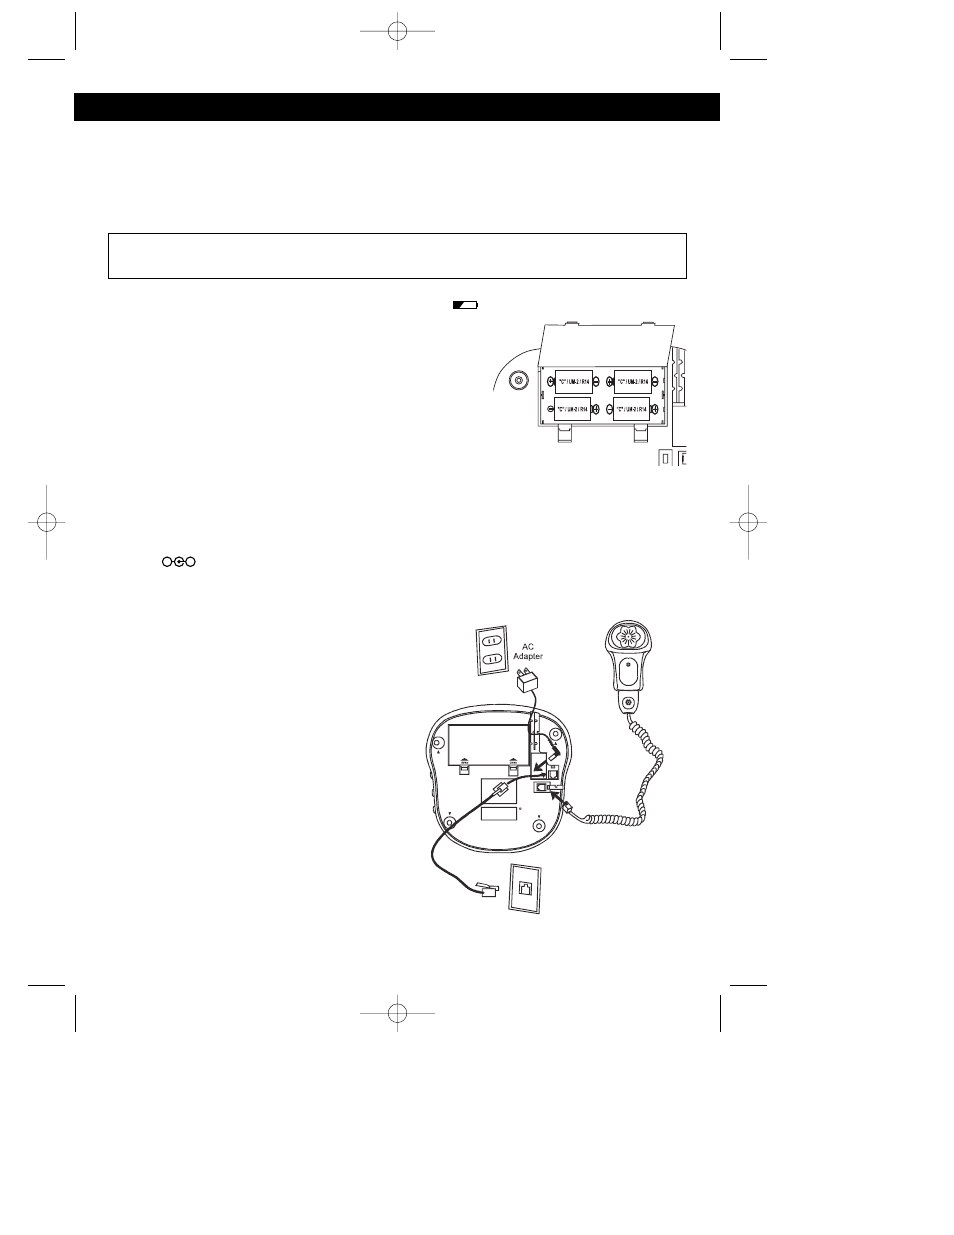
BATTERY INSTALLATION
When the batteries become weak, the battery icon (
) will appear in the display.
Replace as described below. You must replace the
batteries within two minutes, or the caller ID and
memories will be lost.
Insert four (4) “C” size batteries (not included) in this unit to
use the Caller ID and telephone functions as follows:
1. Open the battery door by pulling back on the latch.
2. Insert four (4) “C” size alkaline batteries (not included).
3. Snap the battery door back into place.
AC OPERATION
To operate the unit using AC power, connect an AC adapter to the DC jack on the bottom of
the base and to a wall outlet having 120V, 60Hz AC only. The batteries will work as battery
back-up in the event of power failure and will keep all of the functions without interruption.
Make sure to only use the supplied adapter, 6V 300mA (model UD-0603) with positive
center (
).
+
-
CAUTION
Disconnect the telephone line from the equipment before replacing batteries.
GP755.O/M.v5.QXD 7/7/03 10:46 AM Page 7