Electric powered operating controls, Ss26-15e operator’s console – EDCO SS-26E User Manual
Page 7
E-SS2636-DGE-I-1012
Printed in USA
TVW
©2012
Page 7
100 Thomas Johnson Drive, Frederick, MD 21702-4600 USA
Phone (301) 663-1600 • 1-800-638-3326
Fax (301) 663-1607 • 1-800-447-3326
Website: www.edcoinc.com • Email: [email protected]
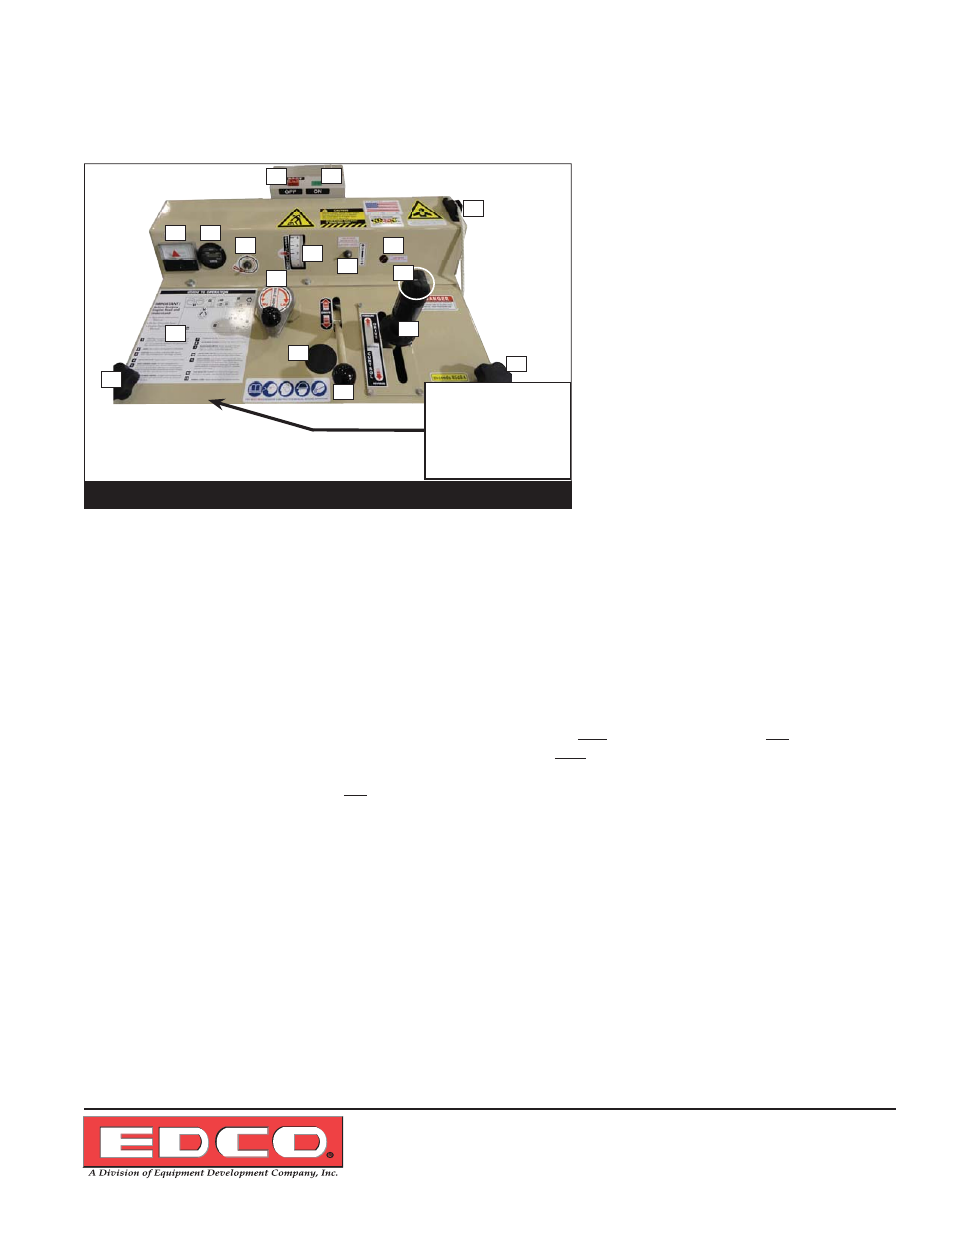
SS26-15E Operator’s Console
1. AMP
Meter
2. Hour
Meter
3. Water Pump Switch
4. Depth
Indicator
5. OFF/E-STOP Button (RED)
6. On Button (GREEN)
7. Battery Saver Switch
8. Low Water Pressure Alert
9. Guide Bar Rope
10. Blade Lift / Lower Rocker Switch
11. Drive Control Lever
12. Depth Control
13 Hydraulic Oil Fill
14. Free Wheeling Clutch
15. Guide To Operation
16. Handle Locks
Electric Powered Operating Controls
With the exception of the ON and OFF/E-STOP buttons the electric version of this saw and its controls operate the
same as Gasoline and Diesel models described in this manual.
Above are descriptions of all controls and indicators shown in Figure 5A. Service and maintenance are the same as
Gasoline and Diesel models.
CAUTION: Before attempting to start the saw be sure blade is not contacting the work surface or in a cut. If saw ever
stops with blade in cut raise blade out of cut by putting item #11 in the neutral position fi rst, then use item #10 to raise
the blade.
NOTE: When machine is not in use turn item #7 “Battery Saver Switch” OFF. If switch is left turned ON the battery will
be drained over a period of time. Turn item #3 “Water Pump Switch” OFF when dry cutting or machine is not in use.
Turn item #3 “Water Pump Switch” to ON if water pressure is not suffi cient to keep item #8 “Low Water Pressure Alert“
indicator extinguished (this also means the blade is not getting proper lubrication and blade wear increases). Turning
the water pump on also increases water fl ow to the blade and will extinguish the indicator.
Maintain the setting of 21 AMPS, on the AMP Meter item #1 when the saw is moving forward and cutting at a constant
speed.
To adjust the setting of 21 AMPS use item #11 “Drive Control Lever” buy moving it toward the front or rear of the ma-
chine while observing the item #1 “AMP Meter”. While cutting keep item #1 “AMP Meter” reading at or slightly below
21 AMPS. No harm will be done to intermittently run slightly over 21 AMPS while making adjustments to the saw. Do
not continuously run over 21 AMPS damage to the motor, blade and protection circuit will result.
While cutting and there is adequate water pressure item #8 “Low Water Pressure Alert” indicator will be extinguished.
When water pressure is lost or too low item #8 “Low Water Pressure Alert” indicator will illuminate alerting the Opera-
tor. Cutting should be stopped to prevent damage to the blade. Investigate and fi x problem before continuing to cut.
7
Figure 5A
DC Hydaulic
Power Unit mounted
inside compartment at
this location.
(See page 11)
(Figure 9)
1
2
3
4
5
6
7
9
10
12
13
14
15
16
16
8
11