EDCO SS-26E User Manual
Page 10
E-SS2636-DGE-I-1012
Printed in USA
©2012
TVW
Page 10
100 Thomas Johnson Drive, Frederick, MD 21702-4600 USA
Phone (301) 663-1600 • 1-800-638-3326
Fax (301) 663-1607 • 1-800-447-3326
Website: www.edcoinc.com • Email: [email protected]
To Stop Cutting:
•
Stop forward motion of the saw by returning the speed control lever to neutral position.
•
Raise the blade completely out of the cut by depressing the blade lift/lower switch.
(Figure 8) DO NOT attempt to raise the blade with the depth control lock.
•
Throttle the engine down to idle, on gas, propane and diesel models.
•
Flip the Blade Saver Switch back to DRY CUT.
•
If wet cutting, turn off the water pump and close the valve.
•
Turn the ignition switch to the OFF position on gas, propane and diesel models.
• Turn power switch off on electric models.
If the Power Stops While the Blade is in the Cut:
•
Raise the blade completely out of the cut.
Disconnect the spark plug, battery leads or electrical power depending on the source of power to pre-
vent the machine from starting by accident.
•
Inspect the blade arbor bolt to verify is still tight, and inspect the blade for damage.
Replace damaged or questionable blades immediately. Use Rx for Diamond Blades as a guide.
Note: The SS26-38K is equipped with an engine ammeter, the SS26-31D, SS36-61D uses lighted indicators to show
the rate of charge for the battery while the engine is running. The engine alternator is designed for an output of 30
amperes. This is adequate to keep the battery fully charged. If the ammeter indicates a minus (-) condition when the
engine is running, or the charge indicator lights, immediately raise the blade out of the cut, stop the engine, inves-
tigate and solve the problem. This condition must be corrected before continuing or damage to the equipment will
result. This feature is not available on the SS26-E.
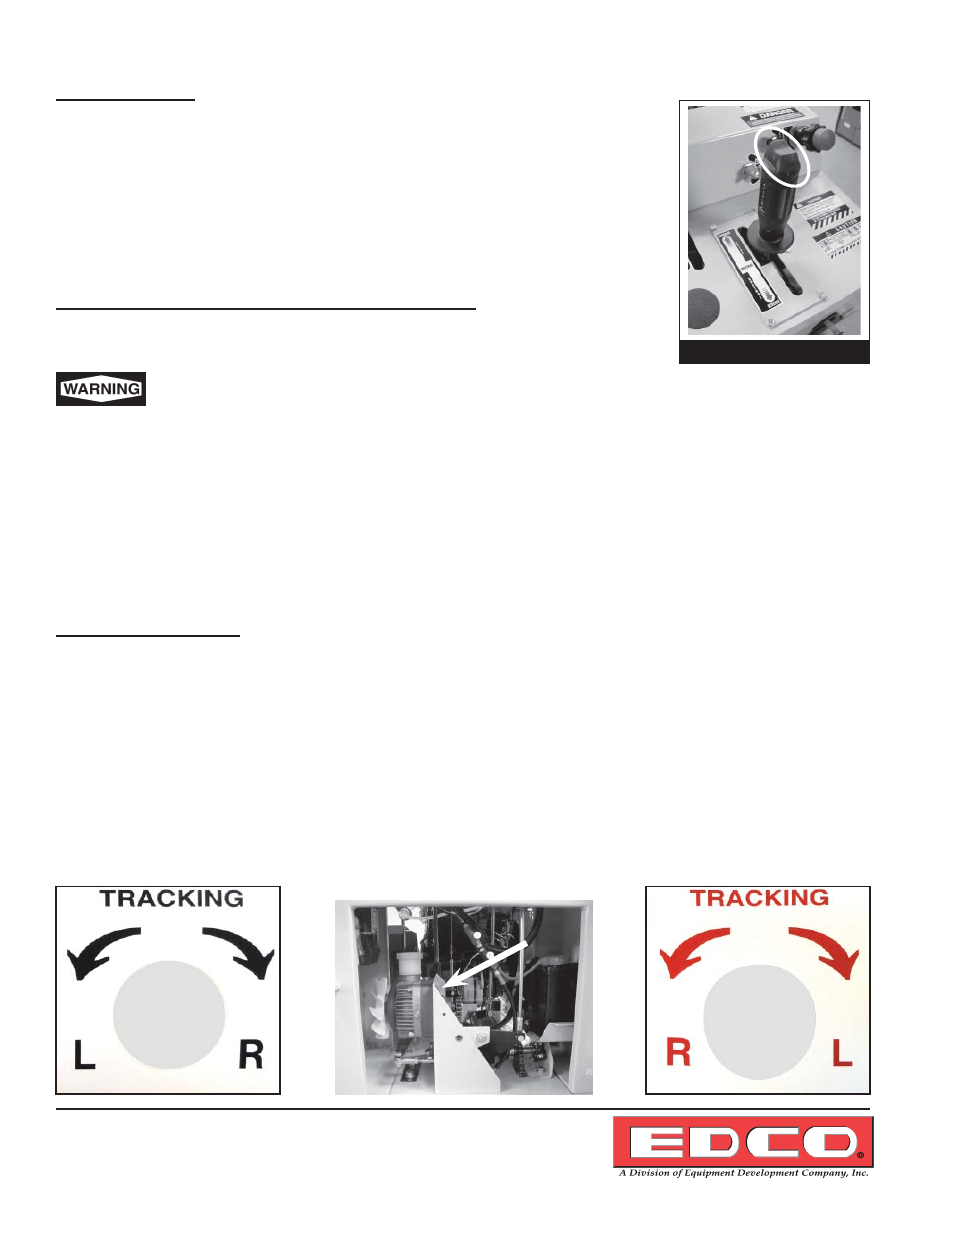
Figure 8
Blade
Raise/
Lower
Rocker
Switch
Tracking Adjustment:
• Note the difference in tracking adjustment decals below, SS-36 on the left and SS26 on the right.They are located
at the bottom rear of the saw. SS-36 on left side and SS-26 on the right side.
• If necessary loosen/tighten chain by loosening four hex nuts located on inside of bracket indicated by arrow in
photo below. Raise/lower pump and tighten four hex nuts as needed during tracking adjustment.
•
Strike 25’ line on concrete.
•
Set blade over line and start forward with blade out of cut above the start of the line.
•
Saw should drift 2”-3” to left of the line in 25’.
• Start
cutting.
• If saw still feels like it is binding remove from cut and adjust drift to compensate.
• Note chain tension before tracking. If chain is already tight loosen slightly before starting adjustments.
• After tracking is complete, retighten chain.