EcoTech Marine TIR Lens User Manual
Tir lens, Step 3, Step 7
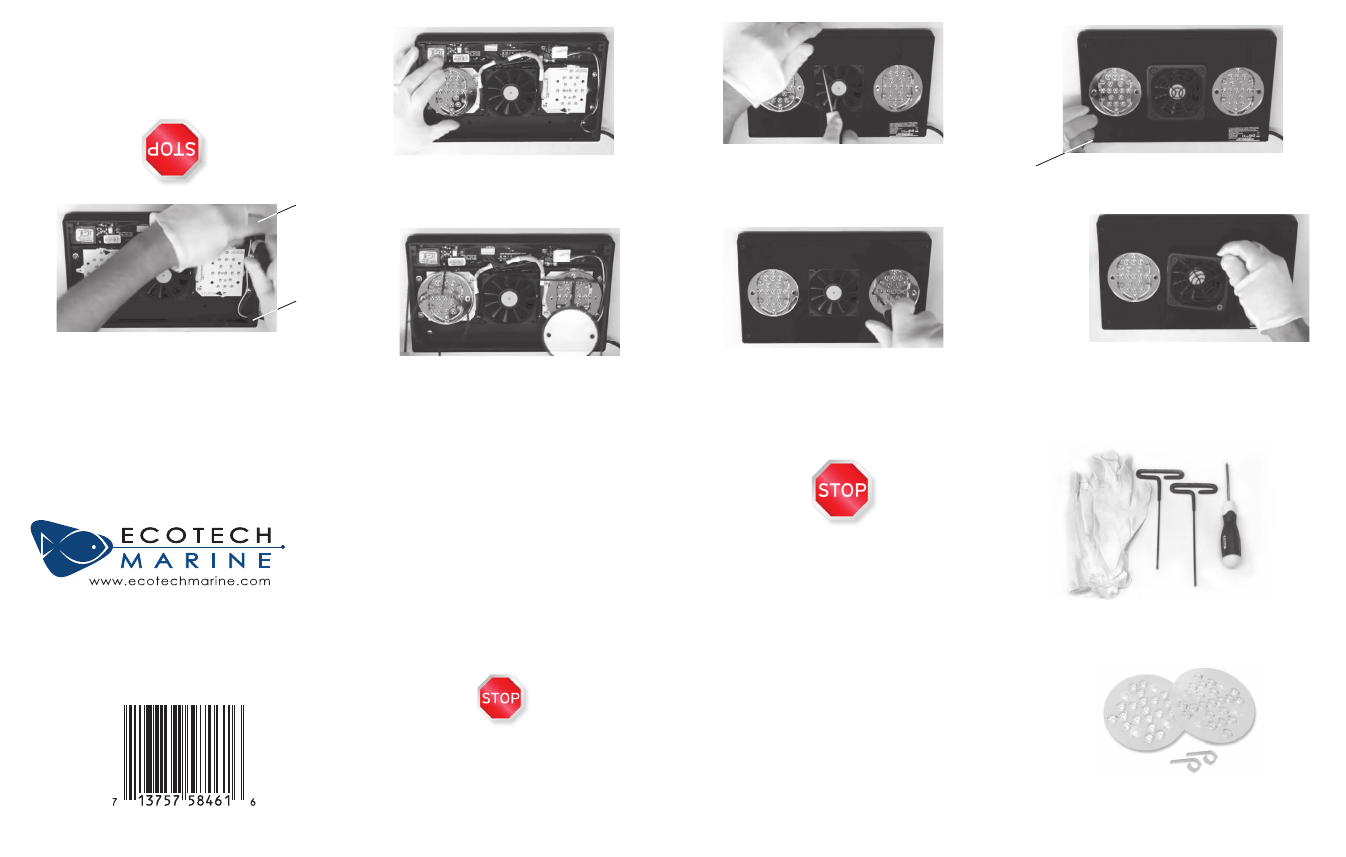
TOOLS NEEDED:
Phillips screwdriver, 2.5mm &
3mm Allen keys and gloves
INSTALLATION
OF THE
TIR LENS
FOR THE
RADION XR30w
View the video at www.ecotechmarine.com/tirlens/
Installation of TIR lenses will increase
the light output from your Radion fixture.
Overlighting your tank may cause damage
to inhabitants.
View the video at
www.ecotechmarine.com/tirlens/
®
610 954 8480
800 785 0338 (toll free)
888 500 2907 (fax)
INCLUDED IN TIR LENS KIT:
wire ties (2), TIR lens (2)
• Before starting this process, ensure that
your Radion XR30w is disconnected from its
power supply.
• Place the Radion on a soft surface to protect
the cover plate from scratches.
• EcoTech Marine recommends the use of gloves
during this process to prevent any fingerprints
from getting on the LED clusters. Fingerprints
could cause a decrease in light output.
• EcoTech Marine is not responsible for any
damage caused to the Radion, your aquarium
and its livestock, or your property as a result
of improper use of the TIR Lens Kit.
• Installation of the TIR Lens Kit will not affect
your existing warranty of the Radion XR30w.
STEP 3:
REMOVE PHILLIPS LENS
SCREWS (2 FOR EACH LENS)
AND REMOVE LENSES.
STEP 7:
REMOVE HEATSINK
SCREWS FROM HOUSING SIDE
WHERE WIRES CROSS (2).
STEP 4:
REMOVE BOTTOM
PLATE USING NOTCH IN F
AN AND A
SCREWDRIVER TO FACILIT
ATE.
STEP 2:
REMOVE PHILLIPS BOTTOM
PLATE SCREWS (4) A
T OUTER CORNERS.
STEP 1:
REMOVE PHILLIPS
FAN SCREWS (4) AND REMOVE F
AN
GRILL ASSEMBLY (2 PIECES).
STEP 5:
REMOVE
RUBBER GASKET.
STEP 6:
REMOVE 2.5MM REFLECTOR
SCREWS (4) AND REMOVE REFLECTOR.
(Repeat this process for second r
eflector.)
You’ll need supplied
wire ties (2) and TIR lens (2)
to continue.
>
(Discard r
eflectors. Keep screws.)
XR695 TIR LENS KIT
>
>