Dynaflite DYFA2018 User Manual
Page 15
touch or be glued to the ribs. They should be
thoroughly glued to the spars.
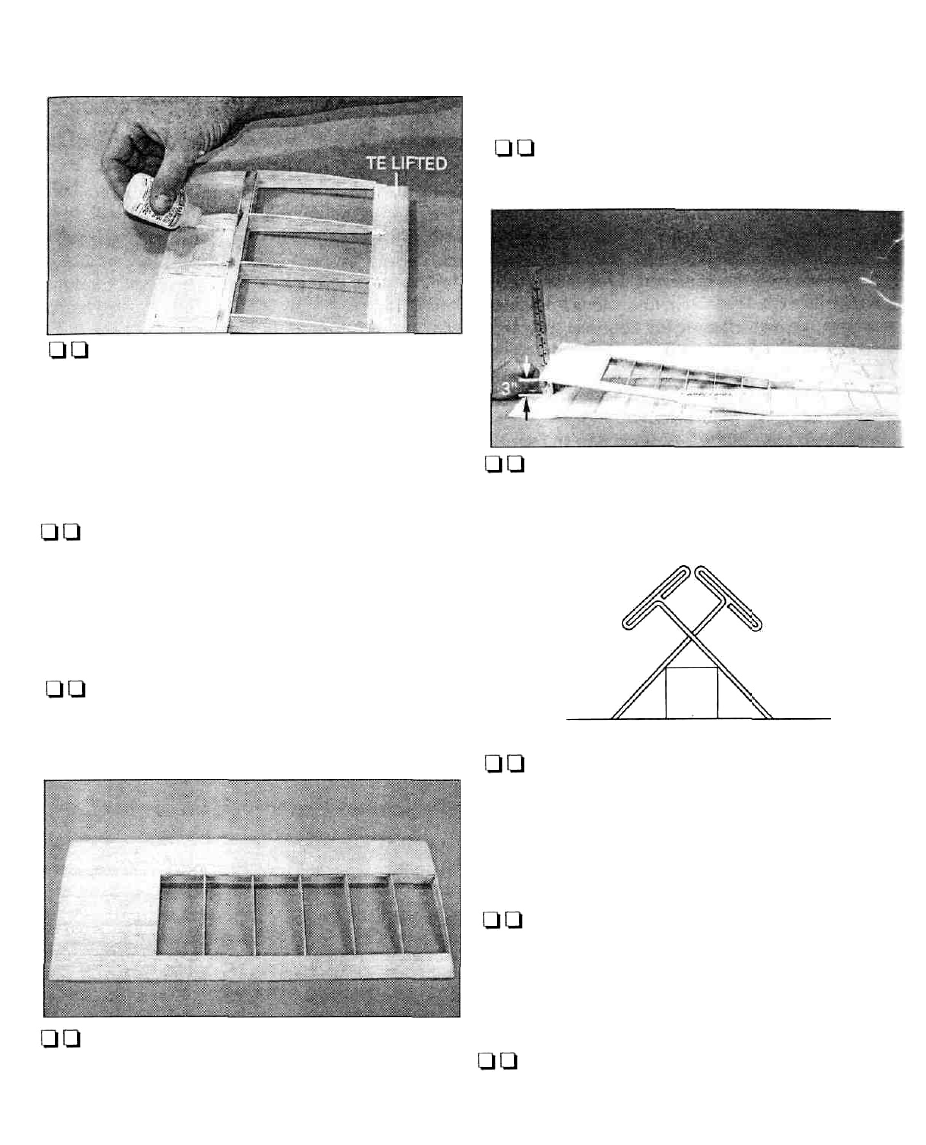
Q Q 10. Remove the pins holding the wing
panel to your building surface. Slowly lift the
trailing edge up off the plan, rolling the wing
onto the front part of the wing ribs. The rolling
process is to push the sheeting against the wing
ribs, allowing you to glue the sheeting to the
ribs using thin CA.
QQ 11. Once the glue sets, align the wing panel
back onto the plan. Use medium CA to glue a
1/16" x 1-1/4" x 24" balsa top trailing edge sheet
into position. Glue a 1/16" x 3" x 24" balsa top
leading edge sheet onto the spar and the front
area of the wing ribs.
Q Q 12. Sheet the center-section area between
the trailing edge sheeting and spar using 1/16"
x 3" x 24" balsa sheeting.
a hobby knife or razor saw. Use your sanding
block or bar sander with medium (150-grit)
sandpaper to sand the sheeting and the leading
edges smooth.
14. Using a Hobby Knife, remove the
section of the tip R2 rib between the spars.
Q Q 1 5 . Place the center panel onto the plan
aligning the R2 rib to the plan. Block the pane
up so the center is 3" from the building surface
QQ 13. Remove the center panel from the plan.
Cut the sheeting and the leading edges flush
with the outer edges of the R1 and R2 ribs using
QQ16. Place a 1/8" x 3/8" x 24" balsa spar over
its location on the plan and cut it to length. Using
the criss-cross pin technique shown in the
illustration to pin the spar in 3 or 4 places. The
end of the spar must be sanded to fit tightly
against the spar on the center panel.
QQ 17. Insert the narrow end of the die-cut 1/8
ply tip dihedral brace into the opening which
you previously cut between the spars in the
center wing panel. Do not glue the brace a
this time.
QQ18. Pin one of the 1/16" x 1-1/4" x 24" balsa
trailing edge sheets in its proper location.
15