Clippasafe 120 Pressure Fit Gate User Manual
Page 4
3
4
5
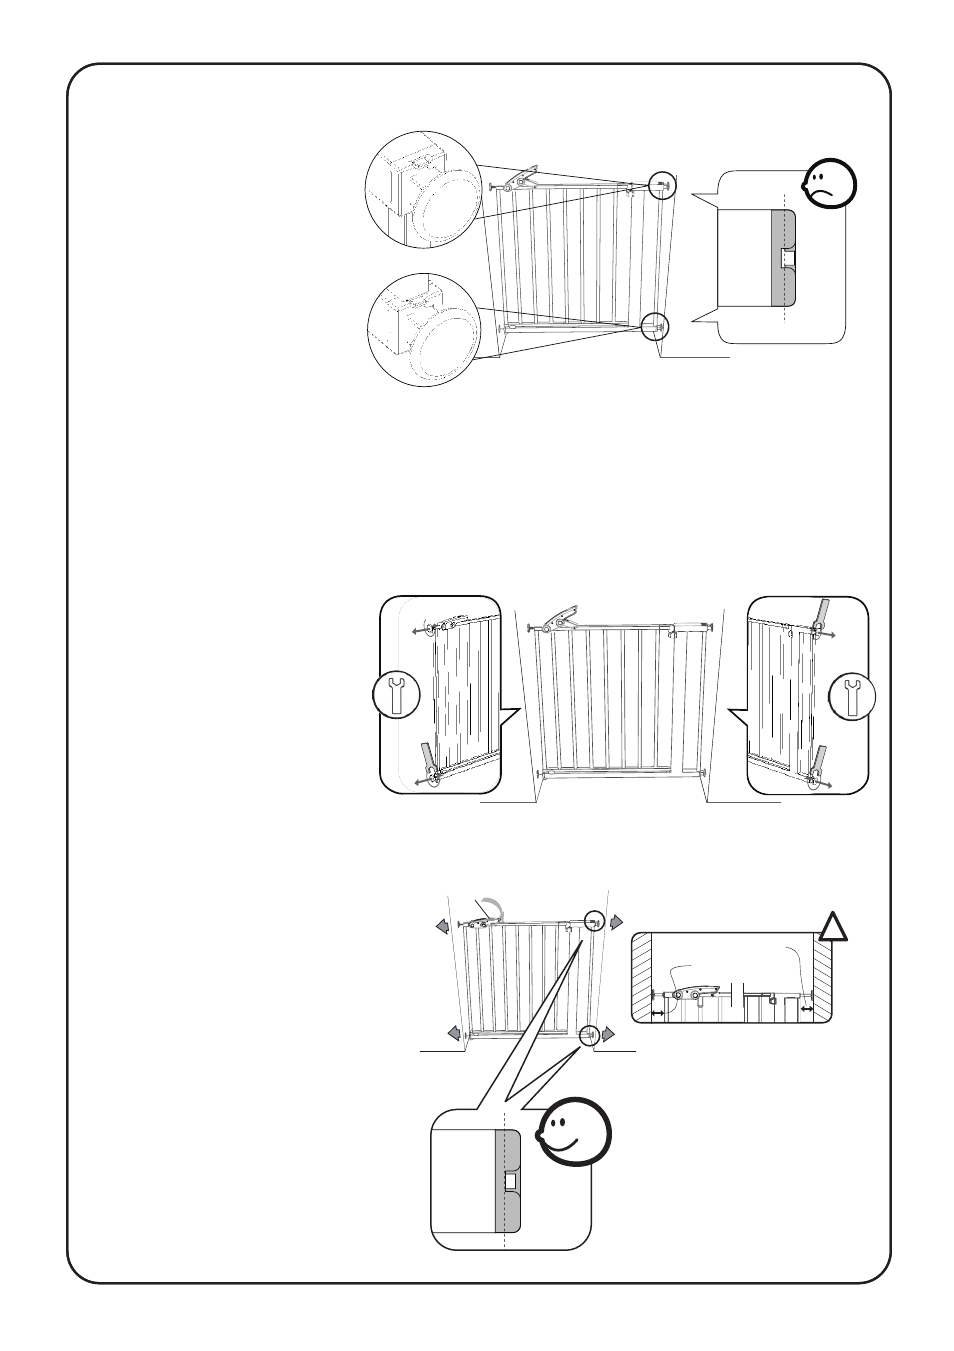
Place the gate in the desired opening and push the latch downwards gently.
The screw adjusters will
extend and the latch
should ‘click’ into
place indicating
that the gate is
secure. If you feel
a lot of resistance
STOP and screw
the screw adjusters
further into the frame.
Check the pressure indicators on the top and bottom corners of the frame.
When the gate is under no pressure, the red plastic indicator should be
completely visible. When the gate is closed and under pressure the wide
part of the red plastic indicator, should be completely invisible indicating
that the gate is under enough pressure.
If the wide part of the red indicator is still visible the screw adjusters need to
be adjusted. Open the
latch and using the
spanner ‘E’ loosen the
nuts ‘B’ and adjust each
of the screw adjusters
so they extend further
from the frame. This will
increase the pressure.
Continue to adjust the screw adjusters until the wide part of the red
indicator disappears when the gate is securely closed. Make sure that
the distance between the
wall and the gate is no less
than 18mm and no more
than 63mm on both sides.
clac
max 63 mm
min 18 mm
max 63 mm
min 18 mm
!