Note, Iv. types of stitches, Looper threading – Brother 2340CV User Manual
Page 7
Attention! The text in this document has been recognized automatically. To view the original document, you can use the "Original mode".
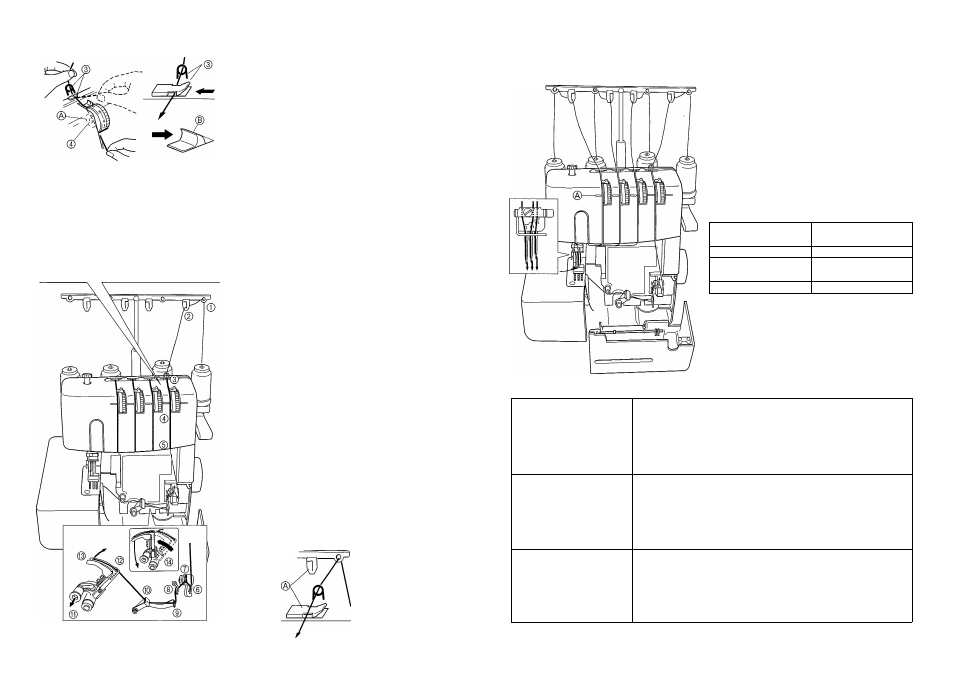
Looper threading
• Pass each thread from (
3
) to 0 as shown in
this illustration.
•
Pass the thread through the proper thread
guide.
•
Slide and hold the thread tension release
button to the right, then pass the thread
through the tension disc which is in the
channel next to the tension adjustment dial.
Release the button.
©Tension disk
©Thread tension release button
CAUTION
Always be sure to turn off the power before
carrying out the following operation.
(1) Follow the procedure described below to thread the
looper.
1 Open the front cover by sliding to the right and guiding
the top toward you.
2 Run the thread in the sequence illustrated, following
the blue color and the numbers next to each threading
point. (©-©)
3 After running the thread to pull the release lever ©,
and then run the thread through ® and 0.
4 With about 10 cm (4 inch) of thread pulled through the
eye of the needle, as shown by ® in the illustration,
move the looper back in the direction of the arrow to
lock it.
5 Close the front cover.
10
NOTE:
When using thick thread, such as decorative thread,
as the looper thread, run the thread as shown in the
illustration.
Do not run the thread through ®.
IV. Types of stitches
Tri-cover stitch (Three needies four threads cover stitch)
Use four threads, three front needles and the looper
thread to sew a 6 mm (15/64 inch) cover stitch.
Use: Ideal for hemming and for decorative stitching.
Threading
• For details on threading the machine, refer to “III.
Threading” on page 9 to 10.
< Threading the left, center and right needle >
< Threading the looper >
Tension adjustments
(1) First, set each thread tension dial to the number
shown below.
©Tension selection mark
Left needle dial
(yellow)
Center needle dial
(pink)
4
4
Right needle dial
(green)
Looper needle dial
(blue)
4
4
CAUTION
Make sure that the thread is properly seated in
the tension discs by holding the tension release
button to the right while passing the thread
through the tension discs.
(2) Sew a test stitch. (Refer to “V. Sewing” on page 15.)
(3) Adjust the tension of each thread according to the
condition of the stitch.
Balanced tension
▲ The needle thread sews a straight seam on the top
1 side and the looper thread forms loops on the under
Stitching direction side of the fabric.
1 1
^ 1 1 1
Needle thread is too loose
Turn the needle thread adjusting dial to a higher
number. Or turn the looper adjusting dial to a lower
number for looser tension.
^ 1 1 1-
Needle thread is too tight
Turn the needle thread adjusting dial to a lower
number. Or turn the looper adjusting dial to a higher
number for tighter tension.
11