Refrigerator, Features, To remove the ice bin – Kenmore 2200128 User Manual
Page 13: The ice dispenser, Refrigerator features, Awarning, Ice liakch, Fcter and ice dispensers, On some mocieis
Attention! The text in this document has been recognized automatically. To view the original document, you can use the "Original mode".
REFRIGERATOR
FEATURES
Ice liakcH:''
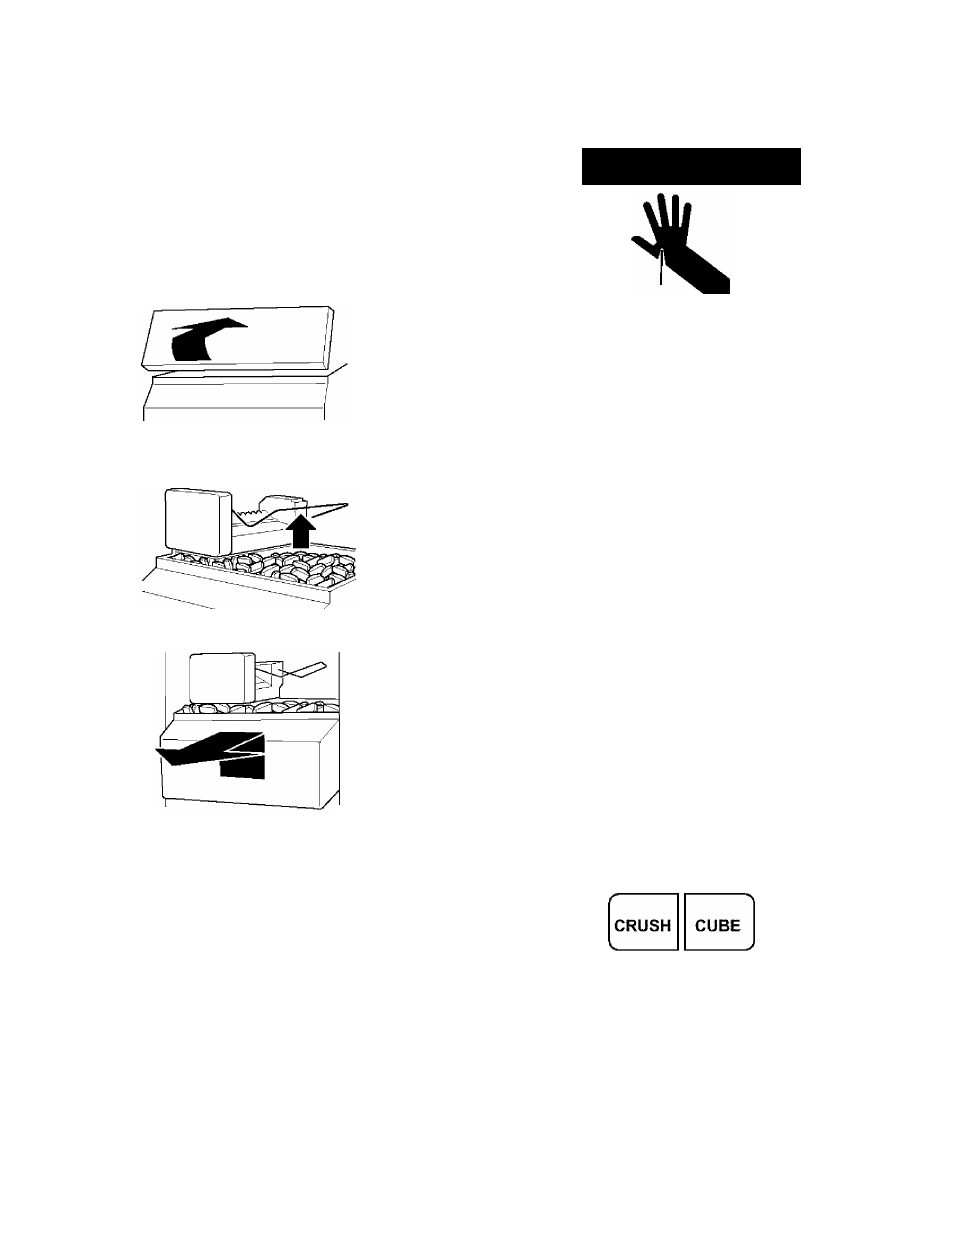
To remove the ice bin;
1. Pull the covering panel out from the bottom and then
slide it back toward the rear.
2.
Lift the signai arm so it clicks into the OFF (up) position.
Ice can stiii be dispensed, but no more can be made.
3.
Lift up the front of the storage bin and puli it out.
4.
Empty the ice bin. Use warm water to meit the ice if
necessary.
Never use anything sharp
to break up the
ice in the bin. This can cause damage to the bin and the
dispenser mechanism.
5.
Wash with a mild detergent, rinse well and dry
thoroughly. Do not use harsh or abrasive cleaners or
solvents.
6. When you replace the bin,
make sure it is pushed in all
the way or the dispenser will not work. Then push the
signal arm down to the ON position to restart ice
production. Make sure the door is ciosed tightiy.
fcter and Ice Dispensers
{on some mocieIs|
AWARNING
Cut Hazard
Use a sturdy glass when dispensing ice or water.
Failure to do so can result in cuts.
Depending on your model, you may have one or more of
the following options: the abiiity to seiect either crushed or
cubed ice, a special light that turns on when you use the
dispenser, or a iock option to avoid accidentai dispensing.
The ice dispenser
Ice dispenses from the ice maker storage bin in the freezer.
When the dispenser iever is pressed:
■ A trapdoor opens in a chute between the dispenser and
the ice bin.
■ Ice moves from the bin and falls through the chute.
■ When you release the dispenser iever, the trap door
cioses and the ice dispensing stops. The dispensing
system will not operate when the freezer door is open.
Some models dispense both cubed and crushed ice.
Before dispensing ice, seiect which type of ice you prefer.
The button controis are designed for easy use and
cieaning.
■ For cubed ice, press the CUBE button until the red
indicator appears in the window above the CUBE
button.
ICE
■ For crushed ice, press the CRUSH button until the red
indicator appears in the window above the CRUSH
button.
For crushed ice, cubes are crushed before being
dispensed. This may cause a slight delay when dispensing
crushed ice. Noise from the ice crusher is normai, and
pieces of ice may vary in size. When changing from
CRUSH to CUBE, a few ounces of crushed ice will be
dispensed along with the first cubes.
13