Assembly instructions – Kenmore 122.161249 User Manual
Page 7
Attention! The text in this document has been recognized automatically. To view the original document, you can use the "Original mode".
ASSEMBLY INSTRUCTIONS
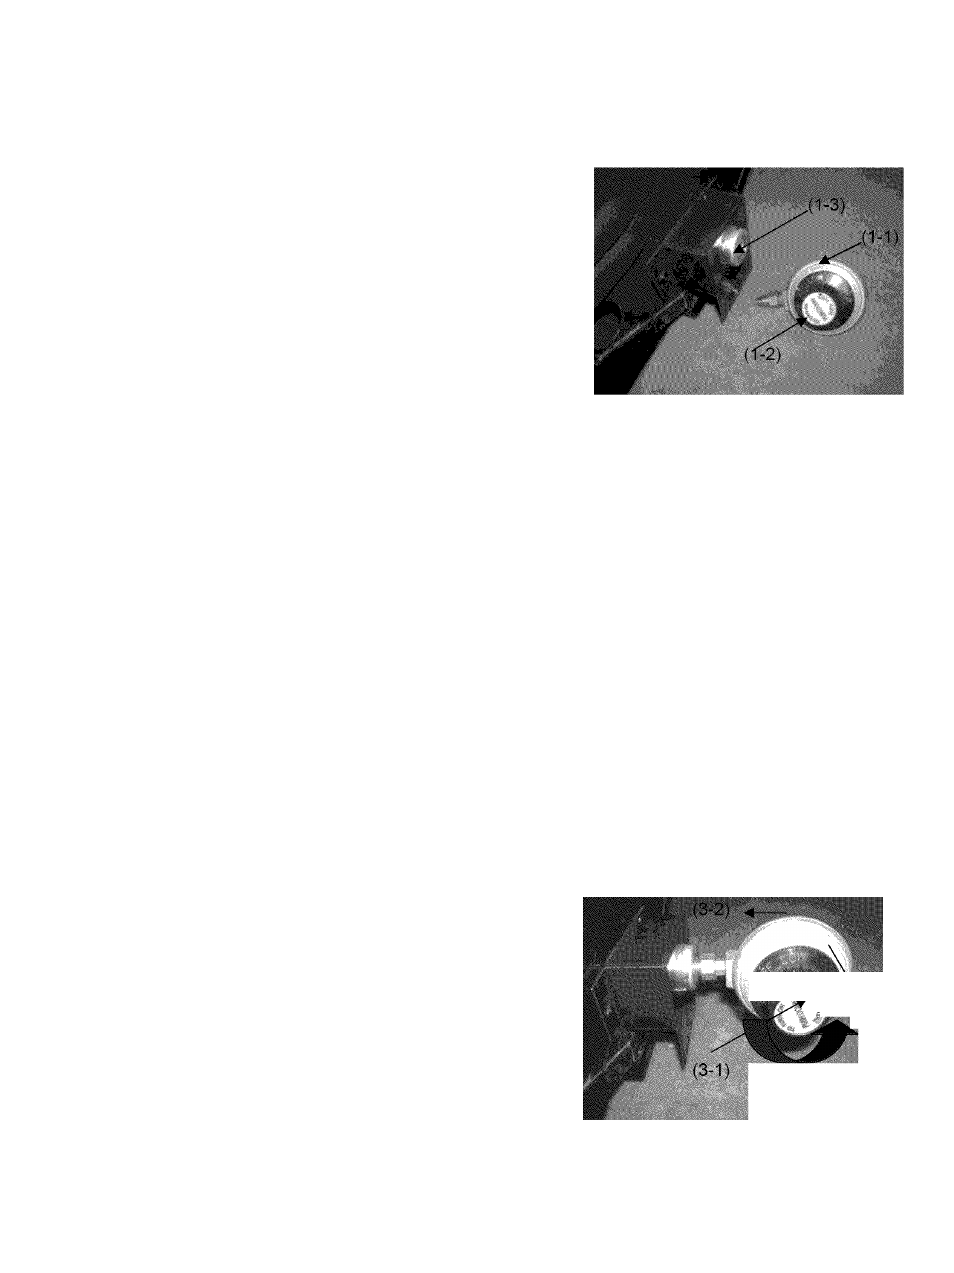
Fig.1
1. Locate the gas regulator (1-1). Grasp the regulator (1-1)
with the knob (1-2) facing directly up. Line up the collar on
the regulator (1-1) with the open end of the burner tube (1
3) as shown in fig. 1.
Fig.2
2. Screw the regulator (2-1)
as shown in fig. 2.
into the open end of burner (2-2)
(2-1;
(
2
-
2
)
/
3. Once the regulator is in as far as it will go, tighten regulator
nut with the supplied wrench. Turn the regulator so that the
knob is facing forward. Note: Always make sure the
regulator is secured facing forward in the fully locked in
position before attaching propane cylinder.
Fig.3
4. Be sure the gas control knob (3-1) is in the “OFF” position.
Check to make sure threaded areas on cylinder and
regulator are clean. Screw the propane cylinder (3-2) onto
the regulator (3-3) making sure to engage threads correctly
to achieve proper connection. To remove the propane
cylinder (3-2) unthread the cylinder from the regulator (3-3)
as shown in fig.3.
“
(3-3)