How to care for your range, Finishes, Oven vent duct – GE JBP87GD User Manual
Page 16: Oven lamp and surface lamp, Cooktop surface lamp, Finishes adjusting
Attention! The text in this document has been recognized automatically. To view the original document, you can use the "Original mode".
How To Care For Your Range
Finishes
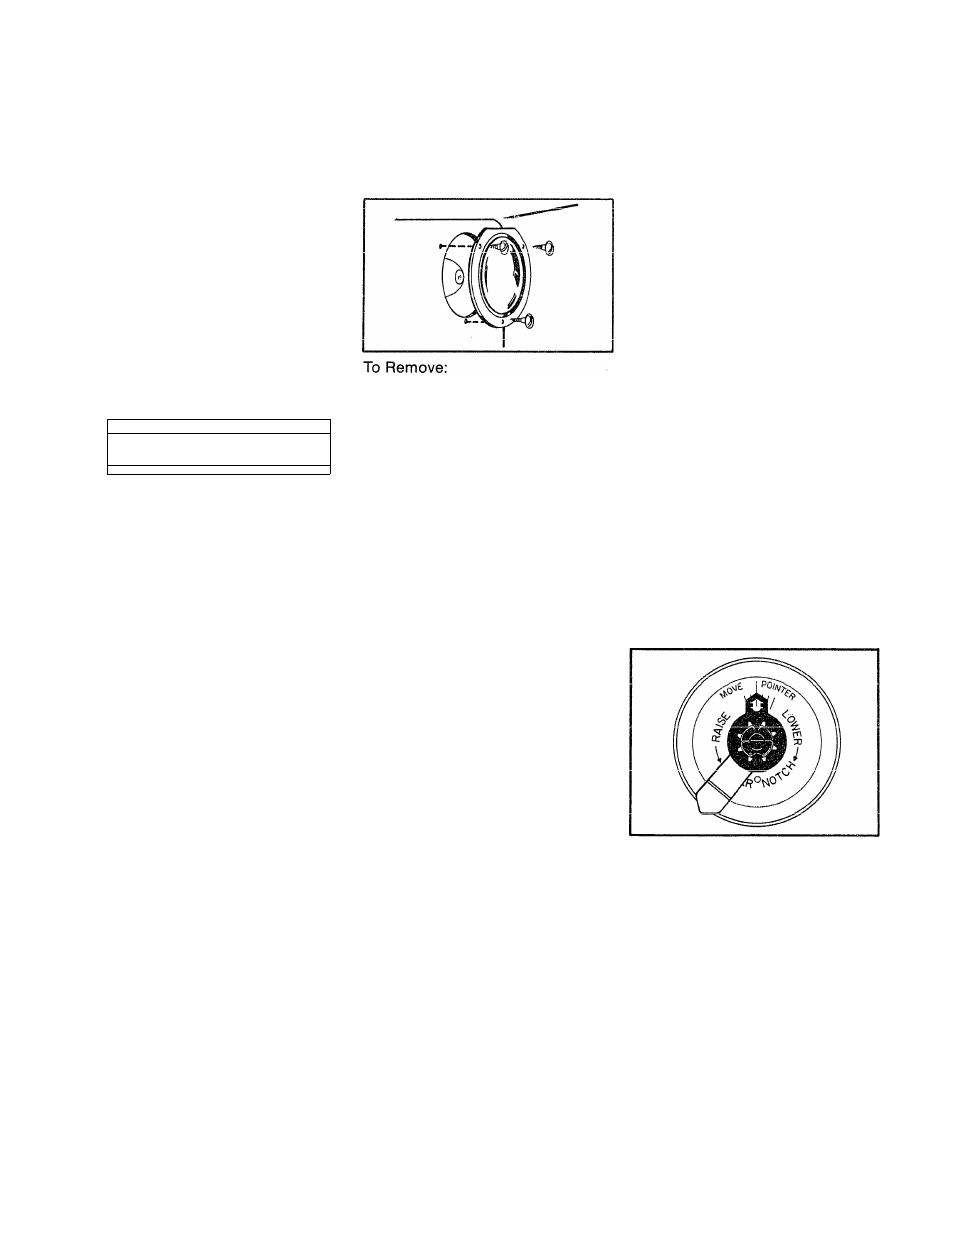
Adjusting
I
I
r - » / n
I
- f I f t * \ I l - i I
I f
1
^ p v t u c 7 i a i i i c ^ i i a m o i m n o i i i d
sturdy but breakable if misused.
This finish is acid resistant. How
ever, any acid foods spilled (such
as fruit juices, tomato, or vinegar)
ohruilH nr»+ r ^ i ^ r n n + / ^
I I I I W l . ^ d t v / I V 7 i l l C l l i l
on the finish.
Oven Vent Duct
■
7=
11
OVEN VENT DUCT
Your oven is vented through an
of the control panel.
During most operations it is normal
to observe moisture and/or vapor
emitting from opening. Clean this
I li»^ 11 + 1 \ i
OIC7C1 I I OV| UOI I LI y .
NOTE: NEVER COVER OR BLOCK
VENT OPENING. TO DO SO PRE
VENTS THE OVEN VENT FROM
FUNCTIONING PROPERLY DUR-
!NQ COOKING OR
ING OPERATIONS.
Oven Lamp and
Surface Lamp
CAUTION: Before replacing your
oven bulb, disconnect the elec
trical power for your range at the
main fuse or circuit breaker panel
or pull plug. Be sure to let the lamp
cover and bulb cool completely
before removing or replacing.
• Remove the 3 slotted screws In
the lamp cover as shown in
diagram,
• Detach lamp cover and remove
bulb.
.To Replace:
® Put in a new 40-watt appliance
bulb.
• Install lamp cover. Replace 3
.Qr^rP\A/Q PnH tinhfpn maL'inn ctir*^
cover fits flush with oven wall.
• Reconnect electrical power to
the range.
Cooktop
Surface Lamp
LAMP, DO NOT TOUCH THE
METAL AT ENDS OF LAMP.
a.
Remove Phillips head screws at
paoh pnri
r\i nr\\/£Mr
W V . 4 V / 1 1 V ' l l V « V / i
b.
Place fingers on top near each
end of lamp. Press down and roll
top of lamp gently toward front of
range until it stops. Remove.
c.
Check type and wattage of
Icinnm*
i v 4 i i i ^ , I
v v u i i o a i i i c ? I M I I U .
Hold lamp near each end and in
sert prongs into sockets. Gently
roll top of lamp toward rear of
range until it stops.
d. Replace lamp cover and screws.
e. Connect electric power to range.
ww^ii
I
Ii^i
Use time given on recipe when
cooking first time. Oven ther.mo-
stats, in time, may “drift” from the
factory setting and differences in
timing between an old and a new
oven of 5 to 10 minutes are not
unusual. Your oven has been set
correctly at the factory and is more
apt to be accurate than the oven
which it replaced. However, if you
find that your foods consistently
brown too little or too much, you
may make a simple adjustment in
the thermostat (Oven Temp) knob.
PULL KNOB OFF OF SHAFT, LOOK
AT BACK OF KNOB AND NOTE
CURRENT SETTING, BEFORE
MAKING ANY ADJUSTMENT.
To
increase
temperature,
turn
toward RAISE; to decrease turn
toward LOWER. Each notch
p.hflnnpc fomnorp+i irp 1H
I . W I I
W I V W ^ I ^ V ^ O .
Temperature can be raised by 20
degrees or lowered by 30 degrees.
1. Remove knob, and hold so
pointer is at top of knob. Using a
pot holder or similar material, hold
“skirt” of knob firmly in one hand.
Grasp handle of knob in other ha.nd.
Note position of pointer and turn
handle to move pointer toward
Raise or Lower. Pointer is designed
not to move easily. If it
Is
seated so
it is difficult to move, pointer may
be loosened slightly. Insert a thin
screwdriver, knife blade or similar
instrument and lift up end of
pointer slightly.
0
Affor ii H i I icf monf lo moHci
— ■
r « I V W I V 4 V , < J w I k i I I V I t & I V i i f U W ) l ^ l V s 7 0
monitor firmly against knob. Return
knob to range, matching flat area
on knob and shaft. Recheck oven
performance before making an
additional adjustment
14