Using your oven, Before using your oven, Oven controls – GE JBP87GD User Manual
Page 10: Oven light, Lamp over surface unit
Attention! The text in this document has been recognized automatically. To view the original document, you can use the "Original mode".
Using Your Oven
Before Using
Your Oven
1. Look at the conirois. Be sure you
understand how to set them prop
erly. Read over the directions for the
Automatic
Oven
Timer
so
you
understand its use with the controls.
2. Check oven interior. Look at the
shelves. Take a practice run at re
moving and replacing them prop
erly, to give sure sturdy support.
3.
Read over information and tips
that follow.
4. Keep this book handy so you can
A M
A#«
II«« ^
lu II,
uuiiiiy uio iiioi
weeks of getting acquainted with
your oven.
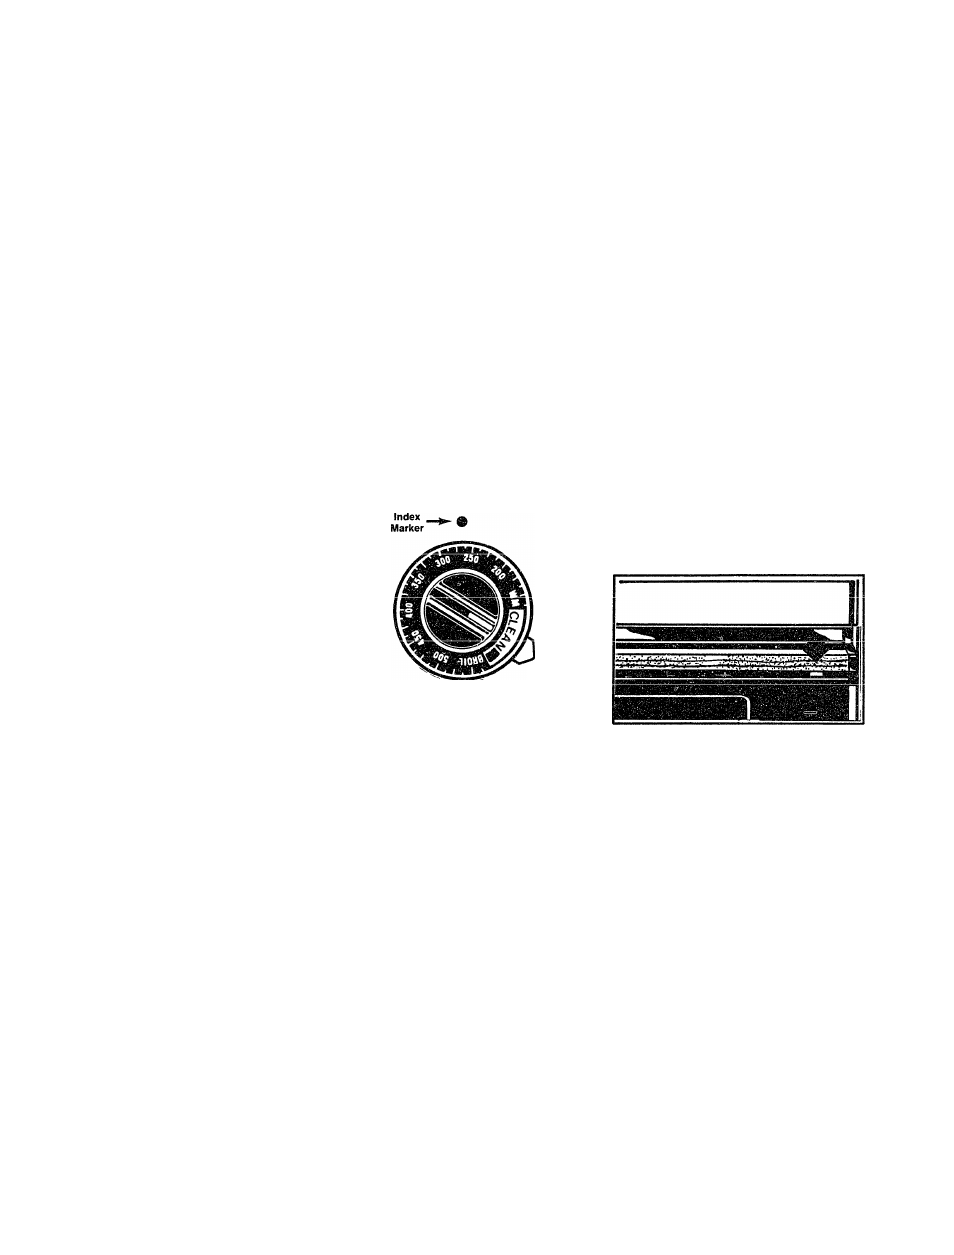
Oven Controls
The
controls
for
the
oven
are
marked
OVEN
SET
and
OVEN
TEMP. OVEN SET has settings for
BAKE, flMi BAKE,
b
I
r
OIL, CLEAN
and OFF. When you turn the knob
to the desired setting, the proper
heating units are then activated for
that oneration.
OVEN TEMP maintains the tern- Qveo Interior Shelves
rvQristi irCl
alu■ ^
cot frrtm \A/ARK/I
(150° ) to BROIL (550° ) and also at
CLEAN (880°). The Oven Cycling
Light glows until oven reaches the
selected
temperature,
then
goes
off ap(j Qn with the oven unit(s)
during cooking. PRE-HEATING the
oven,
even
to
high
temperature
settings,
is
speedy—rarely
more
than about 10 minutes. Preheat the
oven only when necessary. Most
foods will cook satisfactorily with
out preheating. If you find pre
heating is necessary, keep an eye
on the indicator light and put food
in the oven promptly after light
goes out.
Pointer
Oven Temp Setting for Normal Cooking
IMPORTANT:
The
OVEN
TEMP
control has a blue pointer that is
iicoH r»nl\/ for O.l PAM Por normal
W...JT .W.
cooking, line up the desired tem
peratures
(marked
on
the
outer
edge of the control knob) with the
index
marker
located
immediately
above the control.
For GLEAN; rotate the knob to the
right until blue pointer is pointing
up,
toward
Index
Marker.
When
position is reached, knob should
snap into position.
The
shelves
are
designed
with
stop-locks
so
that
when
placed
correctly on the shelf supports, (a)
will stop before coming com-
4v‘r\tnr\
\ lA/iil m/^4’
iii^
\ ^ )
w i l l i i \ ^ t .
tilt when removing food nor when
placing food on them.
TO
REMOVE
shelves from the
oven, when cool, lift up rear of
shelf, puli forward With StOp-IOCkS
(curved extension under shelf)
along top of shelf supports.
TO
REPLACE
shelves
in
oven,
insert shelf with stop-locks resting
on
shelf
supports.
Push
shelf
toward rear of oven; it will fall into
place.
When
shelf
is
in
proper
position, stop-locks on shelf will
run under shelf support when shelf
is pulled forward.
Oven Light
The light comes on automatically
when the door is opened. Use
eiA/it/'h tr» tiirn linht r*n onrf r»ff
W V V I k W I I L W t u i l l M ^ I I V v y i l UIIV.4
I I
when door is closed.
Switch is in horizontal position on
right side of door under handle.
Lamp Over
Surface Unit
Lamp may be iighted by pressing
the lamp switch button. Be sure to
hold button deoressed until lioht
comes on.