T\ install the range (continued), 8 replacing the oven door, Installation instructions – GE JD750SFSS User Manual
Page 9
Attention! The text in this document has been recognized automatically. To view the original document, you can use the "Original mode".
Installation Instructions
[T\
INSTALL THE RANGE (Continued)
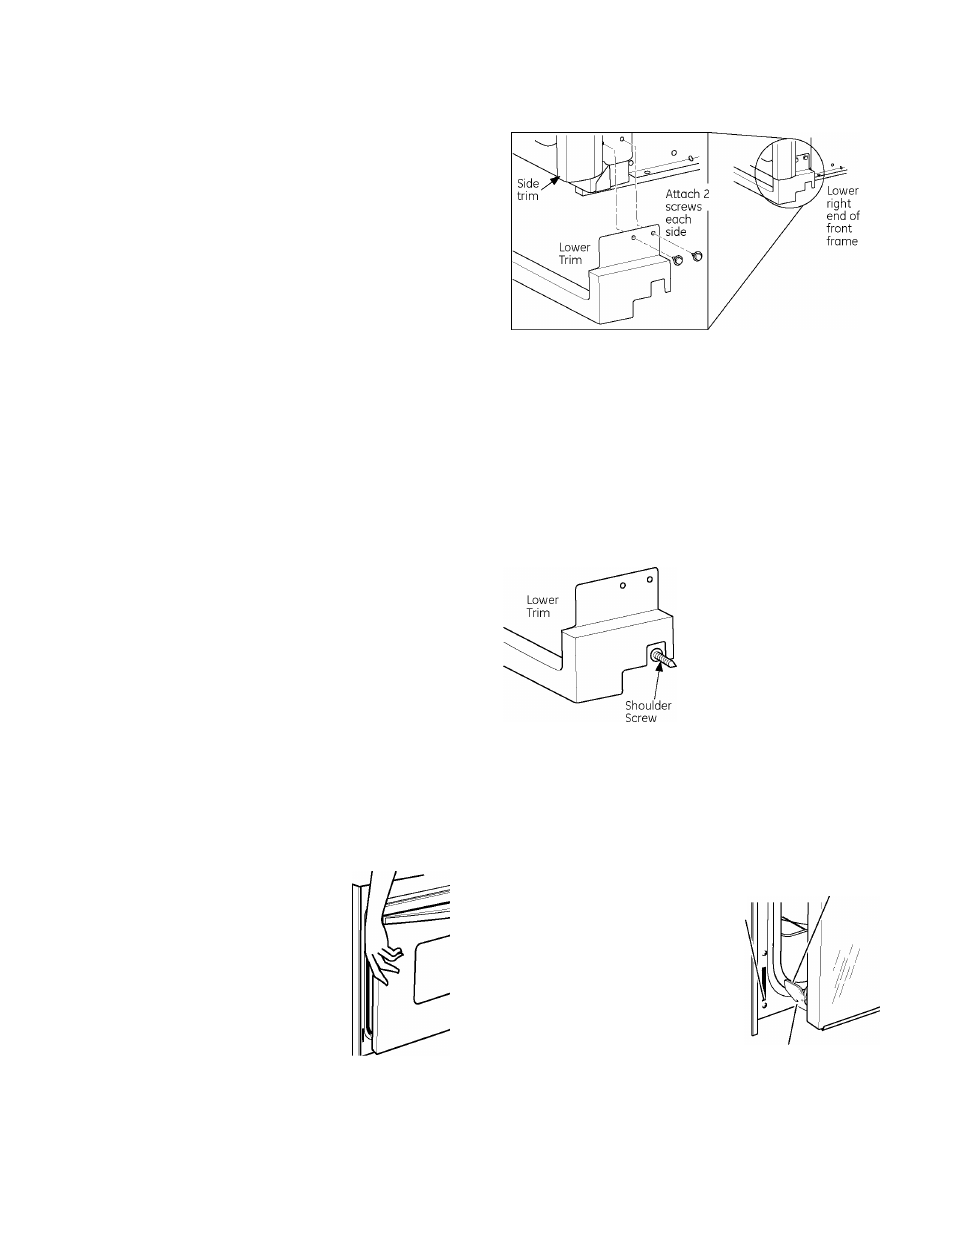
ATTACH THE LOWER TRIM
Attach the lower trim (supplied separately with the
range) to the bottom of the vertical side trim with the
4 screws supplied.
LOCATING THE STOP SCREW
Carefully slide the range towards the bock of the
opening. When the range is approximately 1" from
the bock of the opening, lift the front of the range
approximately Vz" to clear the stop screw located
in the sides of the cabinet. Slide the range until it is
seated into the opening.
Lower the front of the range onto the counter-top.
CHECK FOR PROPER INSTALLATION OF THE STOP SCREW
Look at both sides of the range under the door. The
stop screws must be located in the notch on the
sides of the range, and not touch the top of the notch
when the range is fully seated on the countertop. If
the screws do not meet the requirements, move the
screws to a position that meets these requirements.
(See illustration.)
Clear
J__
f
Notch in Bottom
of Side Trim
8 REPLACING THE OVEN DOOR
Remove Oven Door
1. Lift the oven door by placing one
hand on each side, the door is
heavy, so you may need help. Do
not lift the door by the handle.
With the door at the same
angle as the removal
position (halfway between
the closed and broil stop
position) seat the notch
of the hinge arm into the
bottom edge of the hinge
slot. The notch of the hinge
arm must be fully seated
into the bottom of the seat.
Bottom
Edge of
Slot '
Hinge Arm
Hinge Notch