T\ install the range, Installation instructions – GE JD750SFSS User Manual
Page 8
Attention! The text in this document has been recognized automatically. To view the original document, you can use the "Original mode".
Installation Instructions
[T\
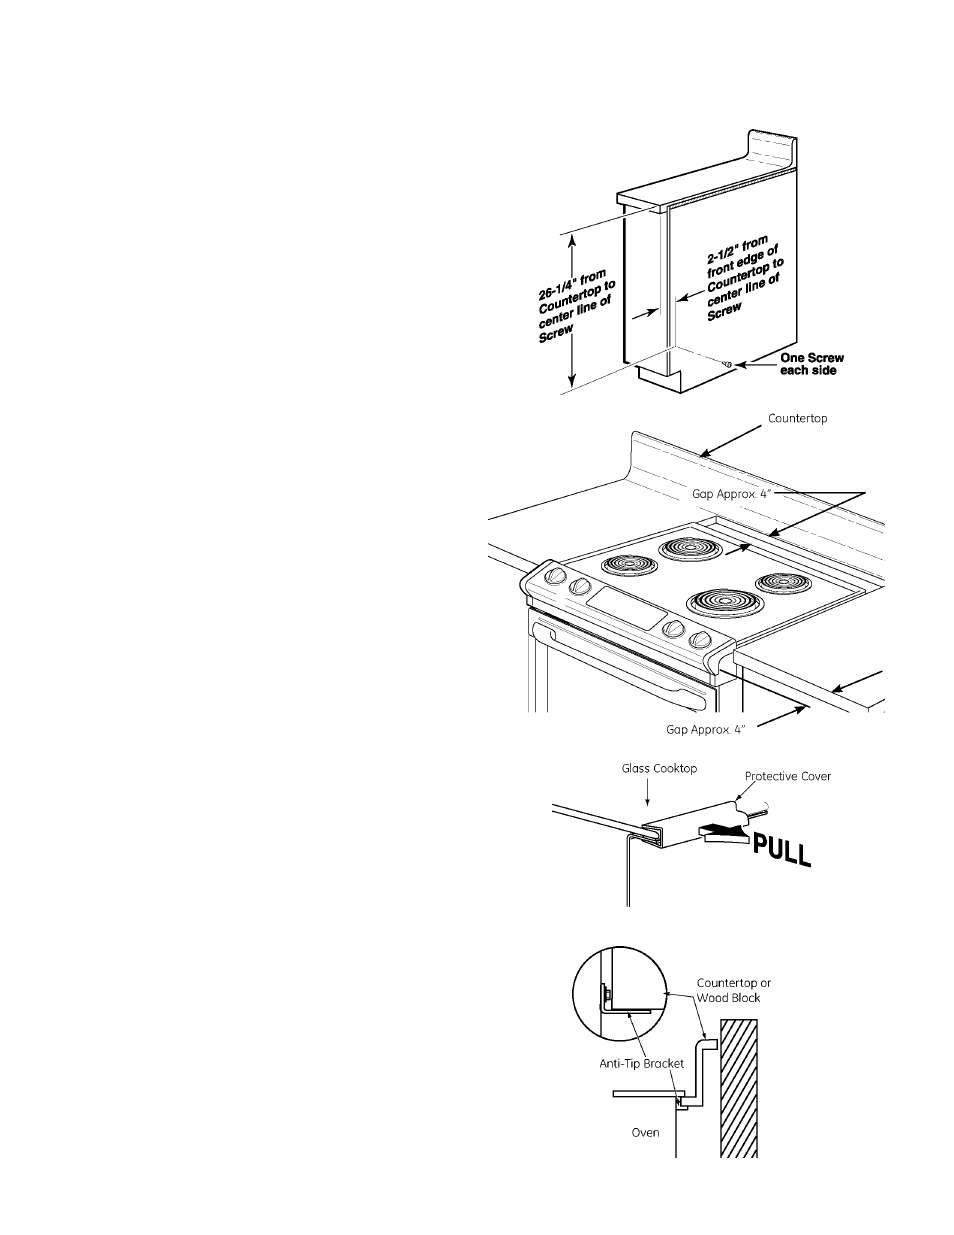
INSTALL THE RANGE
INSTALL STOP SCREW
These screws prevent the range from sliding out of
position during operation.
1. Carefully mark the cabinet for the location of the
stop screws.
2. Drill 1/8" pilot holes into cabinet, on each side of
the range. (Do not drill entirely through the cabinet
wall.)
3. Carefully turn the shoulder screws into the pilot
holes until they are tight.
PLACING RANGE INTO THE OPENING
1. It is recommended that two people lift the range
into place, carefully setting the side metal flanges
under the glass on the edges of the countertop
opening.
2. Carefully slide the range toward the back of the
opening. Stop pushing the range when there is till
a 4" gap at the front before flushing the range with
the counter.
REMOVE THE PROTECTIVE CHANNELS (if provided)
Carefully remove the protective channels from the
sides of the glass cooktop. This may require a slight
lifting of the range to remove the weight of the range
from the protective channels.
CHECK ANTI-TIP BRACKET
With the range still sitting out from the counter-top,
confirm the anti-tip bracket is securely attached to
the rear of the range, and slide the range back so that
the anti-tip bracket slidesjust under the countertop or
wood block attached to the rear wall.
If the range is pulled from the wall for any reason,
always repeat this procedure to verify the range is
properly secured by the anti-tip bracket.
Remove Protective Cover from Both Sides after Range is in Cabinet