6 anti-tip device installation, Installation instructions, A warning – GE JD750SFSS User Manual
Page 7
Attention! The text in this document has been recognized automatically. To view the original document, you can use the "Original mode".
Installation Instructions
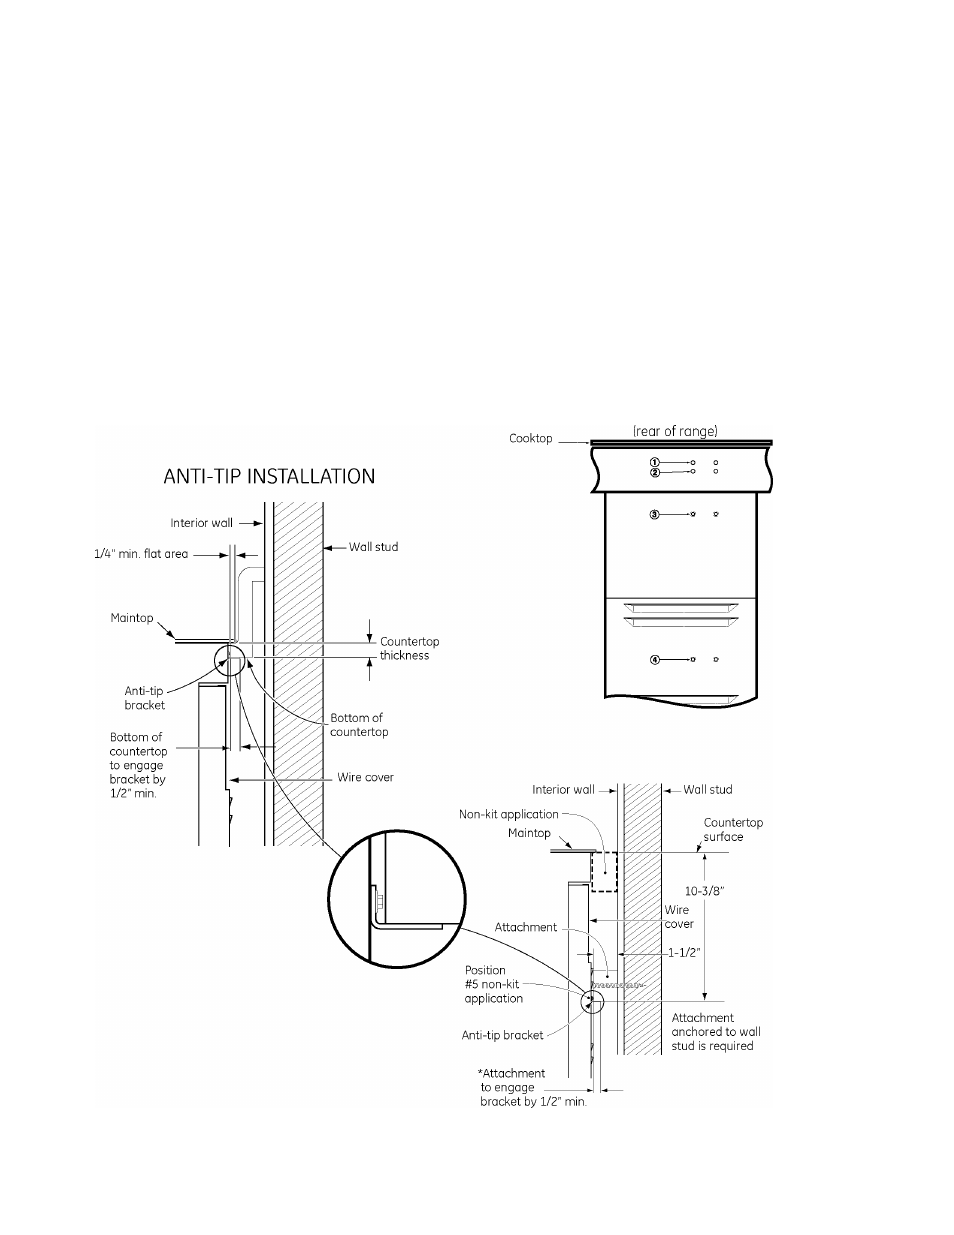
6 ANTI-TIP DEVICE INSTALLATION
A WARNING
• To reduce the risk of tipping the range, the range must be properly secured to the countertop or rear wall
using the anti-tip suppport. (See section 3 for details.)
• Weight on the door could potentially cause the range to tip and result in injury. Never allow anyone to
climb, sit, stand, or hang on the oven door.
Installing the Anti-Tip Bracket
The anti-tip bracket is attached to the back of the
Drop-In Range. It is designed to fit under the bottom
of the countertop opening at the rear. Measure
counter thickness at back of cutout to determine
correct bracket location.
Select the proper position for the countertop
thickness and move bracket to proper position. (Unit
is supplied with bracket in position 1.)
(jl) For 1.18" (3 cm) Counter (3) For 3.5" Counter
(4) Alternate
(shown below)
For 1.5" Counter
Anti-tip bracket location