Carl Goldberg GBGA1047 User Manual
Page 7
7
❏
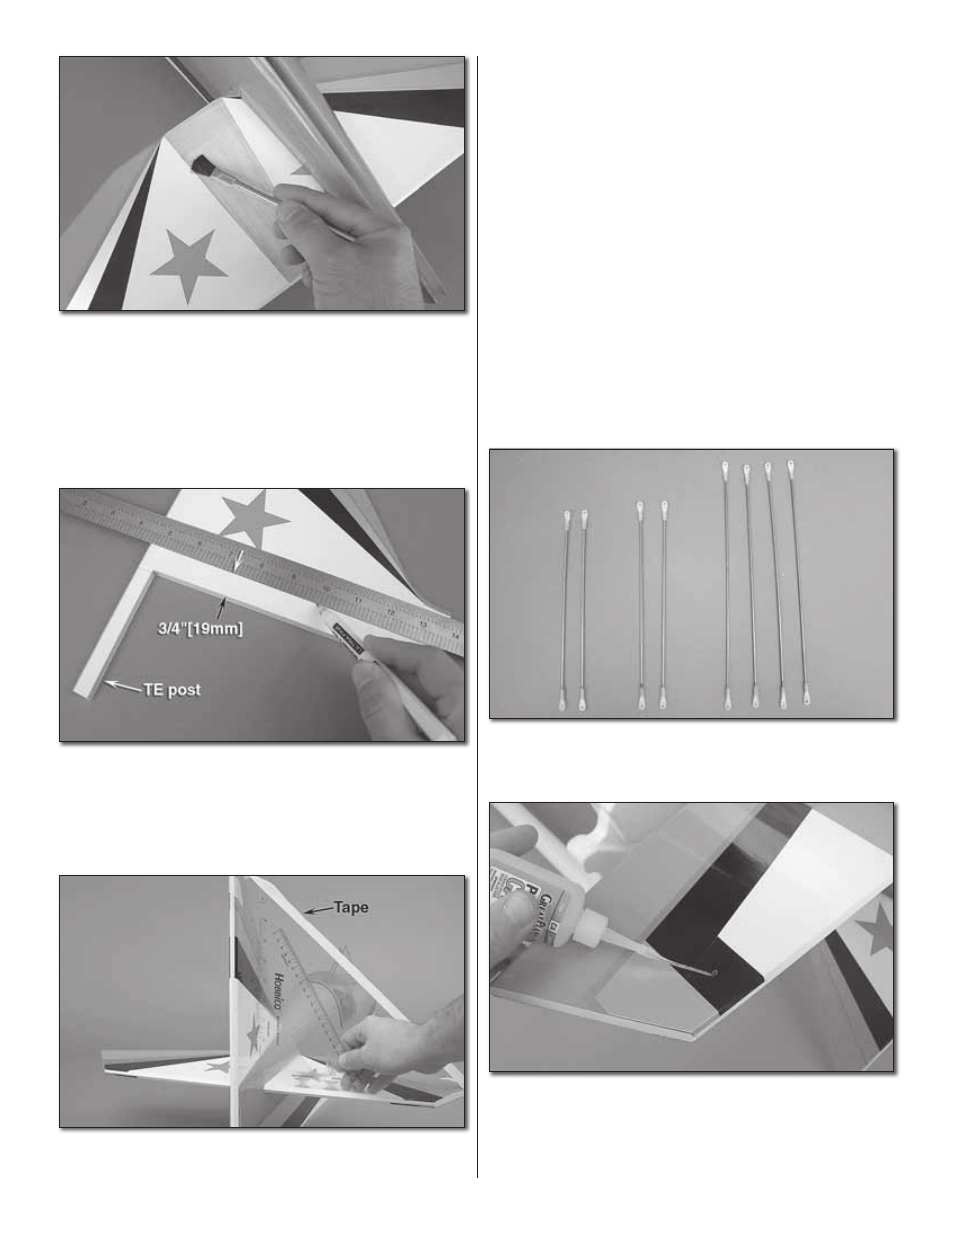
7. Coat the top and bottom of the stab with 30-minute
epoxy. Fit and align the stab as you did earlier, but take note
of the trim design – the top and bottom are very similar, so
be careful to install it with the right side up.
❏
8. Use denatured alcohol applied to a paper towel to
clean up the excess epoxy. Set the fuselage aside until the
epoxy cures.
❏
9. Lay the vertical fi n on your building table. Draw a line
that is 3/4" [19mm] above the bottom edge of the fi n and is
parallel to that edge.
❏
10. Trim the covering from the fi n at the line you drew.
Don’t forget to trim the covering from the vertical TE post.
❏
11. Apply 30-minute epoxy to the fi n and glue it into the
fuselage. Use a builder’s square to make sure that the fi n
is perpendicular to the stab. You can hold it in position with
masking tape.
❏
12. As you’re waiting for the epoxy to cure, you can jump
ahead and build up your landing gear.
FLYING WIRES INSTALLATION
❏
1. Gather two (2) 7-3/4" [197mm] fl ying wires, two 8"
[203mm] fl ying wires, and four (4) 9-3/4" [247mm] fl ying
wires. These should have a plastic fi tting at each end.
❏
2. Harden each of the pre-drilled holes in the fi n and the
stab with thin CA.
❏
3. Turn the fuselage over. A foam fuselage cradle is very
helpful here.