Carl Goldberg GPMA1966 Tiger 2 ARF User Manual
Page 5
5
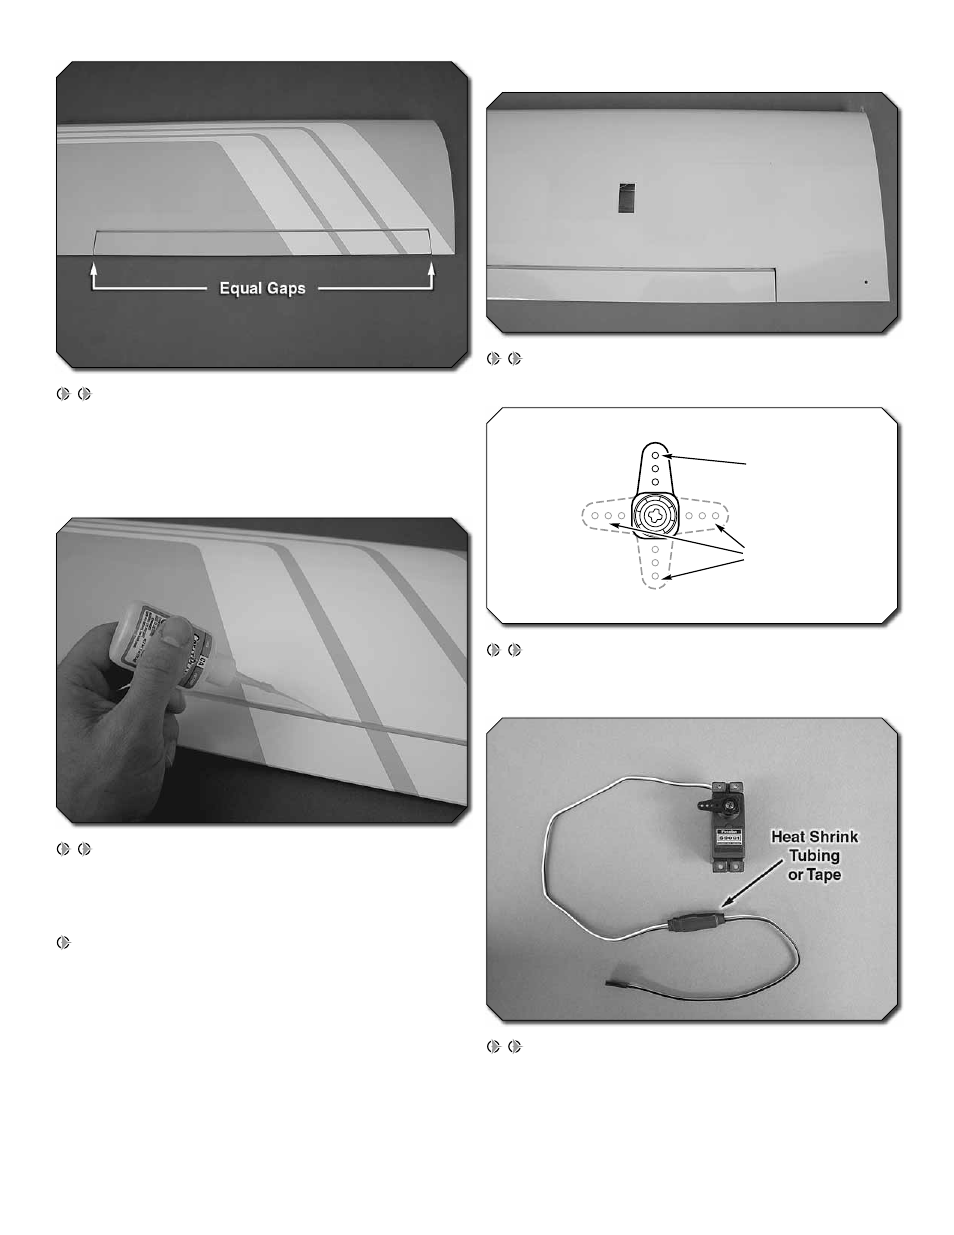
3. Join the aileron to the wing panel and remove
the pins from the hinges. Center the aileron on the wing.
Remove the pins and adjust the aileron so there is a small
gap between the LE of the aileron and the wing. The gap
should be small, just enough to see light through the gap or
to slip a piece of paper through.
4. Apply six drops of thin CA to the top and bottom of
each hinge without using accelerator. After the CA glue has
hardened, confi rm that the aileron is secure by pulling on it
and defl ecting it up and down.
5. Repeat steps 1– 4 for the other wing panel.
INSTALL THE AILERON SERVOS AND PUSHRODS
1. Trim the covering from the aileron servo bay on the
underside of the wing panel.
Cut off
unused
arms
Enlarge to
5/64" [2mm]
2. Cut three arms from a four-armed servo arm for the
aileron servo. Enlarge the outer hole of the remaining arm
with a 5/64" [2mm] drill bit.
3. Attach a 9" [229mm] servo extension to the aileron
servo and secure the connector using tape, heat shrink tubing
(not included), or a product designed specifi cally for securing
servo lead connections. Center the servo with your radio
system and install the servo arm to the servo perpendicular
to the servo case as shown. Be sure to reinstall the servo
arm screw into the servo.