Carl Goldberg GPMA1960 Gentle Lady Glider ARF User Manual
Page 9
9
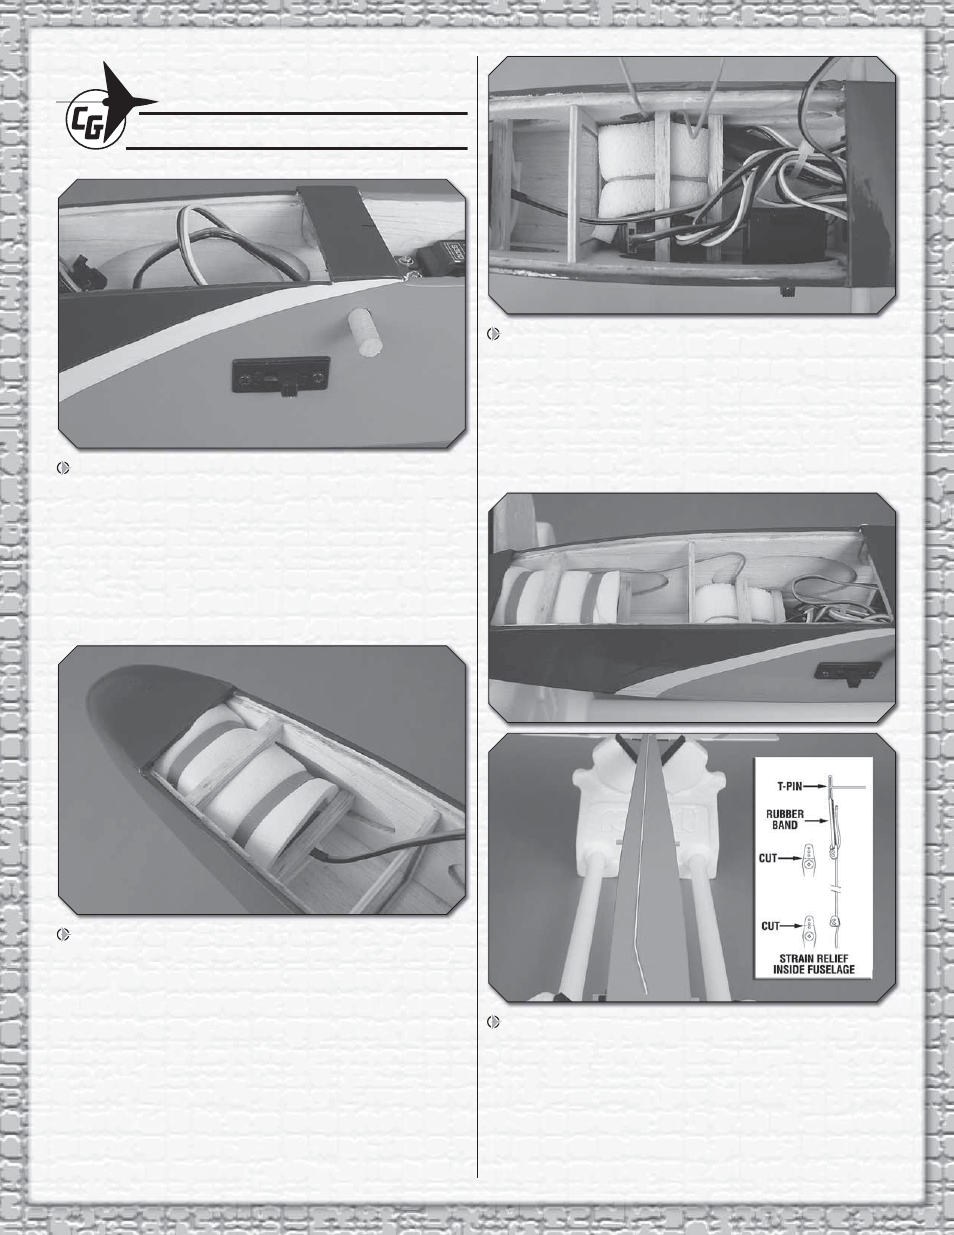
INSTALL THE RECEIVER & BATTERY
1. Mount the radio switch in a location that will not
interfere with the installation of the receiver and battery. Use
the switch plate as a guide to drill the two holes and to cut a
slot for the on/off switch. After you have drilled the mounting
holes for the switch, apply a drop of thin CA to each hole to
harden the wood surrounding the holes. Be sure that the CA
is completely dry before installing the switch.
2. Wrap your receiver battery in 1/4" [6mm] foam rubber
(not included). Fit it into the front radio compartment. Cut
pieces from the included 6x6x200mm balsa stick and glue
them along the top and back of the battery to hold it in place
using CA or epoxy. When gluing the sticks, be sure that the
radio hatch cover can be installed without interference.
3. Connect the battery to the switch. It is highly
recommended to secure the connection using tape, heat
shrink tubing (not included), or a clip designed specifi cally for
that purpose. Connect the elevator and rudder servo leads
to the receiver. Wrap the receiver in foam rubber and install
it behind the battery using pieces of the 6x6x200mm stick.
We used a zip tie (not included) to neatly bundle the excess
wires behind the receiver. A rubberband could also be used.
4. If you installed a 2.4GHz receiver, follow the radio
manufacturer’s instructions for routing the antenna wires. If
you are using an AM or FM system, drill a small hole through
the bottom of the fuse just behind the receiver. Route the
receiver antenna wire out the hole and tape it down the
length of the fuselage as shown. Install a “strain relief” (made
from a leftover servo arm) inside the fuselage as shown in
the sketch. Be sure that the antenna will not interfere with the
tow hook locations.