Carl Goldberg GPMA1960 Gentle Lady Glider ARF User Manual
Page 10
10
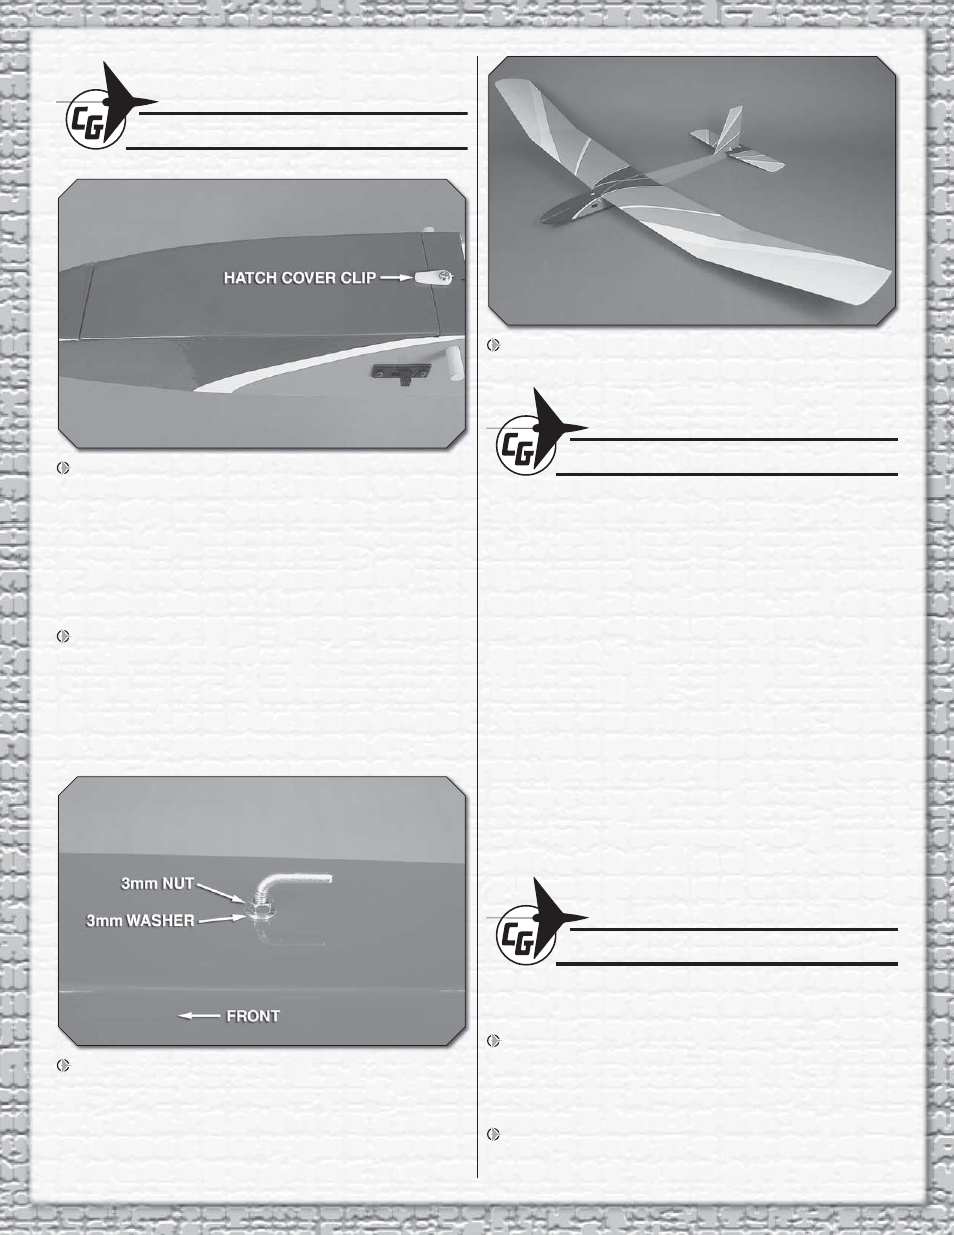
FINISH THE MODEL
1. A small hole is pre-drilled behind the radio hatch
opening. Thread the 2.5x5mm self-tapping screw into the
hole and remove it. Apply a drop of thin CA to the hole to
harden the wood. When the glue has hardened, install the
nylon radio hatch cover clip using the 2.5x5mm screw and
2.5mm washer. The screw should be tight, but still allow the
clip to swivel on the screw. Fit the hatch cover in place and
secure it with the clip as shown.
2. Two tow hook positions are provided on the underside
of the fuselage. For the fi rst few fl ights, the forward position
should be used. When you are accustomed to the launch
and fl ying characteristics of the Gentle Lady, the tow hook
position can be moved back to aft position for a higher
launch. Be careful as the plane may be more apt to “pop-off”
the line when using the aft position.
3. Trim the covering from the forward tow hook hole
(approximately 11-13/16" [300mm] back from the front of the
fuse). Thread the 3mm nut and 3mm washer all the way onto
the tow hook. Tighten the tow hook into the blind nut. With
the hook threaded almost all the way into the blind nut and
pointing straight back, tighten the 3mm nut to secure it.
4. This completes the assembly!
APPLY THE DECALS
1. Use scissors or a sharp hobby knife to cut the decals from
the sheet.
2. Be certain the model is clean and free from oily fi ngerprints
and dust. Prepare a dishpan or small bucket with a mixture
of liquid dish soap and warm water—about one teaspoon of
soap per gallon of water. Submerse the decal in the soap and
water and peel off the paper backing. Note: Even though the
decals have a “sticky-back” and are not the water transfer
type, submersing them in soap & water allows accurate
positioning and reduces air bubbles underneath.
3. Position decal on the model where desired. Holding the decal
down, use a paper towel to wipe most of the water away.
4. Use a piece of soft balsa or something similar to squeegee
remaining water from under the decal. Apply the rest of the
decals the same way.
GET THE MODEL READY TO FLY
CHECK THE CONTROL DIRECTIONS
1. Turn on the transmitter and receiver and center the
trims. If necessary, remove the servo arms from the servos
and reposition them so they are centered. Reinstall the
screws that hold on the servo arms.
2. With the transmitter and receiver still on, check all the
control surfaces to see if they are centered. If necessary, adjust
the clevises on the pushrods to center the control surfaces.