Carl Goldberg GPMA1960 Gentle Lady Glider ARF User Manual
Page 8
8
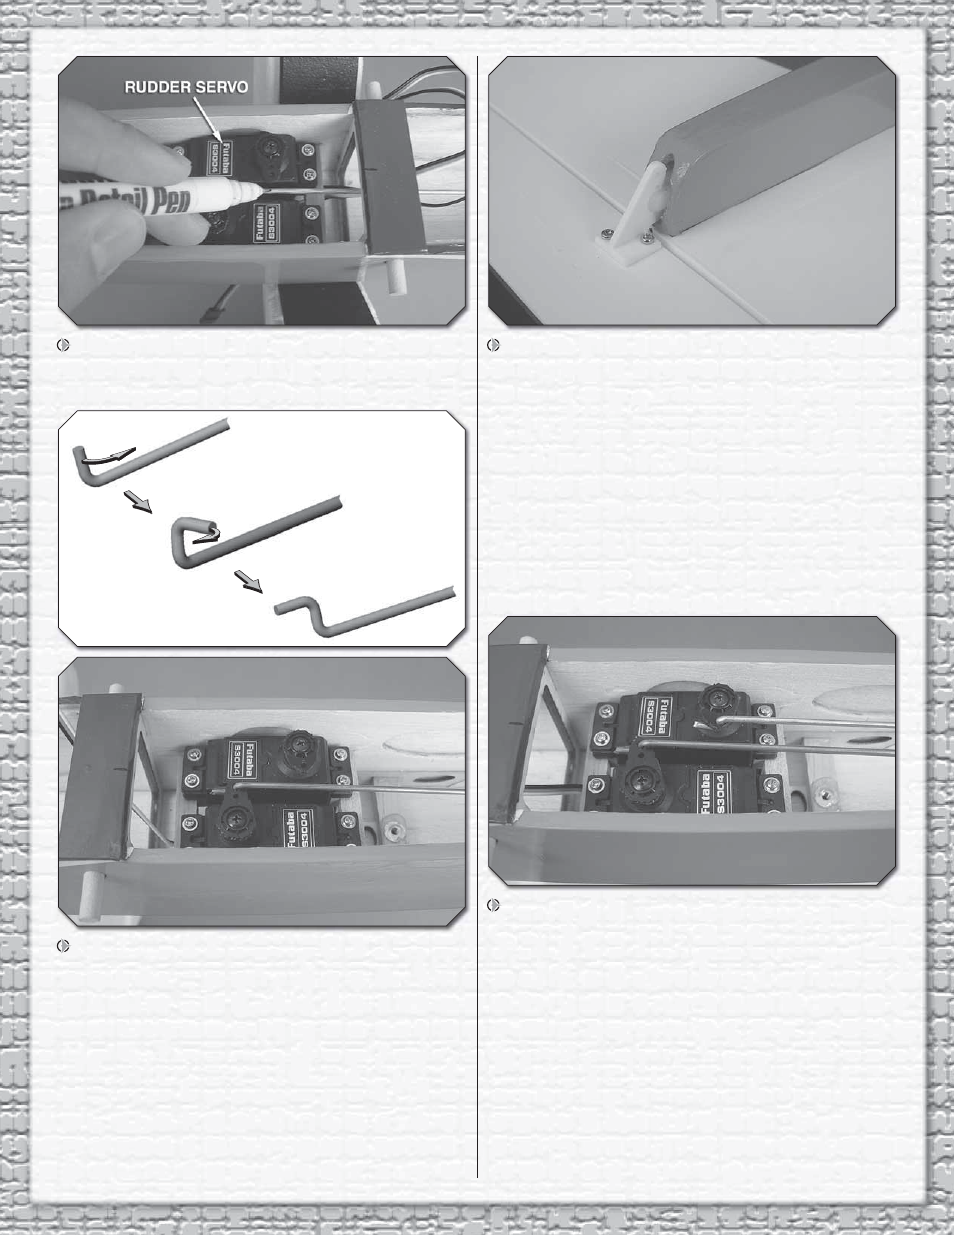
8. Use a small clamp or tape to hold the rudder in the
neutral position. Mark the pushrod where it crosses the outer
hole in the rudder servo arm.
9. Remove the clevis from the rudder control horn and
remove the pushrod from the fuselage. Make a “Z” bend at
the mark on the pushrod and cut off the excess pushrod 1/4"
[6mm] beyond the bend. The “Z” bend can be made using
needle nose pliers or “Z” bend pliers designed specifi cally for
that purpose (GPMR8025). Fit the Z-bend into the servo arm
as shown. Remove the clevis from the pushrod and reinsert
the pushrod into the pushrod guide tube from the front this
time. Reinstall the clevis onto the pushrod by 20 turns and
attach to the control horn and secure with a clevis retainer.
Thread the clevis up or down on the pushrod as necessary
to center the rudder with the servo arm centered. Slide the
silicone clevis retainer to the end of the clevis to secure it.
10. As you did with the rudder pushrod, thread a nylon
clevis onto a 31-1/2" [800m] pushrod 20 complete turns.
Slide a silicone clevis retainer over the clevis. Temporarily
attach the clevis to the second inner hole of a control horn.
Insert the elevator pushrod into the elevator outer pushrod
tube from the aft end. Confi rm that the elevator clevis moves
easily in and out of the fuselage. If there is any rubbing, use
a hobby knife to remove wood from the sides of the opening.
When satisfi ed, align the holes in the control horn over the
elevator hinge line and mark the locations of the control
horn mounting holes onto the elevator. Drill two 5/64" [2mm]
holes at the location, harden the holes with CA and install
the control horn using two 2x10mm machine screws and the
control horn backplate.
11. With the elevator in the neutral position, mark the
pushrod where it crosses the hole in the elevator servo arm.
Remove the pushrod from the fuse. Make a “Z” bend in the
pushrod and reinstall the pushrod. Make any adjustment to
the clevis necessary so the elevator is centered when the
servo is centered. Be sure to slide the silicone clevis retainer
to the end of the clevis and that the servo arm screw in the
elevator is installed.