Coleman AMERICAN HERITAGE ® WEATHERMASTER CABIN User Manual
American heritage, Weathermaster, Cabin 12'x9
AMERICAN HERITAGE
®
WEATHERMASTER
®
CABIN 12'X9'
1
Layout & Positioning of Tent
– Layout and position tent with door
facing desired direction. (illus. 1)
– Stake down tent, starting with
the corners. Do not stretch
too tight. Angle the stakes
slightly toward the tent.
(illus. 2) Keep the floor taught.
– Unzip the door.
2
Assemble & Place Roof Poles
– Assemble all shock-corded
roof poles. When assembled will
form a continuous arch with both
ends pointing down. (illus. 3)
– Insert the curved ridge roof pole
through center roof pole sleeve.
(illus. 4)
– Insert the curved End roof poles
through end roof pole sleeves.
(illus. 4)
When You Are Ready
To Set Up Your Tent
– Select a level campsite clear
of rocks, branches and other
hard or sharp objects.
– Do not set up your tent
under trees.
– For best results in windy
conditions, position the end
of tent into the wind.
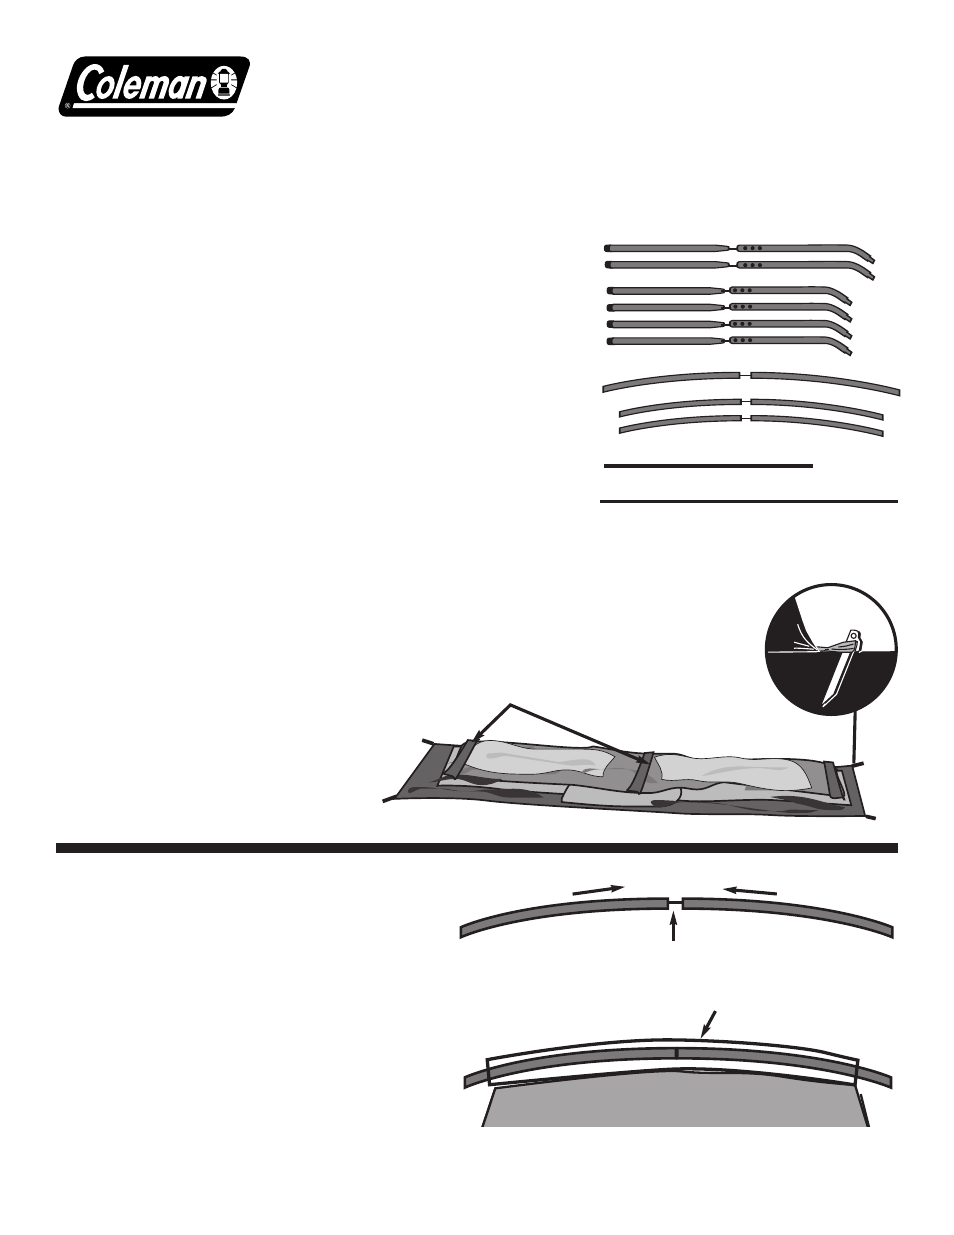
(1) Curved Ridge Roof Poles
(Red Sticker)
Part No. 9232-1321
(2) Curved End Roof Poles
(Green Sticker)
Part No. 9232-1331
(2) Center Adjustable Poles
(Red Sticker) Part No. 9232-1301
(4) End Adjustable Poles
(Green Sticker) Part No. 9232-1311
Rainfly Part No. 9232-1341
Instructions apply to Part Number 9232D129
illus. 3
Curved roof pole assembly.
illus. 4
Curved roof pole system shown
inserted through pole sleeves. (3 total)
illus. 2
Stake loops
properly staked
Front door
Roof sleeve
illus. 1
Pole sleeves
Shock-corded poles
Forms an arch
POLE ASSEMBLY PARTS
Hinged Door Pole
Part No. 9232-1361
Vertical Hinged Door Pole
Part No. 9232-1351