Measurement procedure, Correct cuff size – American Diagnostic Corporation (ADC) Diagnostix 75XX User Manual
Page 6
Measurement Procedure
1. Patient Position
The patient should sit or lie comfortably. The arm should be fully supported on a flat
surface at heart level. (If the arm’s position varies, or is not level with the heart, measure-
ment values obtained will not be consistent with the patient’s true blood pressure.) When
seated, the patient should have their back and arm supported, and their legs should not be
crossed. The patient should relax prior to measurement comfortably for five (5) minutes
and should refrain from talking or moving during measurement. Observer should view
manometer in a direct line to avoid “Parallax error”.
2. Apply the cuff
ADCUFF
TM
nylon cuffs are specially designed to promote the precisely accurate determi-
nation of blood pressure. Index and range markings ensure use of the correct cuff size.
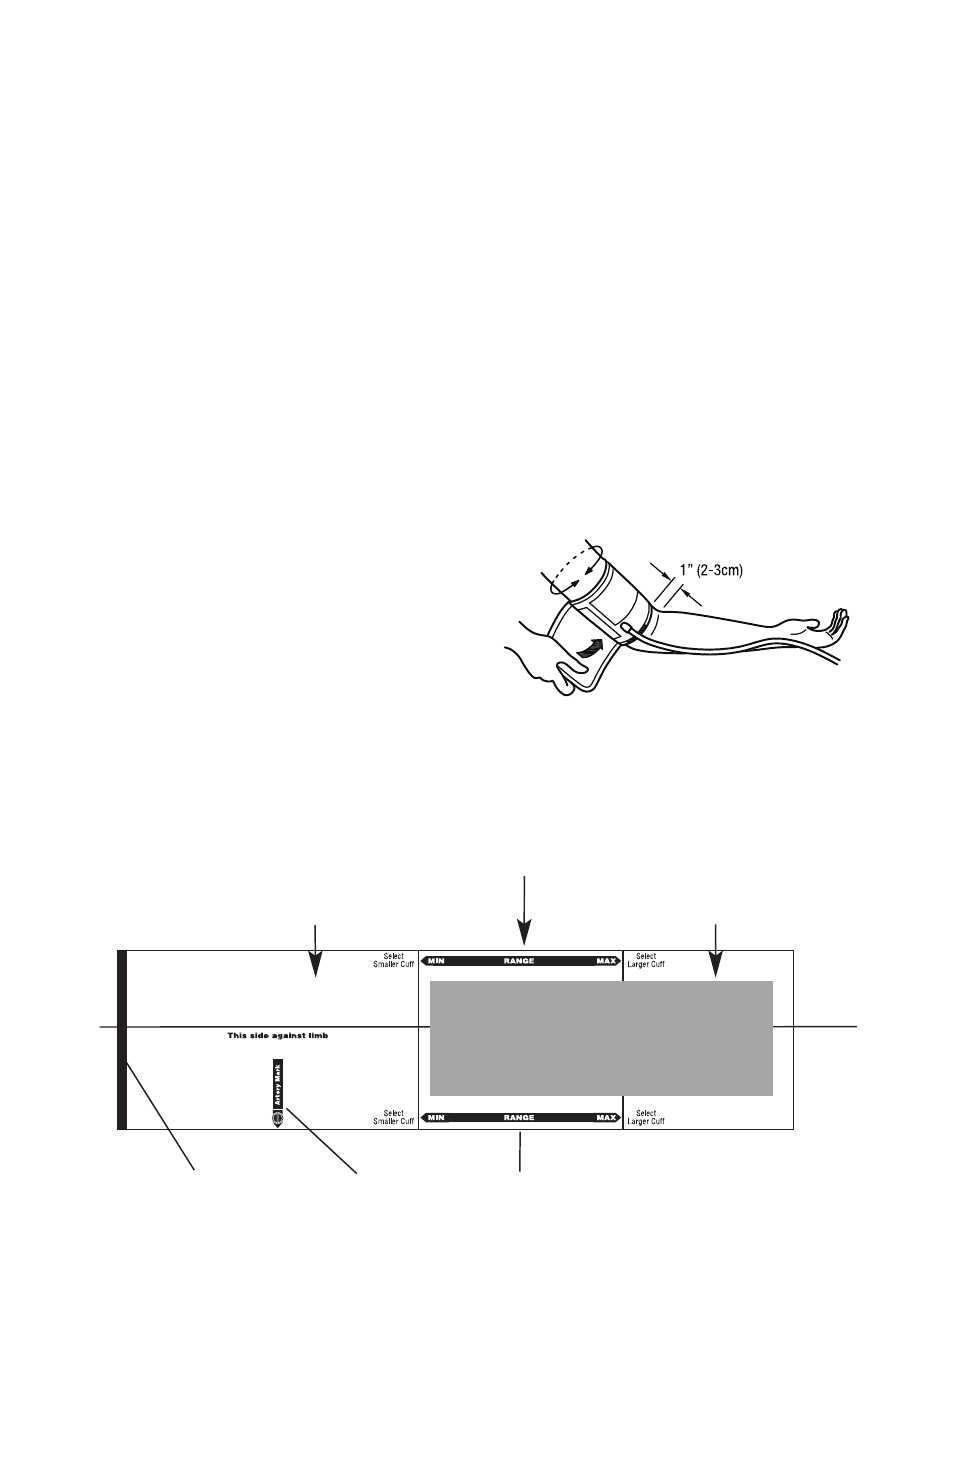
The artery mark indicates proper cuff positioning.
Place the cuff over the bare upper arm with
the artery mark positioned directly over the
brachial artery. The bottom edge of the cuff
should be positioned approximately (1”) one
inch (2-3cm) above the antecubital fold.
Wrap the end of the cuff not containing the
bladder around the arm snugly and smoothly
and engage adhesive strips (Figure 1).
To verify a correct fit, check that the Index Line falls between the two Range Lines (Figure
2).
3. Inflate the cuff
Close the ADFLOW
TM
valve by turning thumbscrew clockwise.
Palpate the radial artery while inflating the cuff. Be sure to inflate cuff quickly by squeezing
bulb rapidly.
Left Arm
Tube
(Figure 1)
Index Line
Range Lines
Index Line
Artery Mark
Select Smaller Cuff
Correct Cuff Size
Select Larger Cuff
(Figure 2)