Cub Cadet 3000 Series User Manual
Page 59
9 - 1
Cub Cadet 3000
Prior to performing this test, it is necessary to remove
the deck and fender assemblies.
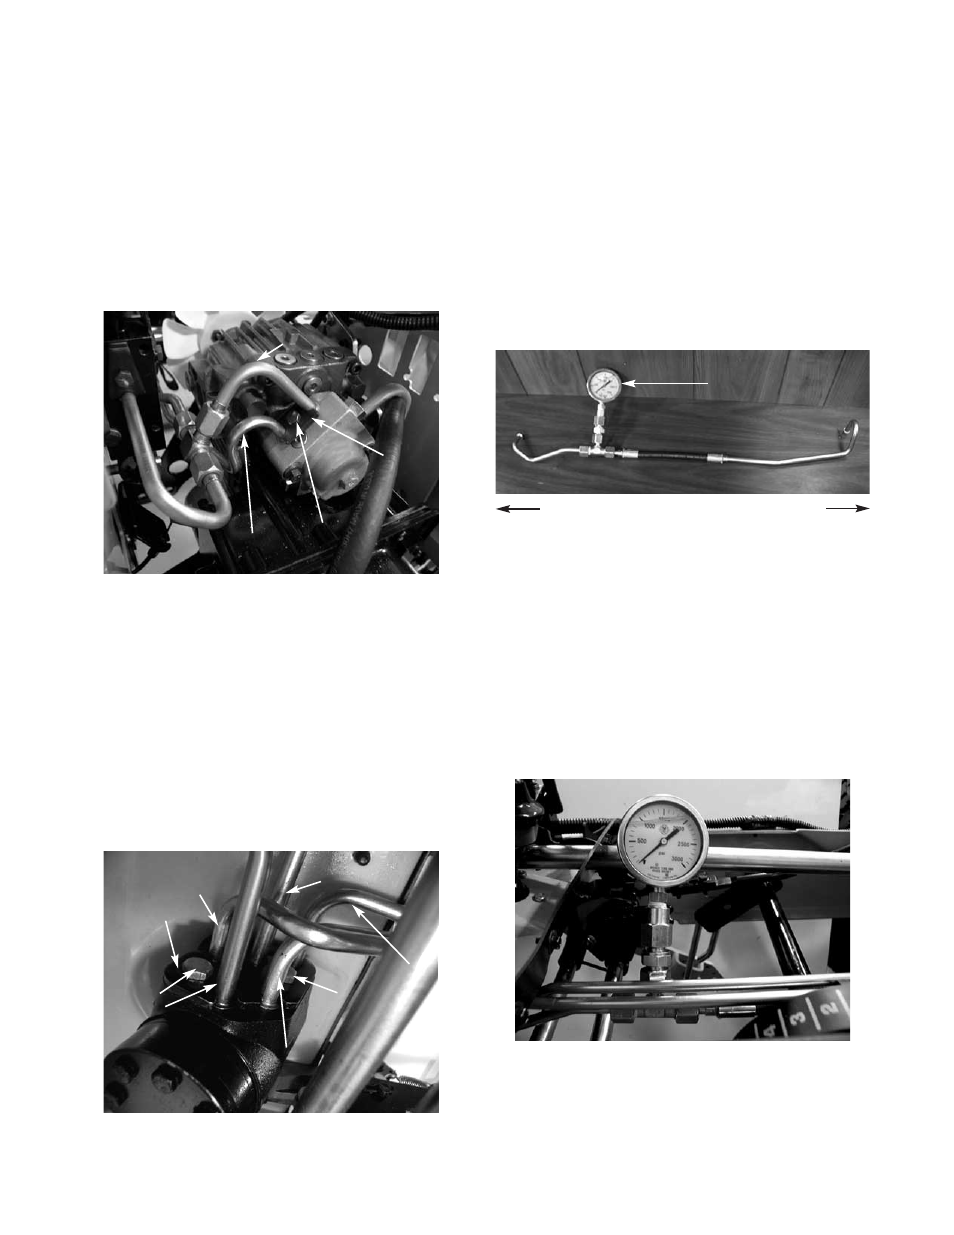
1. Remove the hex cap screw securing the double
valve clamp to the charge pump using an 11mm
swivel socket. See figure 1.
2. Remove the hydraulic pressure tube end from the
charge pump.
BDU-21L-500 Auxiliary Pressure Test
FIGURE 1.
Hydraulic
Return Tube
Pressure
Tube
Hex
Bolt
Double
Valve
Clamp
6. Install the pressure test kit into the unit with the
pressure gauge standing straight up. See figure 3
and 4.
7. Reinstall the double valve clamp to the charge
pump. See figure 1.
8. Reinstall the power steering pump port plate. See
figure 2.
9. Fasten all hardware securely.
FIGURE 3.
Pressure Gauge
To Steering Pump
To Charge Pump
FIGURE 2.
Pressure Tube
Charge Pump to
Steering Pump
Steering Pump to Rear
of Steering Cylinder
Return
Tube to
Charge
Pump
Port Plate
From Steering
Pump to
Auxiliary
Valve
Steering Pump
to Front of
Steering
Cylinder
Hex Cap
Screw
Hex Cap
Screw
3. Remove both of the hex cap screws from the
power steering pump port plate using a 13mm
wrench. See figure 2.
4. Remove the hydraulic pressure tube end from the
hydraulic steering pump. Charge pump to steer-
ing pump. See figure 2.
NOTE: Be careful not to damage the “O” rings. If
damaged, replace.
5. Remove the hydraulic pressure tube from the
unit.
10. Start the unit and allow the hydraulic fluid to
circulate at idle.
11. Slowly increase the throttle to full.
12. Slowly decrease the throttle to idle. Record the
hydro reading at the pressure gauge. See
figure 4.
NOTE: The pressure will be very low if shown at all
on the gauge.
FIGURE 4.