Cub Cadet 3000 Series User Manual
Page 53
7 - 1
Cub Cadet 3000
CAUTION: Slowly remove the hydraulic lines from the
cylinder. Test for pressure in the lines before removal.
1. Place an oil pan directly under the center lift
cylinder. This will catch the hydraulic fluid that will
be drained from the lines and the cylinder.
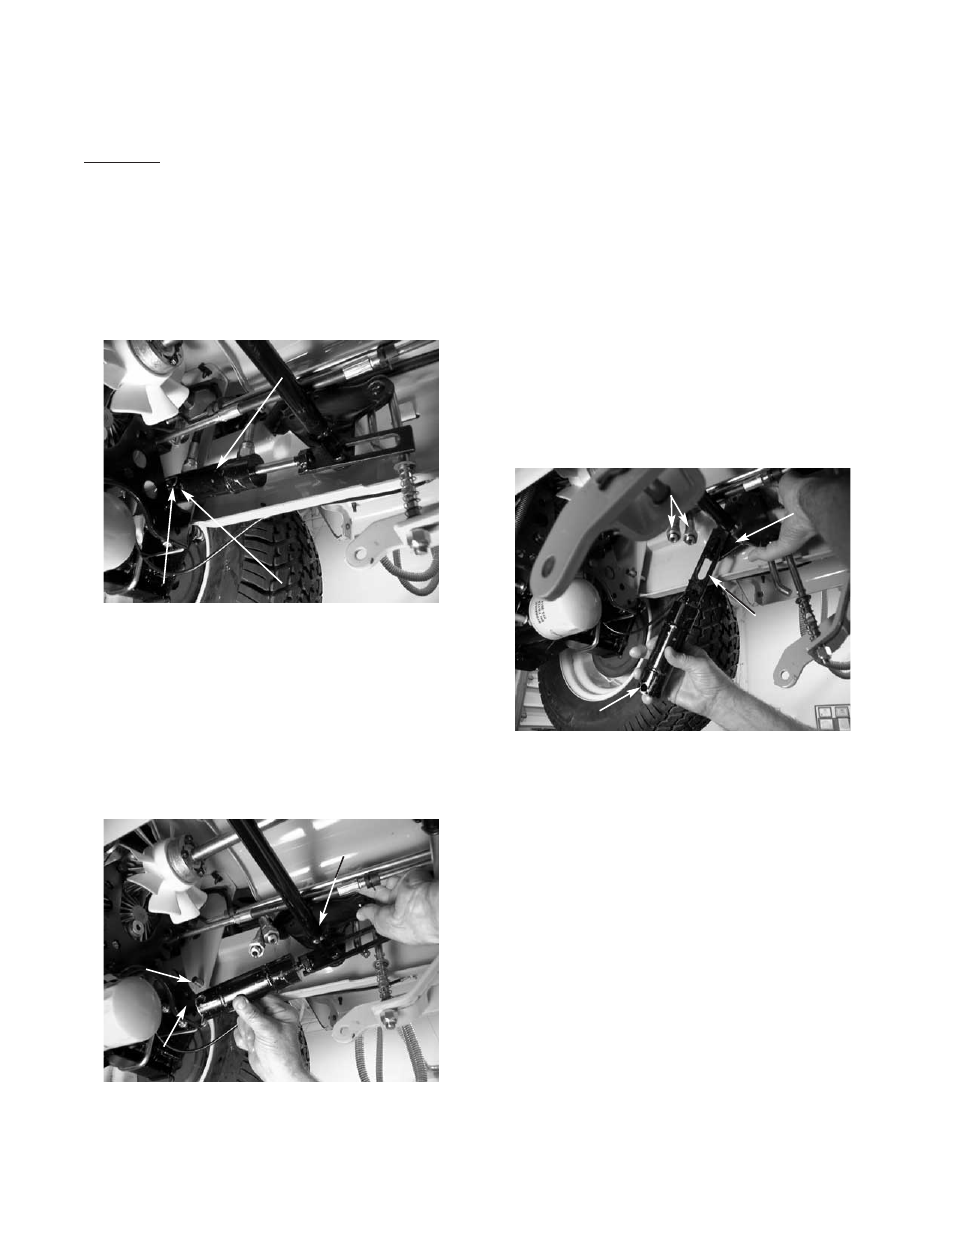
2. Remove the hairpin from the clevis pin at the rear
of the lift cylinder. See figure 1.
3. Slide the clevis pin all the way to the left rear tire.
4. Pull the cylinder towards the center of the
machine and release the cylinder from the clevis
pin. See figure 2.
5. Pull the cylinder forward applying pressure to the
lift shaft assembly. The lift shaft assembly will
pivot forward with the cylinder, and allow the rear
of the cylinder to pass by the front transmission
support bracket.
Removal and Replacement for the Center Lift Cylinder
FIGURE 1.
Lift
Cylinder
Hairpin
Clevis Pin
FIGURE 2.
Lift Shaft
Assembly
Front Transmission
Support Brkt.
6. Remove both hydraulic connectors from the lift
cylinder using a 7/8” open end wrench.
NOTE: The front connector on the lift cylinder
hydraulic line runs to the top port of the lift valve.
The back connector on the lift cylinder hydraulic
line runs to the bottom port of the lift valve. Be
sure to reinstall the hydraulic lines in the correct
ports during reassembly.
7. Inspect the “O” rings on the connectors for any
damage. If damaged, replace.
8. Pivot the cylinder down 90 degrees and release
the slotted bracket from the lift shaft assembly
cam. See figure 3.
NOTE: Allow the hydraulic fluid to drain
completely from the cylinder into the oil pan.
FIGURE 3.
Hydraulic Connectors
Slotted
Bracket
Clevis Pin
Hole
Lift Shaft
Assembly
Cam
REINSTALL THE CENTER LIFT CYLINDER IN THE
REVERSE ORDER ABOVE.
NOTE: When reinstalling the cylinder to the cam on
the lift shaft assembly, make sure the slotted cylinder
bracket is offset towards the left frame of the tractor.
Clevis
Pin