Cub Cadet 3000 Series User Manual
Page 34
5 - 2
Cub Cadet 3000
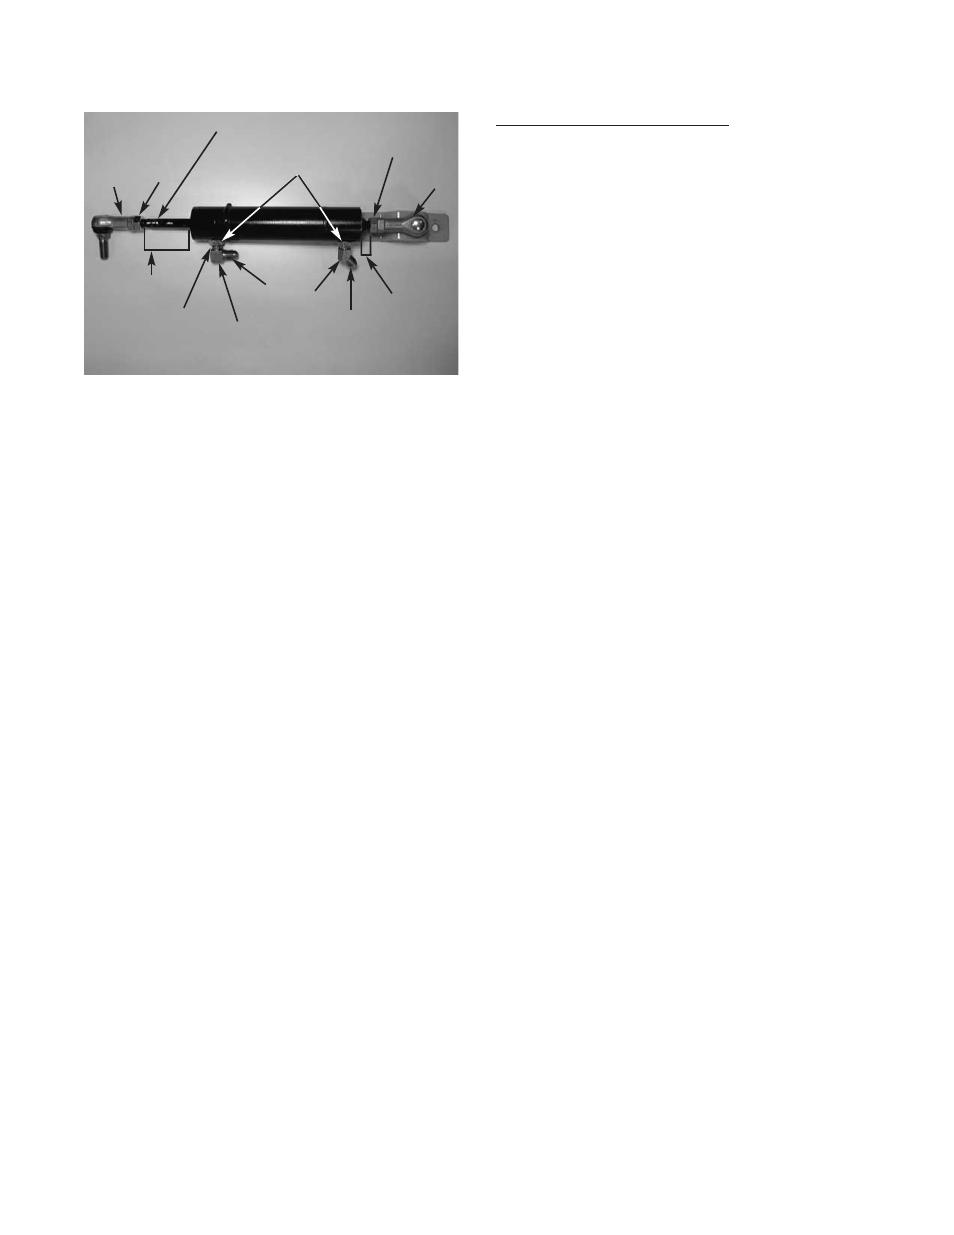
FIGURE 4.
Cylinder Rod
Ball
Joint
Ball
Joint
Hex
Jam Nut
Hex
Jam Nut
Hex
Jam
Nut
Elbow
Fitting
Elbow
Fitting
Approx.
2.75"
7/16”
90°
45°
“O” Rings
CAUTION ON THE NEXT STEP: There are “O” rings
between the cylinder block and the fittings. Extreme
care should be used to hold the fittings in place while
loosening the hex jam nuts, or damage will occur to
the “O” rings. Replacement of the “O rings” is
recommended.
14. Hold the hydraulic cylinder elbow fittings in place
with a 5/8 wrench, and loosen the hex jam nuts
with an 11/16 wrench. Slowly back the fittings out
of the cylinder.
15. Replace the “O” rings at this point.
NOTE: The front fitting is a 90 degree and the
rear fitting is a 45 degree.
1. Set the new hydraulic steering cylinder on a
bench.
2. Loosen the hydraulic fitting jam nut until it
bottoms out on the threads.
3. Press the flat washer snug up against the hex
jam nut.
4. Inspect the “O” ring for damage. If damaged,
replace.
5. Press the “O” ring snug up against the flat
washer.
6. Gently screw the fitting into place until the fitting
becomes snug.
NOTE: Do not tighten!!! At this time the “O” ring
will be seated properly in the cylinder port. If it is
over tightened, damage will occur.
Reinstallation of the Hydraulic Fittings to the Cylinder
7. Slowly unscrew the hydraulic fitting to the correct
recorded position.
NOTE: Do not unscrew the fitting more than one
full turn, because the cylinder may leak at the “O”
ring.
8. Hold the fitting in place with a 5/8 wrench, and
tighten the hex nut with an 11/16 wrench.
INSTALL THE SECOND FITTING BY REPEATING
STEPS ONE THROUGH EIGHT IN THIS SECTION.