Warning – Cub Cadet 190-209-100 User Manual
Page 16
16
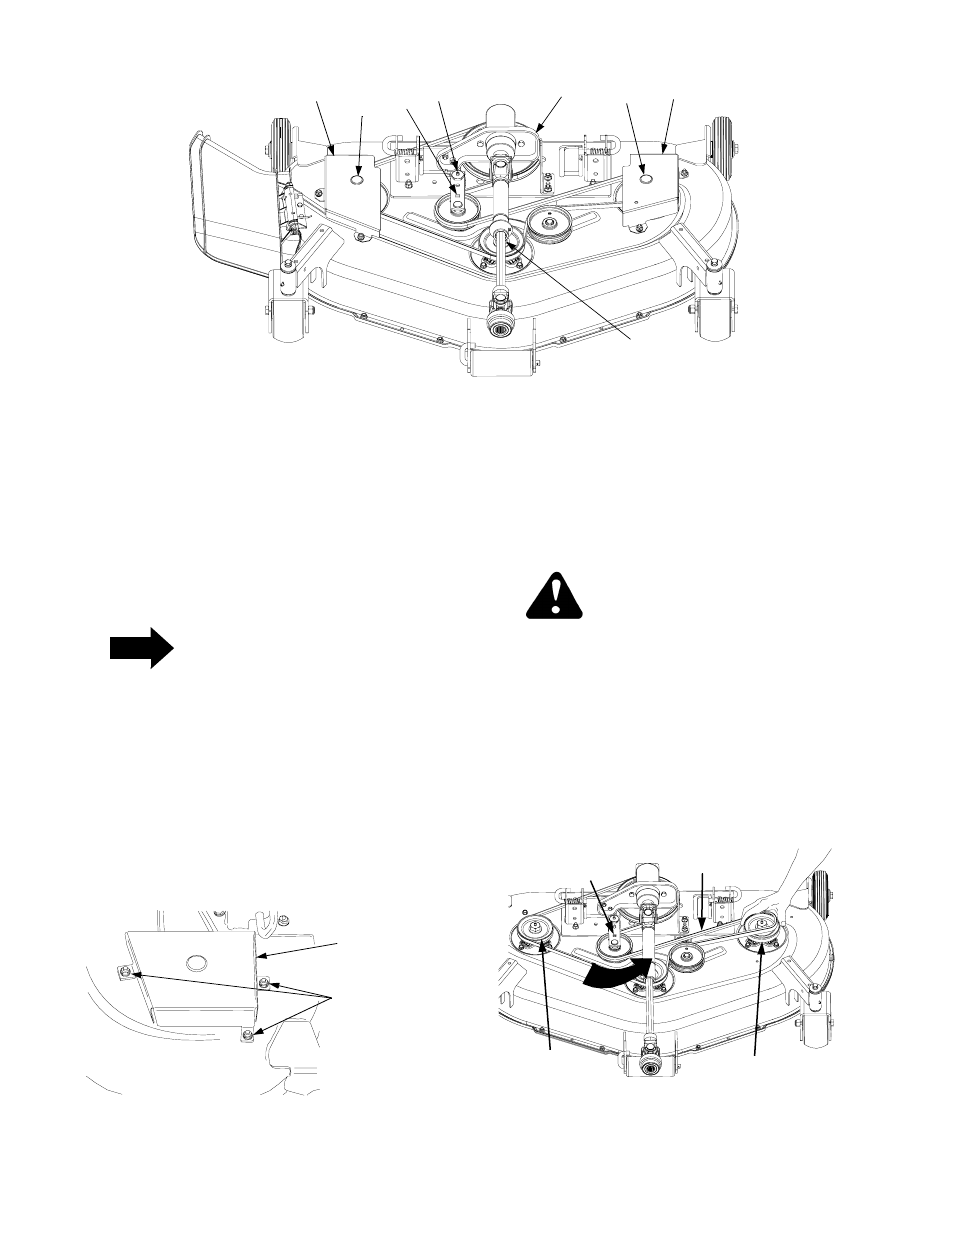
Figure 26
1
2&5
3
4
5
6
1
2&5
1.
2.
4.
5.
6.
Belt Covers
Button Plugs - Access to Spindle
Lube Fittings
Idler Arm - w/ Square Hole
Idler Arm Lube Fitting
Spindle Assembly Lube Fitting
Gear Box Mounting Bracket
3.
Belt Covers
Button Plugs - Access to Spindle
Lube Fittings
Idler Arm - w/ Square Hole
C. SPINDLE BELT REPLACEMENT
A worn spindle belt will affect the quality of cut from the
mower deck and should be replaced. Referring to
Figures 26 thru 30, replace the spindle belt as follows:
NOTE
The two hex flange lock nuts and carriage bolts
securing the left side of the gear box mounting
bracket (See Figure 29) are removed from the
deck when replacing the belt. Clean any
accumulated grass clippings from the
underside of the mower deck to ensure proper
reassembly of these fasteners.
REMOVE SPINDLE BELT
1.
Remove the RH and LH belt covers by removing
the six hex nuts and lock washers (See Figure 27).
Figure 27
2.
Note the routing of the spindle belt to help ensure
proper installation of the new belt.
WARNING
The idler arm and movable flat idler pulley are
under spring tension. To prevent possible inju-
ry, use caution when handling the idler pulley.
3.
Insert a 3/8” drive ratchet or breaker bar into the
square hole of the idler arm (Refer to Figure 28).
4.
Using the ratchet (breaker bar) for leverage, pivot
the idler arm toward the left side of the deck to
loosen tension on the belt: then roll the belt off
either the LH or RH spindle pulley (See Figure 28).
Figure 28
BELT
COVER
HEX NUTS
AND LOCK
WASHERS
PIVOT
IDLER ARM
SPINDLE BELT
SQUARE HOLE
IN IDLER ARM
RH SPINDLE
PULLEY
LH SPINDLE
PULLEY