COP-USA CD56NV-IR User Manual
Page 14
5.3 Installation Procedures of the Product
1. Remove the bottom plate of the pan/tilt;
2. Set the corresponding information in accordance with the schematic drawing of the dip-switch of
addresses, protocols and baud rates;
3. Install the bottom plate of the pan/tilt and take care of the tightness of waterproof seal ring;
4. If vehicle-carried pan/tilt is used, first of all fix the chock absorber on the bottom of the pan/tilt then fix
the whole pan/tilt;
5. If the plain base is used, fix the pan/tilt onto the fixation hole of the pan/tilt;
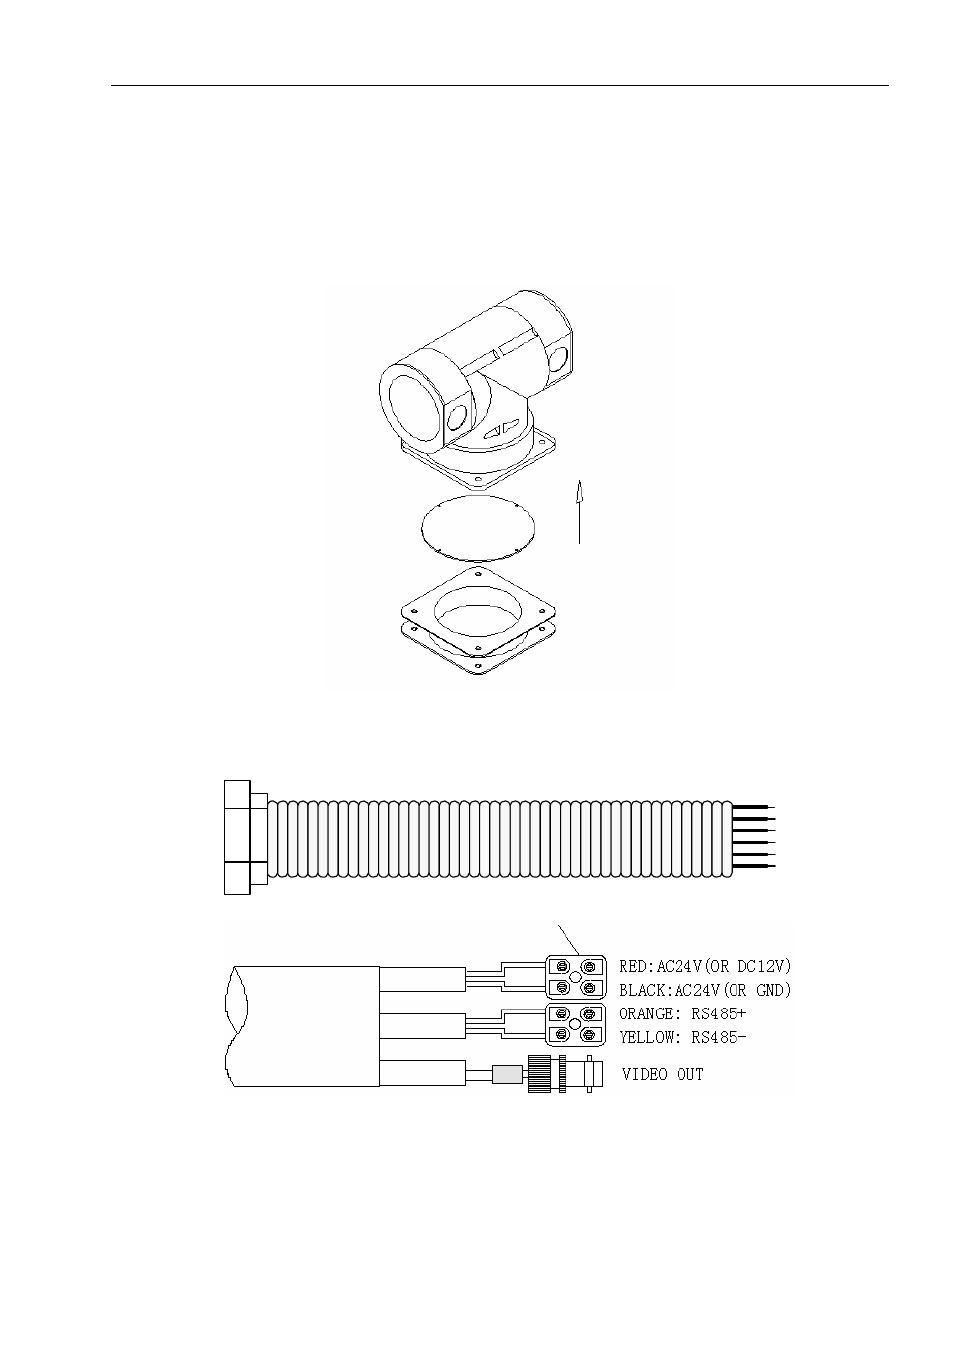
6.Connect the output wires of the socket according to relative colors on the schematic drawing and do not
make wrong connections.
Attention: refer to power label
Attention: the input of power supply couldn’t be selected and should be connected as per actual applied
style. The vehicle –carried pan/tile takes DC power supply while common pan/tilt takes AC power supply.
7. For the common pan/tilt, 10-core socket is used as the alarm interface and detailed connection can be
seen from the description of colors of terminals.
13