Checkline MK User Manual
Page 3
-3-
To set the Dashpot
1. Turn the setscrew clockwise as far as it will go
(screw is protected against overturning). The
dashpot is now at its maximum setting.
2. Screw the setscrew out again counter-clockwise
until the desired damping factor for the scale
pointer is achieved.
Note: A change in the damping factor is only
possible within the first three counterclockwise
revolutions of the setscrew.
3. Turn the setscrew clockwise to increase
damping.
4. Turn the setscrew counterclockwise to reduce
damping.
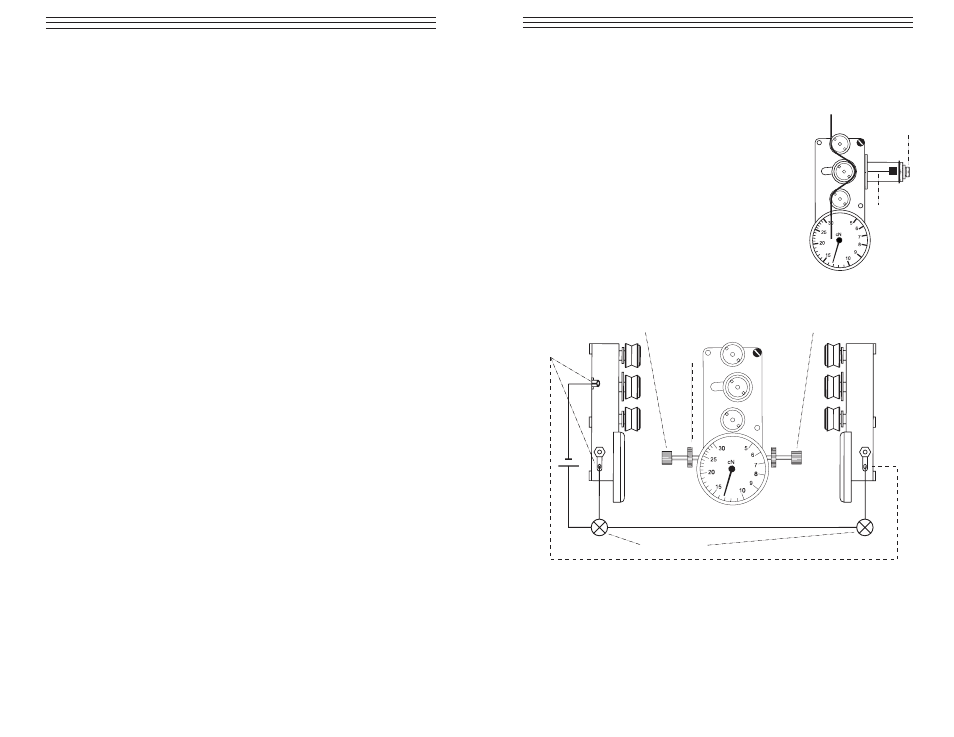
1.4 Min/Max Contacts (Optional Accessory Code D)
Your MK tensionmeter can be factory-equipped with Min/Max tension-
detecting contacts which allow you to monitor the tolerance limits for the
measured tension. We recommend application of the tension-detecting screw
contacts in case of automated production sequences. These factory-installed
Setscrew
Dashpot
Locknuts
MIn Setscrew
MAX Setscrew
Soldering tag
for cable
connection
max. 24 V / 2 W
-6-
3.0 S
ERVICE AND
M
AINTENANCE
The tension meter is easy to maintain. Depending on operating time and load, the
tension meter should be checked according to the locally valid regulations and
conditions.
Other testing methods as can cause different measuring readings.
3.1 Rollers
You should regularly inspect the rollers to assure that they are running easi-
ly and smoothly. You can replace the rollers yourself, as necessary. When
ordering spare rollers, please indicate the tension meter model and the serial
number (on the rear side of the tension meter).
Ordering of spare rollers
Model: MK-12 (on the right side of the tension meter)
Serial number: 300 -888888 (on the right side of the tension meter)
Standard rollers: Order number R12013
3.2 Cleaning
For cleaning the unit, do not use any AGGRESSIVE SOLVENTS such as
trichloroethylene or similar chemicals. NO WARRANTY OR LIABILITY
shall be accepted for damage resulting from improper cleaning.
3.3 Verification Intervals
The question of finding the right frequency of calibration accuracy
verification depends on several different factors:
• Operating time and load of the SCHMIDT tension meter
• Tolerance band defined by the customer
• Changes of the tolerance band compared to previous verifications of
calibration
Therefore, the interval between verifications must be determined by the
user`s Quality Assurance Department based on the user`s experience.
Assuming normal operating time and load as well as careful handling of the
tension meter, we recommend a verification interval of 1 year.