Checkline DX2 User Manual
Page 4
4
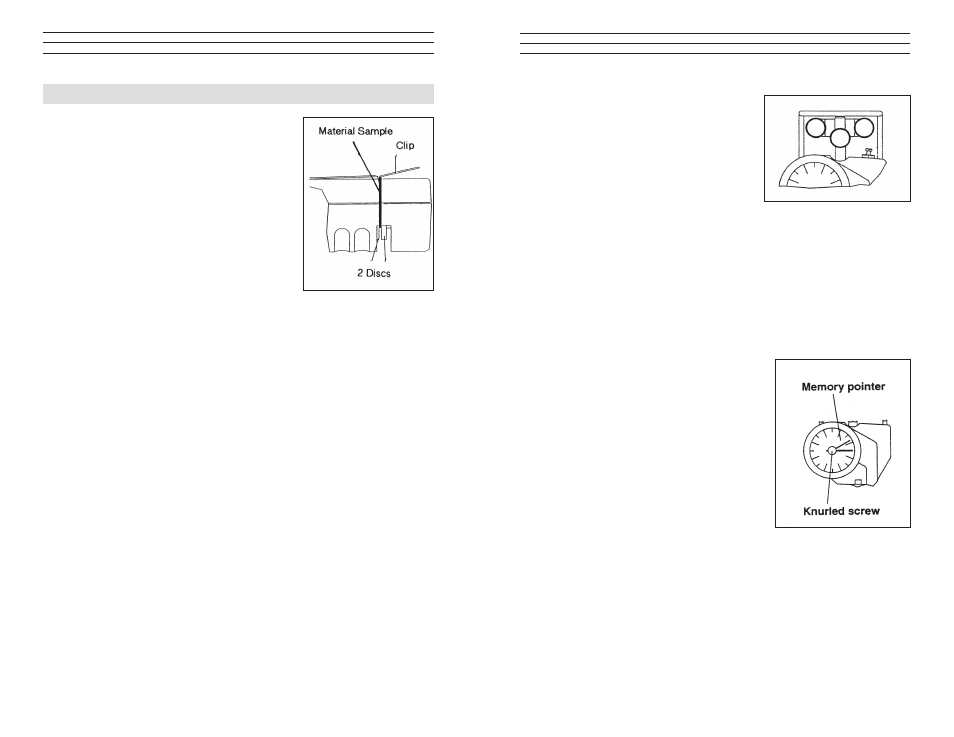
3.0 Thickness Compensation
The 3-roller system for tension measurement
relies on the displacement of the middle roller to
give an indication of line tension. As the material
diameter or thickness changes, there will be
a change in tension reading, even though line
tension has not changed. To offset this effect,
high-range instruments (1000 grams and
higher) are usually furnished with a Thickness
Compensator, as shown here. To determine
whether the Compensator needs to be used for
a specific application, take readings with and
without the process sample in the Compensator
using a hanging weight approximately equal to
the process operating tension.
To set up the Thickness Compensator, proceed as follows:
1. With the Thumb Piece pushed forward and held, pass a sample of the process
material through the opening at the instrument end, as pictured here,
making sure it lies between the two visible disc-like anvil surfaces.
2. Allow the Thumb Piece to SLOWLY return to its original position.
caUTiON: Do not let the Thumb Piece snap back as this may affect
calibration and also damage the instrument.
3. Secure the process sample ends under the spring clip provided or with some
tape. The instrument is now ready to use.
9
6.3 air dashpot damping
DX2 Tension Meters incorporate a moderate
amount of movement damping to smooth
out some high frequency tension fluctuation.
However, where process fluctuations result
in rapid pointer swings which make it difficult
or near impossible to read the scale, an
optionally-available Air Dashpot Damping
mechanism can be provided to slow down the
pointer swings to permit a reading. In setting up the mechanism, it is best to set
the damping rate just to the point where a readable pointer results with minimal
pointer swings. The amount of damping is set by turning the small slotted screw or
hex-head screw of the damping assembly located near the guide-roller mounting
bracket. The Air Dashpot must be installed at time of original manufacture. It
cannot be added later.
caUTiON: Do not set damping rate too high as this will damage the
movement.
6.4 memory pointer
The optional Memory Pointer assembly retains
the highest reading obtained during a measuring
period. Before using the instrument, rotate
the knurled pointer knob clockwise until the
“memory” pointer tab contacts the measuring
pointer at zero. During operation and after
instrument removal, the trailing “memory”
pointer will hold the maximum reading until
reset with the pointer knob.