Checkline CDT-1000HD User Manual
Page 4
4
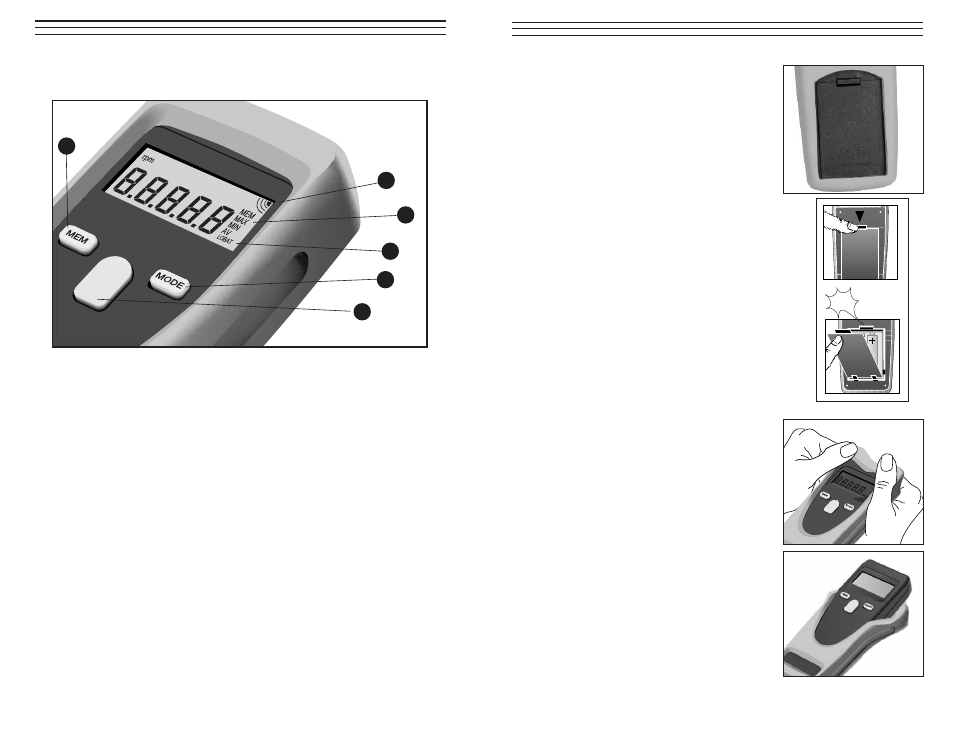
4.0 OVERVIEW OF CDT-1000HD
4.1 LCD Display
1. On-Target Indicator — Indicates that the unit is lined up
correctly for an accurate measurement
2. Memory Indicators — Indicates which measurement
stored in memory (last, max., min., avg) is displayed.
3. Low Battery Indicator — Illuminates to indicate that
batteries need replacement.
4.2 Front Panel Key Functions
4. MEM: Acesses the memory. Each time the key is pressed
the values stored in memory will be recalled to the display.
5. MODE:
Not functional
in this model.
6. MEASURE: Performs the following functions:
• Turns on the power
• Starts and stops the measuring period
• Exits from the memory mode
1
2
5
6
4
3
5
5.0 INSTALLING BATTERIES
1. Turn the gauge over and locate the battery
compartment. You do not have to remove
the rubber shell.
2. Open the battery compartment by pulling
down on the tab located at the top of the
battery cover and remove the cover.
Insert two AA batteries following the
orientation engraved on the inside of the
battery compartment.
3. Replace the battery cover by inserting the
two tabs located on the bottom edge of the
cover into the matching slots in the housing.
4. Push the cover closed until the tab at the top
of the battery cover “clicks” into position.
5. Replace the cut-out section of the protective
rubber shell.
6.0 Removing Protective Rubber Shell
The gauge is supplied with a durable rubber
shell that provides an added measure of
physical and environmental protection in
harsh applications.
To remove the shell, follow the procedure
outlined below:
1. Using your thumbs, slide the rubber shell
up and off of one corner of the gauge.
Repeat for the other corner
2. Pull the shell down until it is completely
off the corners of the gauge, the pull the
gauge forward and out of the shell.
3. Replace the shell by sliding the gauge
bottom first into the large center opening,
then, one at a time, slip the corners of the
shell back over the gauge.
click