Assembly procedure, Glass jar installation – Cannon Instrument CT-1000HT (High Temperature Contant Temperature Bath) User Manual
Page 8
6
CANNON
®
CT-1000HT Constant Temperature Bath
Revision 1.1b—June, 2011;
CANNON
®
Instrument Company
2139 High Tech Road • State College, PA 16803 • USA
Assembly procedure
1. Unpack the bath unit housing.
2. Move the bath unit housing to its
permanent location on the
laboratory bench.
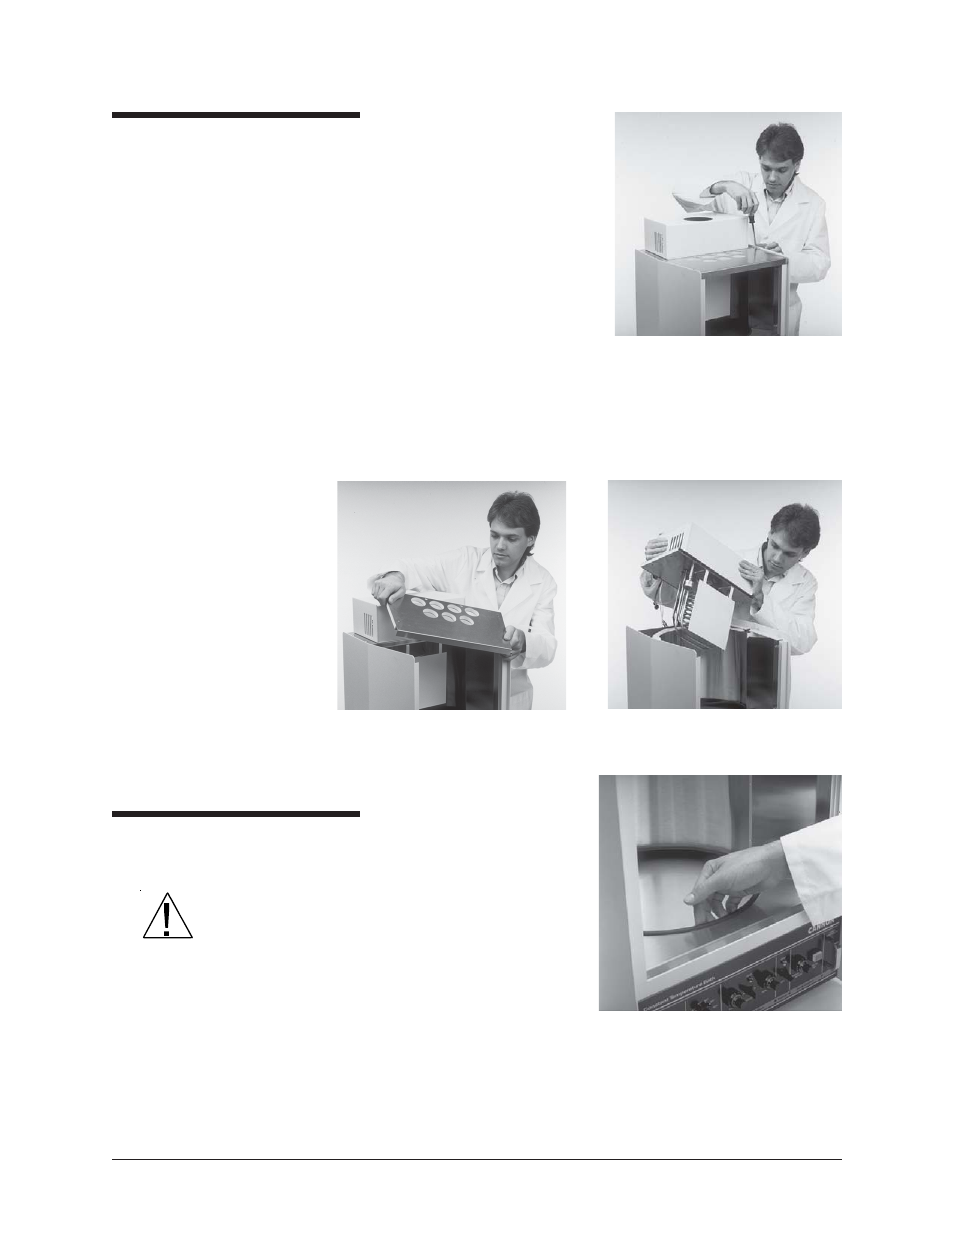
3. Remove all eight screws from the
stainless steel top covers (see
Figure 3).
4. Disconnect all probes, heaters,
and float switch from the rear
panel.
5. Remove the front top cover and rear top cover (see Figure 4 and 5).
Use caution when removing the rear top cover because the tempera-
ture control probes and heating elements are attached to it.
Glass jar installation
1. Remove the glass jar from its
box.
CAUTION
The glass jar is heavy. Use caution
when lifting it.
2. Make sure the
Viton
®
support
ring is seated properly around
the bottom jar opening in the
bath unit (see Figure 6).
3. Place the Viton
®
rubber gasket around the top rim of the jar (see
Figure 7, next page). The ends of the gasket should meet with no gap
when placed around the rim. If necessary, trim one end of the gasket
to achieve a snug fit.
Figure 3: Removing screws
from top cover
Figure 4:
Removing front cover
Figure 5:
Removing rear cover
Figure 6: Checking support ring