Viewing test results, Creating an analysis – Cannon Instrument miniAV-X User Manual
Page 33
27
CANNON
®
miniAV-X Automatic Viscometer with VISCPRO
®
Instruction & Operation Manual
Version 1.0b— March, 2012;
CANNON
®
Instrument Company
2139 High Tech Road • State College, PA 16803 • USA
NOTE
Do not use “0” or “9” as an instrument address for this configuration
option.
When configured per the above instructions, the instruments will always
be displayed in the same “sequence” in the
Machine Status
window
even if a single instrument in the series is not online.
Viewing test results
Data obtained from all miniAV-X instruments during sample testing is
promptly displayed in the
Sample Input
window (
Sample Action
column). It is also stored in the central VISCPRO
®
database. To view
historical data, you must create an analysis requesting the desired sample
information.
The following analyses are shipped with the software:
CAV Data Table
—displays test information of your choosing.
Error Log Table
–lists error messages and related data.
Standard VI Table
—provides a report of matched samples accord-
ing to configuration information you provide.
Error Data
,
Sample Data and VI Data Export Analyses
–config-
ures data for output to a file, parallel port, or serial port.
Creating an analysis
The following procedure creates a standard CAV Data Table which will
be updated as samples are tested. For additional information on analyses,
consult the manual chapter corresponding to the desired analysis.
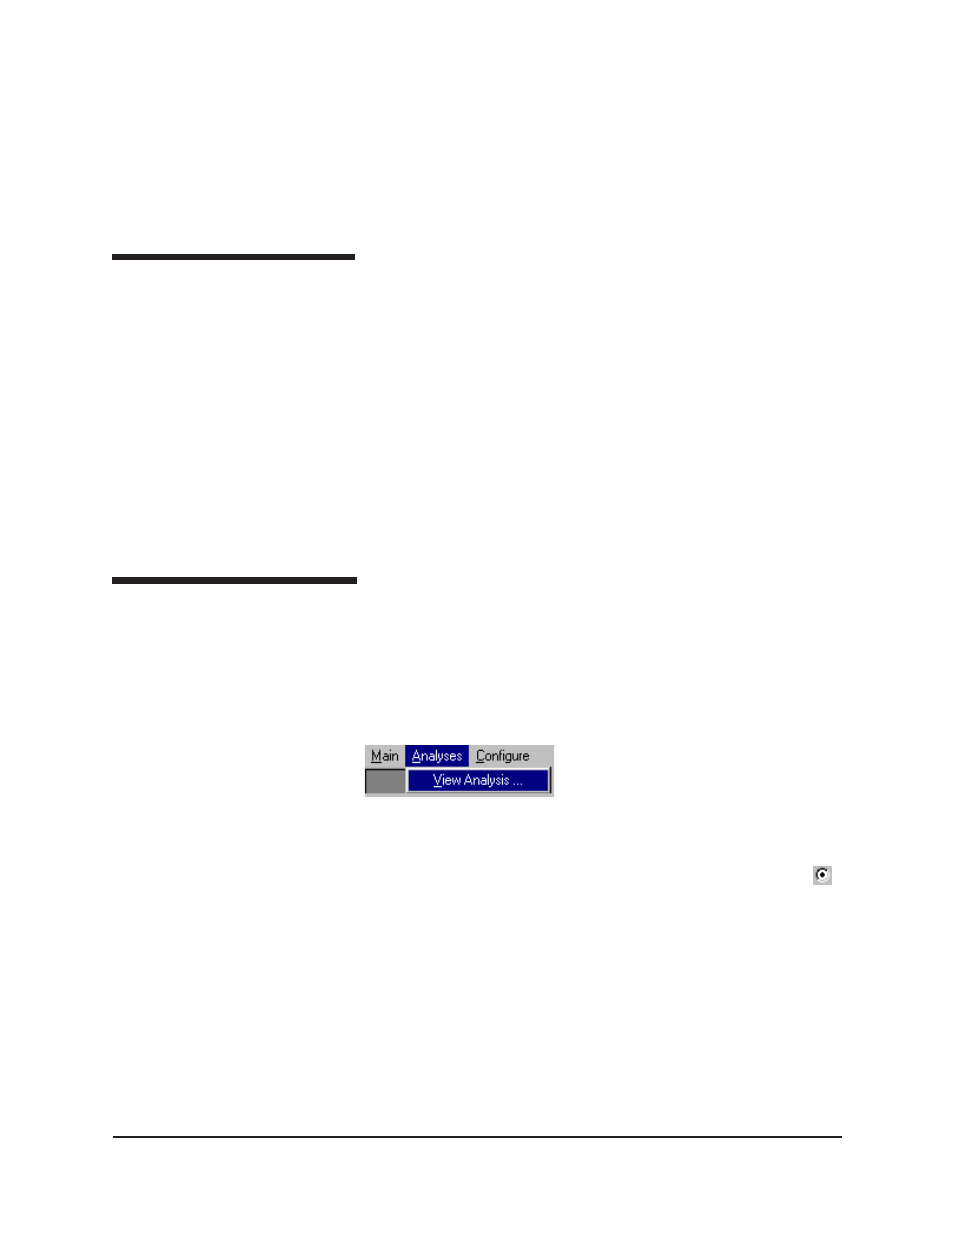
1. Select
Analyses
from the VISCPRO
®
primary menu options.
2. Select
View Analysis ...
from the
Analyses
menu. The
Choose
Analysis
window will appear.
3. Double-click on Basic Package.
4. Click on
CAV Data Table
to reveal the available analyses.
5. Click on the
Define and Open New
Configuration radio button
(or verify that the option is selected).
6. Click
OK
. The
Sample Analysis Configuration
window will
appear. The
Sample Analysis Configuration
window consists of
tabbed pages with filter options appropriate for the analysis.
7. Click on
Date Filter
and then click the
Use Dynamic Update
check
box. This option will update the displayed analysis with new data as
samples are tested.
NOTE
For additional information on analysis filter options, consult the manual
chapter corresponding to the desired analysis.