4 soxhlet extractor, 5 water supply connections, Soxhlet extractor – BUCHI Extraction Unit E-816 SOX User Manual
Page 23: Water supply connections
5 Putting into operation
23
E-812/816 Soxhlet Operation Manual, Version B
5 .4
Soxhlet extractor
b
a
c
d
e
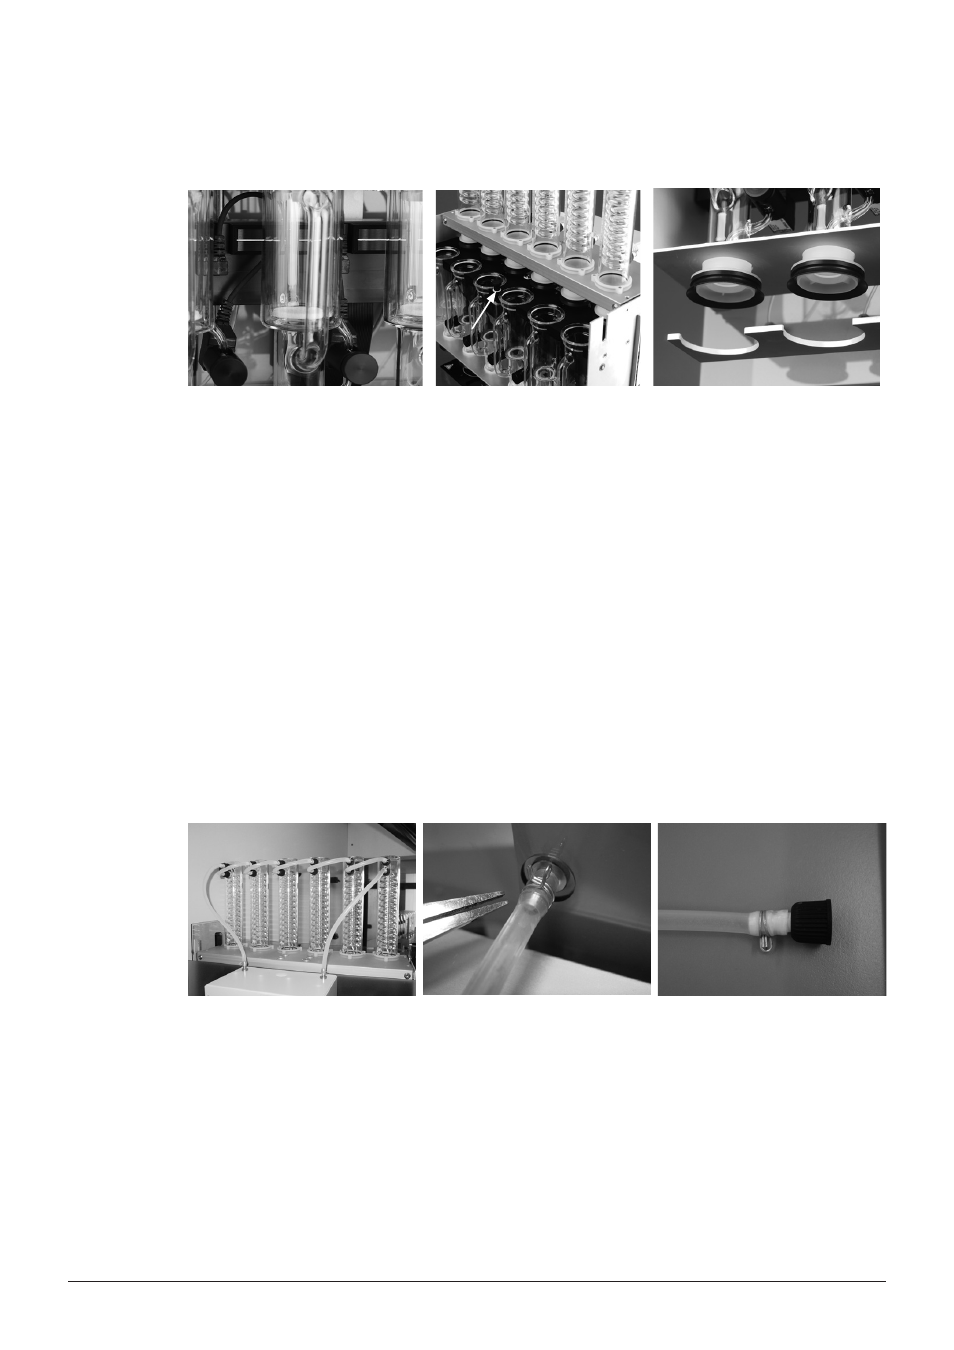
Fig. 5.2: Adjusting the Soxhlet chambers
To adjust the Soxhlet chambers, proceed as follows:
1. Move the rack up.
2. Pull the tray out.
3. Remove the safety shield by loosing the screws on the side of the instrument.
4. Remove the sealing holder from the extraction chambers.
5. Fix the magnet valve at the glass valve of the extraction chamber (b).
6. Connect the magnetic valve cable to the instrument (a).
7. Place the extraction chamber in position (d) and fix it with the sealing holder (e). Make sure that
the PTFE sealing ring is in correct position.
8. Adjust the optical sensor (c). It detects the solvent level. The solvent must cover the sample
during the extraction process. To achieve the optimum extraction efficiency adjust the optical
sensor directly above the sample.
9. Fix the safety shield after having fixed all extraction chambers.
5 .5
Water supply connections
The condensers have to be connected in series.
• Condensers connected in
series.
• Fixing the clamp.
• Hose with pivoting connec-
tion and clamp.
First connect the cooling water hoses (two longer hoses) to the rear panel. Put a hose clamp over the
cooling water hose. Take a pincer to fix the hose clamp. Begin with the left condenser position. Screw
it into the collection vessel (see chapter 5.3 Condensers) and connect the cooling water hoses (hose
clamp and GL-14 plug). To connect them among each other use the short hoses.
NOTE
Do not forget the grommet otherwise cooling water may leak.
• For safety reasons, secure the hoses with pivoting clamps.
• To save cooling water use a chiller.