Magliner RECESSED FOLDING NOSE User Manual
Recessed folding nose installation instructions, Parts list
Parts List
instaLLation instructions
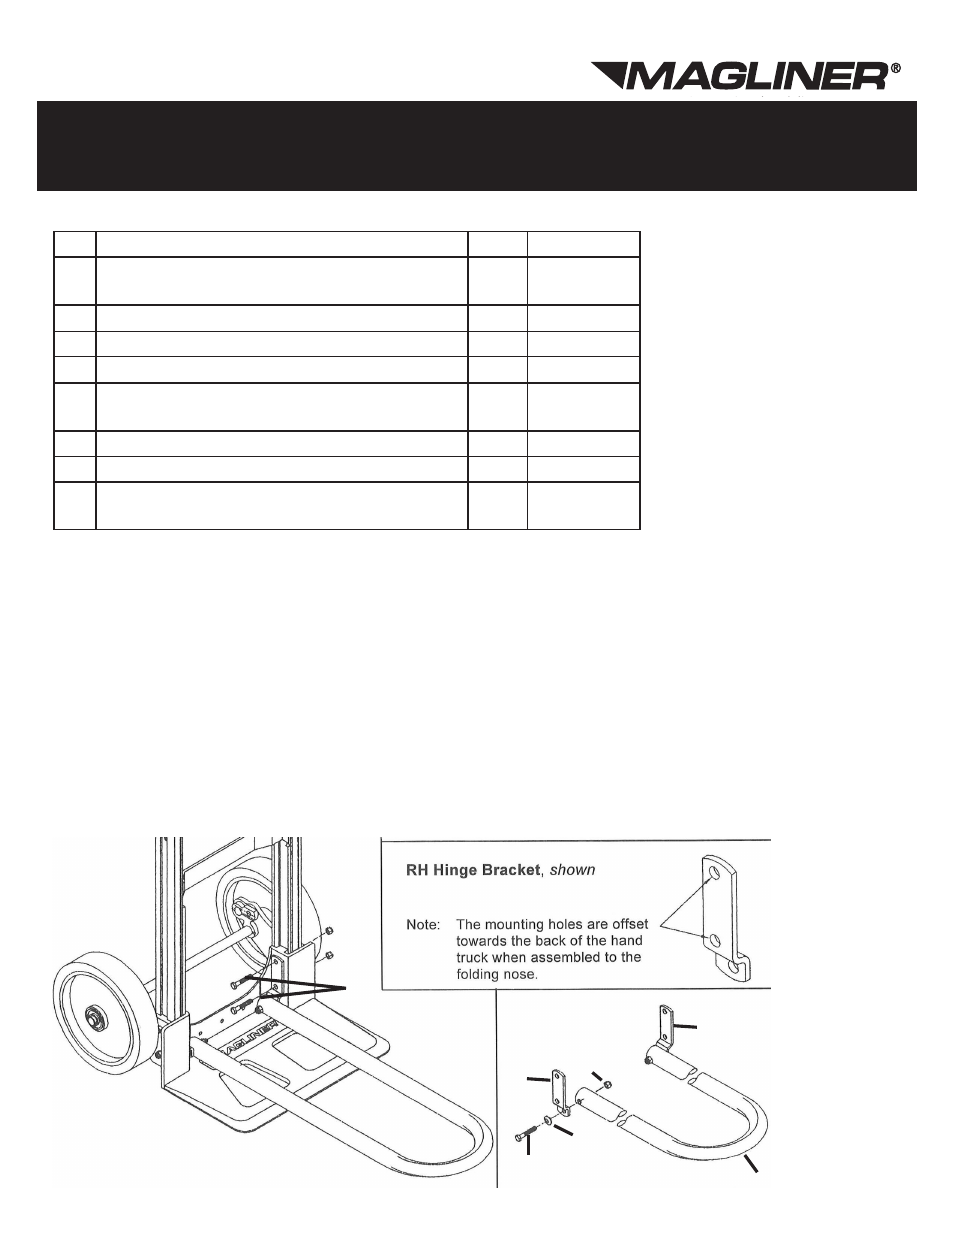
Assemble the right and left hand brackets (B, C) to the recessed folding nose (A) using the 1-3/4"
1.
long hex head bolts (D), disc washers (E) and hex lock nuts (F). Install the washer and hex head
bolt from the bracket side with the lock nut against the folding nose tube.
Remove the four 5/16"-18 hex head bolts which attach the nose plate to the hand truck frame, and
2.
discard the hex head bolts (they will not be reused).
Position the folding nose and brackets assembled in Step 1 over the holes in the nose plate. Install a
3.
2-3/8" long hex head bolt (G) in each of the four holes with the head of the bolts against the brack-
ets. Secure the assembly with the 5/16" lock nuts removed in Step 2. Proper torque for the 5/16"
bolts is 120 to 140 in. lbs.
Adjust the tightness of the folding nose hinge bolts so the bolts will rotate with the folding nose
4.
when it is raised or lowered.
tooLs rEQuirED
• (2) 1/2" combination wrenches
rEcEssED foLDing nosE
instaLLation instructions
DESCRIPTION
QTY. PART NO.
A Recessed folding nose (model numbers
vary)
1
--
Hardware Kit (includes items below)
1
3024731
B
Hinge bracket, RH
1
302421
C
hinge bracket, Lh
1
302422
D
hex head cap screw, 5/16"-18 x
1-3/4" long
2
80014
E
Disc washer, 5/16"
2
80758
F
hex lock nut 5/16"-18
2
80676
G
hex head cap screw, 5/16"-18 x
2-3/8" long
4
80051
C
F
A
D
E
G
B