CANOGA PERKINS 9145 NID User Manual
Page 3
Canoga Perkins Corporation, 20600 Prairie Street, Chatsworth, CA 91311-6008
Phone: (818) 718-6300, FAX (818) 718-6312 www.canoga.com
P/N 6943300 Rev A
Page 3 of 8
Step 4: Applying Power
For AC powered NIDs, power up the device by inserting the provided power cord to an AC
outlet. During the boot-up stage, which may take up to 20 seconds, the LEDs will turn amber and
the STA LED will flash until the boot-up process is complete.
For DC powered NIDs, if a -48VDC power source is used, connect the grounding strap between
the Chassis Ground and the +VDC terminals. If connecting to a +48VDC source to the NID,
connect the grounding strap between the Chassis Ground and the –VDC terminals. With power
now applied, the unit will initiate the boot-up process. All LEDs in the front will flash amber and
the STA LED will flash until the boot-up process is complete.
Figure 5. DC power entry in the rear of the NID
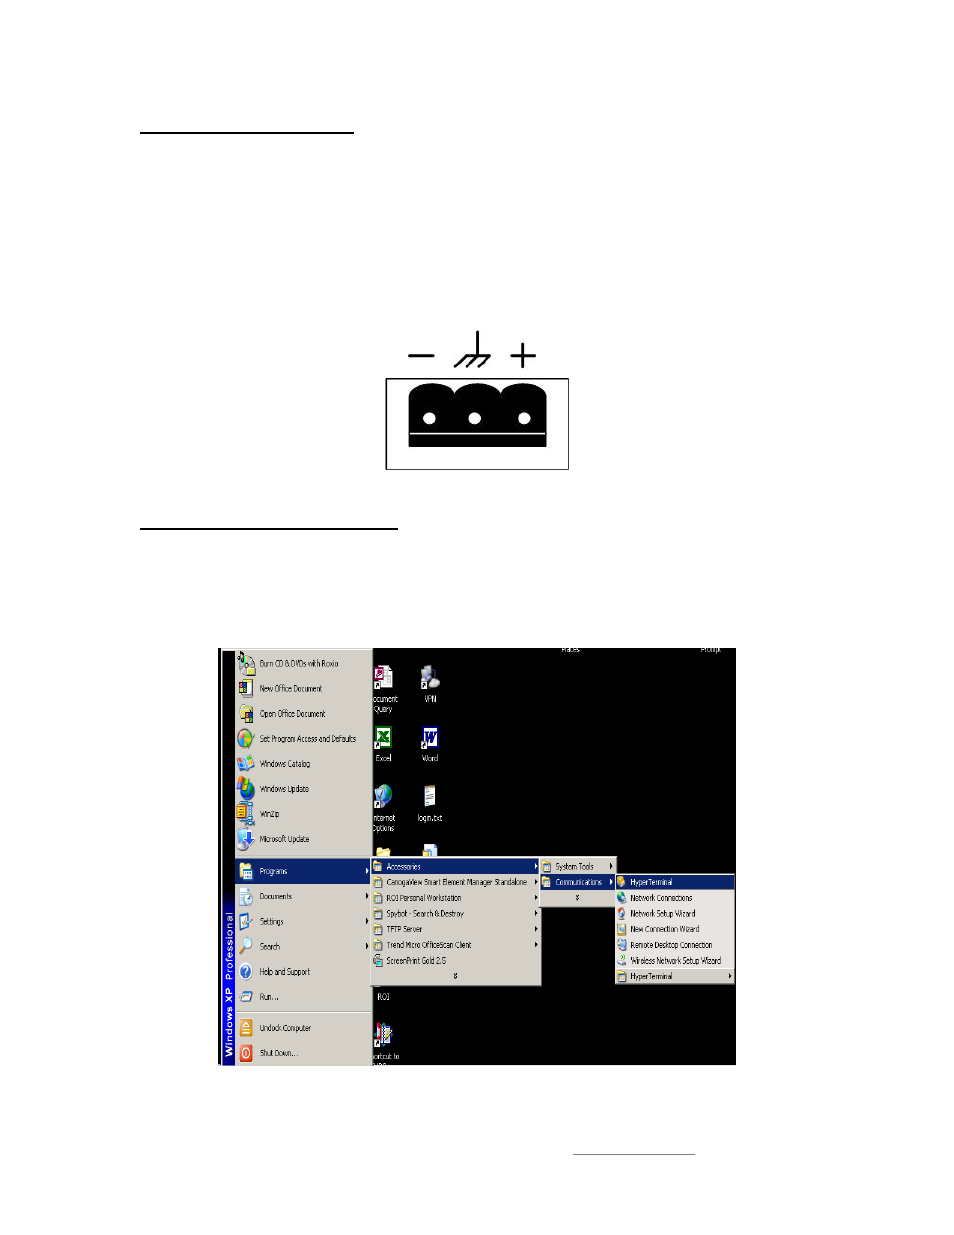
Step 5: Management Access
To access the user interface of the NID, a VT100 session must be created through HyperTerminal
or a comparable VT100 terminal. Connect a DB-9 EIA-232, straight cable from your PC or
laptop (COM 1or any open COM port) to the EIA-232 port of the NID. Access HyperTerminal
session from your laptop or terminal through the
Programs/Accessories/Communications/Hyperterminal menu.
Figure 6. Accessing HyperTerminal