Rane RPE 228 Users Guide User Manual
Page 6
To change a curve without affecting the
audio in the RPE, simply select
Local Edit
before making any changes, make them, and re-
click
Local Edit
. You will be asked:
Accept the
Edited Curve?
Answering
Yes
sends that curve
to the RPE. While
Local Edit
is selected, click-
ing on any of the memory buttons displays the
preview curve without sending it to the RPE.
Device
brings up a selection menu of up to
15 RPE units connected to the computer. Simply
select the device you wish to control.
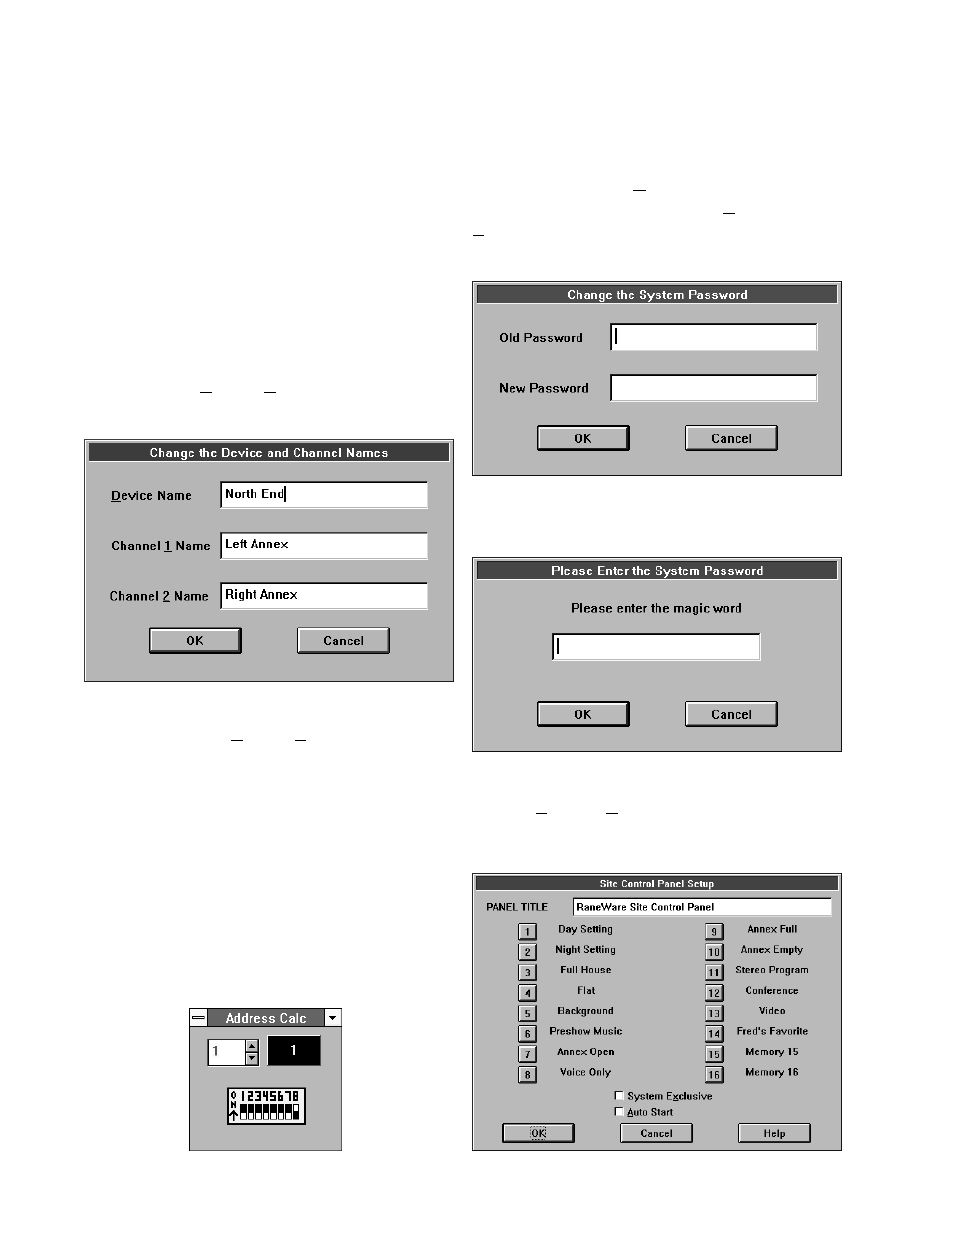
Devices and channels can also be given
custom names, tailored to your installation.
Simply choose
Device
,
Name Device
, and the
following screen appears.
Security. The RPE can be operated on a
daily basis either through the computer, or
through the contact closures. To preserve preset
security with a computer operator, the software
can be locked (under
Device
), and a system
password can be assigned (under
System
,
Change Password
). The default password is
please.
Presets can be customized with names,
through
System
,
Site Control Panel Setup
.
Here each memory can have a logical name.
If your installation changes by adding more
RPE units, choose
Device
,
Select
, and the
POLL
button to make the computer recognize
currently connected units in the system.
When multiple units are connected, assign
each unit a unique Device Address number. Rane
provides a special calculator to assist in setting
the dip switches on the back of each unit. Alt-
Tab to the Windows Program Manager, and in
the RaneWare program group, launch the
RaneWare 232 Address Calculator
. This
binary calculator converts decimal numbers into
corresponding dipswitch settings.
With the device locked, and a user tries to
change a curve, this friendly screen appears.